background image

Assembly Instructions 


NOTE: If you buy more than one unit, the stacking configuration can be available. 


11.


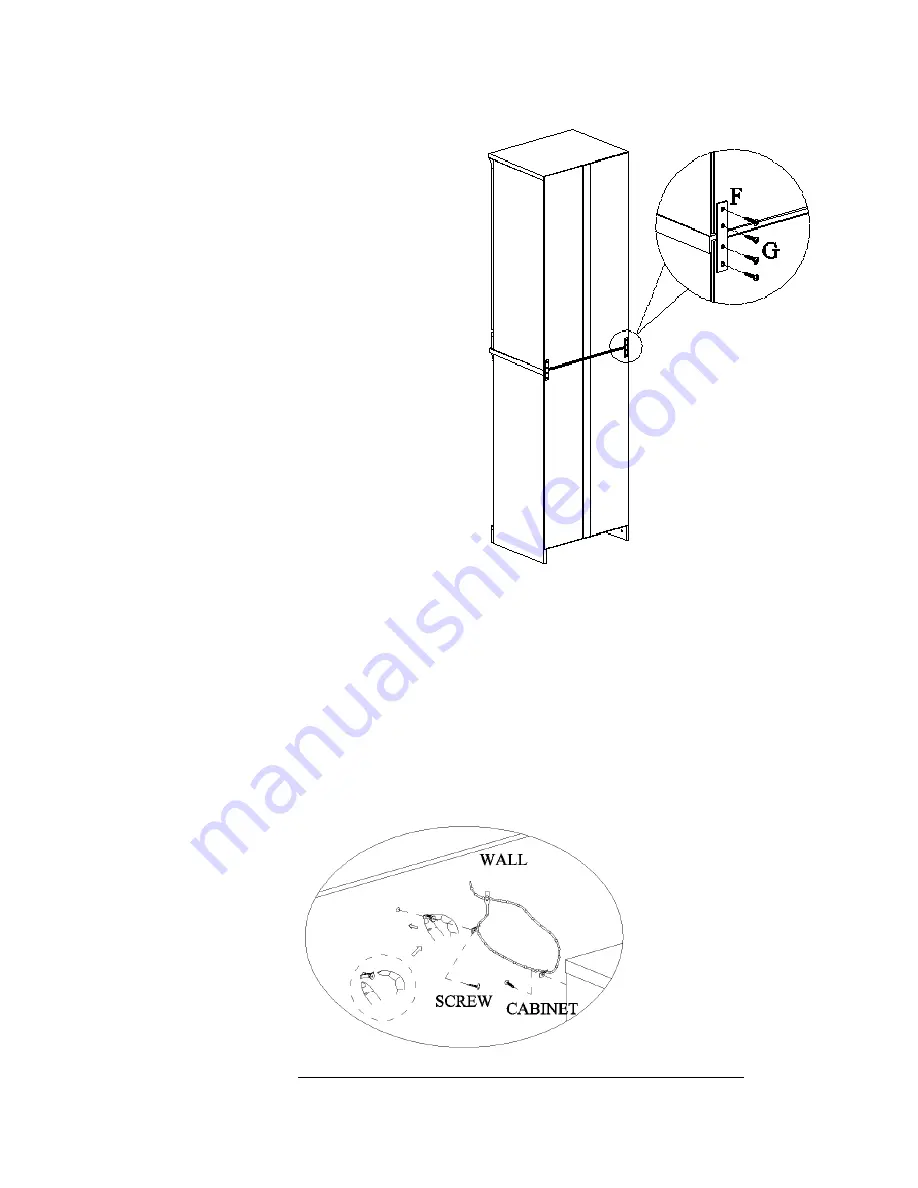
This cabinet was designed with a feature that allows 
stacking two units. Additional units sold separately. 
Place second unit on top of base unit making sure it is 
centered properly and back edges are even. Secure 
units together by attaching the metal plates (F) at both 
ends with the #8 x 16 mm screws (G) into the pre-
drilled holes. Use caution to prevent damage to side 
panels. 


Note: The Metal Plates are provided to prevent 
the unit from falling over. You must attach them 
to the product in use with all the #8 x 16 mm 
Screws.


TIPPING RESTRAINT HARDWARE 


We have included one Tipping Restraint Hardware bag for this unit. You must install this hardware to 
prevent accidents or injuries from falling unit. 
 
When properly installed, this restraint can provide protection against the unexpected tipping of the storage 
rack due to small tremors, bumps or climbing. We strongly recommended mounting this hardware to a 
wall stud and your unit. 


Please carefully read the instructions printed on the bag. 


Note: You must install the Tipping Restraint Hardware with the unit in use to prevent any accidents or 
damage to the unit. 


Tools Required: Phillips Screwdriver, Mallet, Power Drill, and 3/8” Drill Bit.  

Please call for replacement parts or assistance:


1-866-942-5362


Whalen Storage                  


   Factory No.: 15294                 


      Page #10 of 11  

Summary of Contents for WSUC-4C

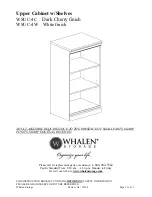
Page 1: ...E READ AND KEEP FOR FUTURE REFERENCE Whalen Storage Factory No 15294 Page 1 of 11 ADULT ASSEMBLY REQUIRED DUE TO THE PRESENCE OF SMALL PARTS SHARP POINTS SHARP EDGES AS RECEIVED Please call for replacement parts or assistance 1 866 942 5362 Pacific Standard Time 8 30 a m 4 30 p m Monday to Friday Or visit our web site www whalenstorage com ...

Page 2: ...lt in instability causing possible injury Serious or fatal crushing injuries can occur from furniture tip over To help prevent tip over z Place heaviest items in the lowest drawer shelf z Do not set TVs or other heaviest objects on the top of this product z Never open more than one drawer at a time and never allow children to climb or hang on drawers doors or shelves Use of tip over restraints may...

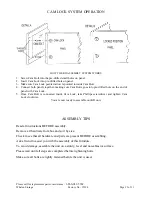
Page 3: ...d tighten Cam Lock clockwise You are now ready to assemble our KD unit ASSEMBLY TIPS Read all instructions BEFORE assembly Remove all hardware from box and sort by size Check to see that all hardware and parts are present BEFORE assembling Ask a friend to assist you with the assembly of this furniture To avoid damage assemble the unit on a sturdy level and non abrasive surface Please wait until al...

Page 4: ...eginning assembly 1 Top Panel x 1 2 Upper Front Molding x 1 3 Stretcher x 1 4 Side Panel Left x 1 5 Side Panel Right x 1 6 Adjustable Shelf x 2 7 Bottom Panel x 1 8 Back Panel x 1 9 Lower Front Molding x 1 Please call for replacement parts or assistance 1 866 942 5362 Whalen Storage Factory No 15294 Page 4 of 11 ...

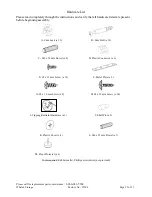
Page 5: ... Plastic Connector x 6 E 8 x 13 mm Screw x 12 F Metal Plate x 2 G 8 x 16 mm Screw x 8 H 4 x 19 mm Screw x 20 I Tipping Restraint Hardware x 1 J Shelf Pin x 8 K Plastic Cover x 4 L M6 x 25 mm Dowel x 3 M Floor Protector x 4 Tools required Rubber mallet Phillips screwdriver not provided Please call for replacement parts or assistance 1 866 942 5362 Whalen Storage Factory No 15294 Page 5 of 11 ...

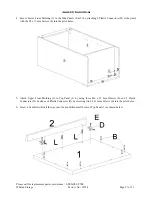
Page 6: ...lips Screwdriver 2 Screw 3 Cam Bolts all the way into the small holes located on Side Panel Left 4 as shown below Insert the M8 x 30 mm Dowel C into the end holes as a guide attach both Bottom Panel 7 and Stretcher 3 to the Side Panel Left 4 by engaging Cam Locks A 3 Repeat last step with Side Panel Right 5 Please call for replacement parts or assistance 1 866 942 5362 Whalen Storage Factory No 15...

Page 7: ...per Front Molding 2 to Top Panel 1 by using three M6 x 25 mm Dowels L and 2 Plastic Connectors D Fasten each Plastic Connector D by screwing two 8 x 13mm Screws E into the pilot holes 6 Screw 6 Cam Bolts B all the way into the pre drilled small holes of Top Panel 1 as shown below Please call for replacement parts or assistance 1 866 942 5362 Whalen Storage Factory No 15294 Page 7 of 11 ...

Page 8: ... A as shown below 8 Expand the Back Panel 8 and lay it onto the back edges of assembled frame making sure the margins along all edges are equal Attach the Back Panel in place by using 4 x 19 mm Screws H through the pre drilled holes of Back Panel Please call for replacement parts or assistance 1 866 942 5362 Whalen Storage Factory No 15294 Page 8 of 11 ...

Page 9: ...lastic Covers K to cover the visible Cam Locks inside the cabinet 10 Gently tap the Floor Protectors M at the bottom of side panels avoiding crack or damage of side panel If you plan to use this unit as a hutch stand this on another unit please skip this step Please call for replacement parts or assistance 1 866 942 5362 Whalen Storage Factory No 15294 Page 9 of 11 ...

Page 10: ...ith all the 8 x 16 mm Screws TIPPING RESTRAINT HARDWARE We have included one Tipping Restraint Hardware bag for this unit You must install this hardware to prevent accidents or injuries from falling unit When properly installed this restraint can provide protection against the unexpected tipping of the storage rack due to small tremors bumps or climbing We strongly recommended mounting this hardwa...

Page 11: ... keep furniture away from direct sunlight as may damage the finish Proper care and cleaning at home will extend the life of your purchase Follow the important and helpful tips that will enhance your furniture as it ages We hope you enjoy your purchase for many years Thank you for your purchase LIMITED LIFETIME WARRANTY This Whalen Storage product exclusive of shelves is warranted to the original p...

Reviews: