Note: when the microphone is active, please do not put it on the receiver, otherwise interference can occur!
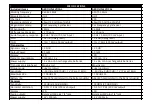
1 - When several units are used at the same time and in the same place, you should choose frequencies from low to high, according
to the distance to the receivers.
2 – If interference happens between multiple units, adjust that unit individually.
There should be at least 1.5 MHz between each system frequency.
3 - To avoid any possible wireless interference caused by the other audio equipment
please keep the receiver away from them by around 0.5 meter.
4 - Sometimes the external environment can cause wireless interference. In such cases,
adjust the frequency until there is no interference.
5 – For best range, always keep the receiver in ‘free space’ and avoid placing it in a flight case, cabinet or cupboard. Range can also
be affected by the number of people in the room between the mic and the receiver.
System notes :
Ir syncing
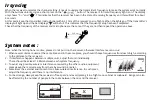
When the receiver completes the channel setting, it needs to update the transmitter's frequency to make the system work normally.
With the buttons unlocked, give a short press on the “ “ button. The receiver's infrared frequency light is on. The display
only shows “F----” and “ ”. This indicates that the receiver has been in the state of receiving frequency and this will last for about
5 seconds.
At this point, keep the transmitter (microphone) within 3-10cm of the receiver's pair of lights. When the lights go off the transmitter's
display will light up and the bar displays “ ”will be full. This indicates that the frequency setup has been completed.
Check that the frequency of the receiver and microphone are the same. If they are not then repeat the operation above.
3-10 cm


