W H E A T N E T - I P
N A V I G A T O R G U I
page 4 – 26
WheatNet-IP
/ Apr 2009
A few final hints about salvos. When you switch to the System Salvos/Macros tab,
the screen will go to the view from the last time the salvo window was opened. Also, if
you find you can’t change connections on the grid, make sure you’ve clicked the
“Editable” button first. We’ve chosen to make the salvo edit process take two steps so
as to avoid inadvertent changes caused by accidental mouse clicks during casual viewing.
Finally, salvos are executed very quickly; however, there is a sequence to them.
Connections changes are made in the order they were created in the salvo, so if the order
is important to you, keep this in mind while creating the salvo.
System Info Tab
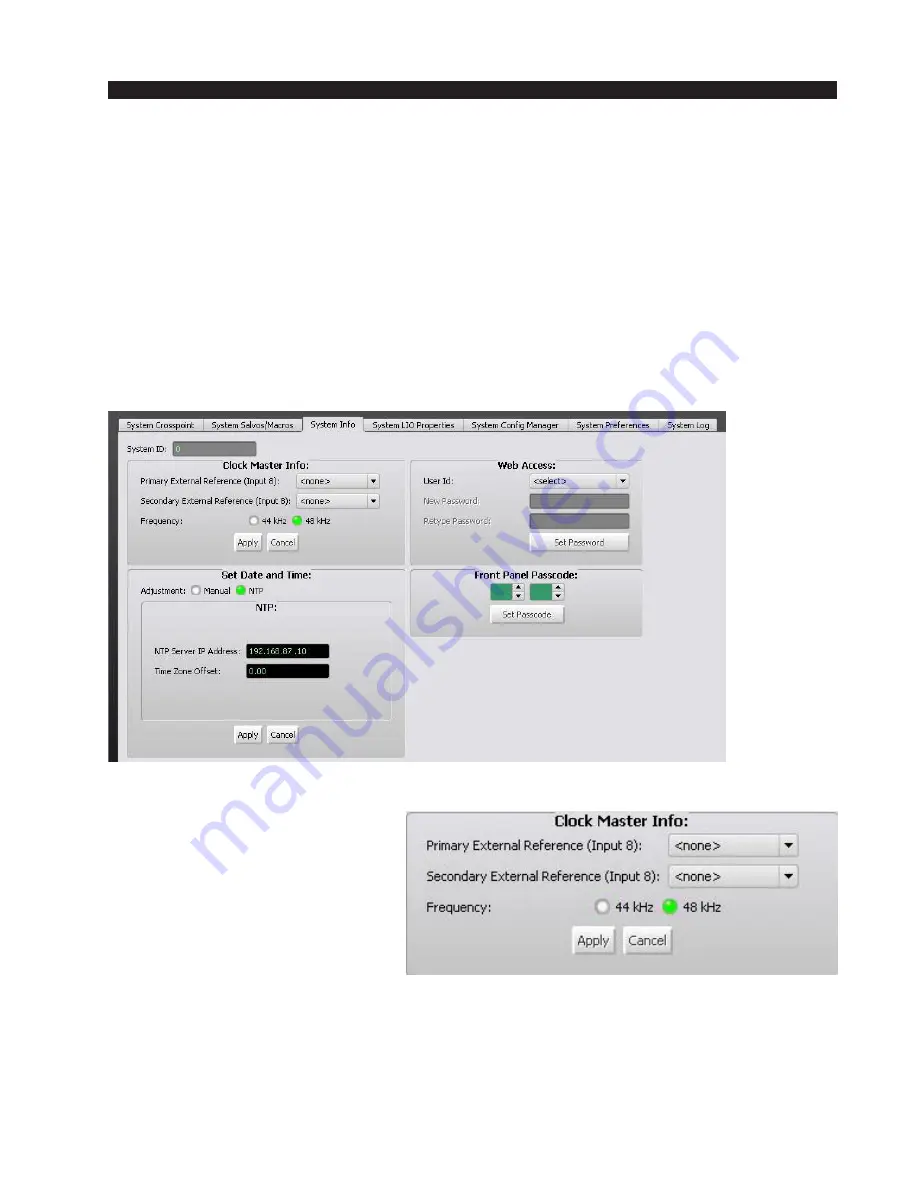
Clicking on the System Info tab removes the crosspoint grid from the main part of the
GUI screen and opens a new window. Within this window are four subwindows used for
setting up important system functions.
Clock Master Info
In the WheatNet-IP system, in
order to keep all of the audio chan-
nels in all of the connected BLADEs
and PCs synchronized, one of the
BLADEs is designated as “system
clock master.” This is something that
is normally done automatically by
the system at start up time, but this
window allows you to deliberately
specify the clock master. Why would
you want to do this? In the case where you are trying to synchronize the entire system to
some external AES master clock. By feeding the external clock reference into AES
input 8 of one of your digital BLADEs and selecting that BLADE in the “Primary
External Reference” window, you will force the system to slave off of the timing
reference on input 8 of the designated BLADE. We chose input 8 as the reference input


