W H E A T N E T - I P
N A V I G A T O R G U I
page 4 – 53
WheatNet-IP
/ Apr 2009
When you click on the silence detect check box and finish the signal wizard, several
things happen.
First, the silence detect function is enabled. Second the silence detect alarm logic
signal (default name is “XXXL” where XXX is the name of the destination signal you
are working on) is automatically created as a Source Signal to generate messages in the
“Alarms” pane of the GUI and to allow connection to a physical logic output port to
activate an alarm device. Finally, a new audio destination signal is automatically added
into the BLADE (and the system). This signal is created with a default name of “XXXB”
(where XXX is the name of the signal you are working on) and represents the secondary
audio path that can be used for automatic failover of your source connection upon
detecting silence. Create a back up signal path by making a source connection from your
back up source to this secondary “B” connection (it will show on the crosspoint grid).
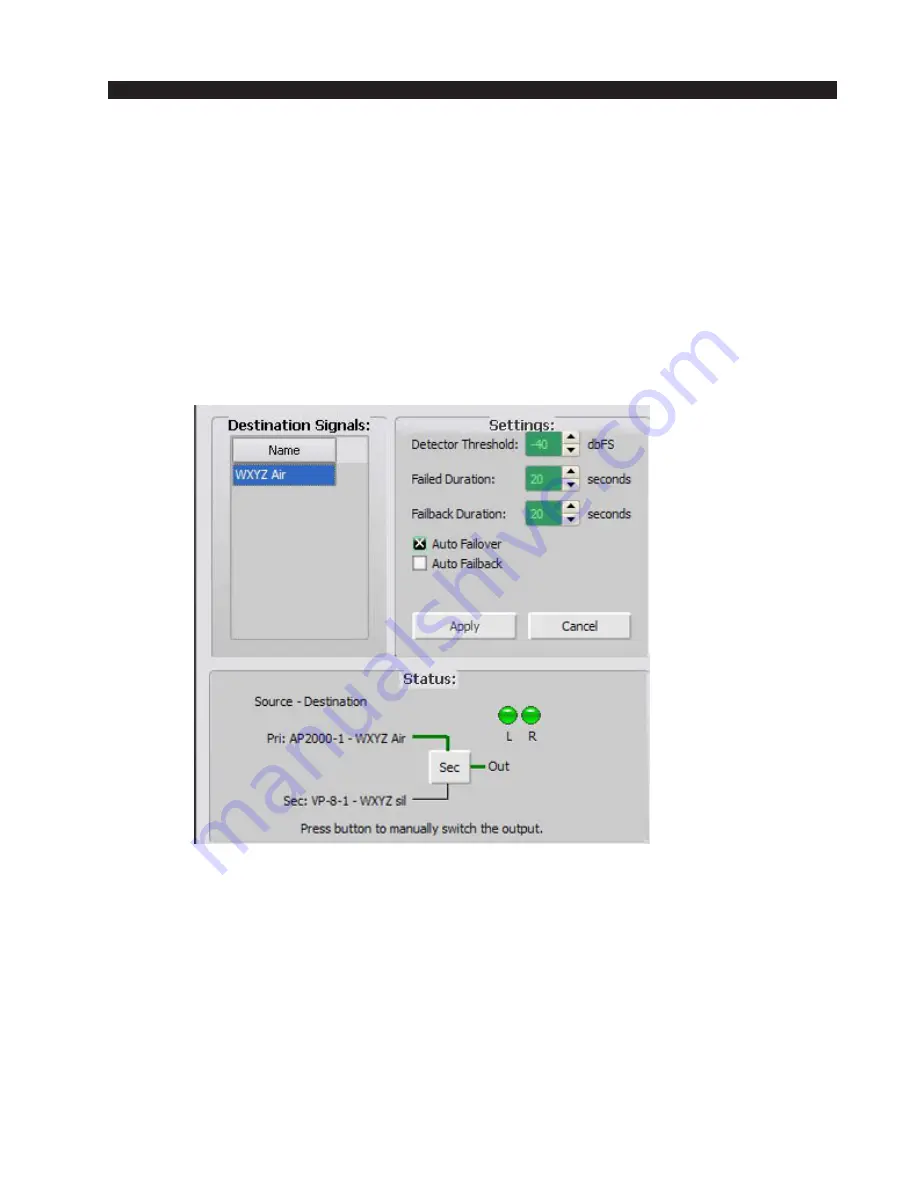
Clicking on the silence detect tab for a BLADE opens up a three part window.
Destination Signals
The upper left hand window part is labeled “Destination Signals” and shows a list
of any destinations that have been set up for silence detection. The upper right hand
window part is labeled “Settings” and shows the particular level and duration param-
eters that have been chosen (or the standard default settings). The bottom window part,
called “Status” shows details about the current state of the silence detect function.
To experiment with the silence detect function, click on one of the destinations in the
“Destination Signals” list. The “Settings” and “Status” areas of the window will change
to show the particulars for the selected destination signal. If there are no destinations
shown in the list, that means silence detection has not been enabled yet for any of the
signals in the BLADE. In the right hand “settings” area you can modify the default
settings or leave them as the defaults.


