page 4 – 11
IP-12/IP-16 / Dec 2014
W H E A T N E T - I P 8 8 c b C O N S O L E B L A D E
jack. Like any other destination, you can choose the source connected to it, allowing you
to monitor any source on a pair of headphones plugged in to the BLADE. To control
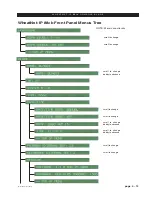
the volume of this headphone output, scroll through the front panel menus until you see
HEADPHONE... and select it. The encoder knob now functions as a volume control for
the headphone jack. The display will show HDPN LEVEL: XX ———— where “XX”
is a number from 1 to 10 indicating relative loudness. The number of dashes next to
these digits also increase to give a “gas gauge” style indication of loudness. To change
the loudness of the headphone output, momentarily press and release the knob; the level
indicators will start flashing and you can turn the encoder to increase or decrease the
level. To choose which audio channel you are monitoring at the headphone jack, scroll
the knob until you see the HDPN SOURCE: xxxxxxxx display (xxxxxxxx represents
the name of the current source for the headphone destination), and press the switch. The
encoder will now let you scroll through the available sources; press the switch when
you find the one you want. Of course, if desired, the optional Navigator GUI can also be
used to choose a source for the headphone destination, just as it can for any other one.
You can use the front panel encoder to set the front panel meter mode for the BLADE.
There are 16 LED bargraph meters on the front panel. These can show either the input
signal levels for each source, or the output signal levels for each destination. To choose,
scroll through the front panel menus until you find METERS... and select it with the
switch. The front panel display will change to show the current mode, either INPUTS
or OUTPUTS. Scroll the knob to select your preference and select it with the switch.
Note there are front panel mode LEDs that indicate whether the meters are showing
input levels or output levels. Also, these meters show audio levels after any gain trim-
ming has been applied, so if for some reason you have the gain for a particular channel
cranked down, you may not see any meter indication even though audio is there.
Connecting to this stand alone BLADE with the optional Navigator GUI will allow
you to create user defined names for each of the source and destination signals, trim their
audio levels, meter the audio, define logic, set silence detect parameters, and a host of
other functions. See the WheatNet‑IP
Navigator GUI chapter of the
WheatNet-IP Audio
Over IP Network
manual for details.
You also have access to some of these functions via a web browser. See the Web
Interface chapter of the
WheatNet-IP Audio Over IP Network
manual.


