background image

Summary of Contents for 1188127A

Page 1: ...ce parts accessories or service call 1 800 253 1301 in the U S A ACONDICIONADOR Si tiene prsguntas respeeto alas caractsrfstisas funsionamiento rendimiento partes ascssorios o servisio teenico Ilame al 1 800 253 1301 en los EE UU Table of Contents Indice 2 1188127A ...

Page 2: ...IRE 28 C6mo poner en marcha su acondicionador de aire Control digital 29 C6mo poner en marcha su acondicionador de aire Controles rotativos 32 C6mo cambiar la direcci6n del aire 33 Sonidos normales 33 CUIDADO DE SU ACONDICIONADOR DE AIRE 34 Limpieza del filtro de aire 34 Limpieza del panel delantero 34 Reparaci6n de la pintura da_ada 34 Mantenimiento anual 34 SOLUClON DE PROBLEMAS 34 AYUDA O SERVI...

Page 3: ...ide Window Kit is available from your dealer or service center See Accessories IMPORTANT Observe all governing codes and ordinances Check the location where air conditioner will be installed Proper installation is your responsibility Make sure you have everything necessary for correct installation The location should provide Grounded electrical outlet within 4 ft 122 cm of where the power cord exi...

Page 4: ...ust be connected to ground screw located in lower right corner of air conditioner when air conditioner is in cabinet The electrical ratings for your air conditioner are listed on the model and serial number label The model and serial number label is located behind the front panel on the flange below the control panel area Specific electrical requirements are listed in the chart below Follow the re...

Page 5: ...extension cord Failure to follow these instructions can result in death fire or electrical shock To test your power supply cord 1 Plug power supply cord into a grounded 3 prong outlet 2 Press RESET 3 Press TEST listen for click Reset button will trip and pop out 4 Press and release RESET listen for click Reset button will latch and remain in The power supply cord is ready for operation NOTES The R...

Page 6: ...sor flange E Remove this screw F Lower shipping bracket 3 Remove screw from end of lower shipping bracket attached to divider wall using a 1 4 nut driver or socket wrench 4 Remove the other end of lower shipping bracket from compressor flange NOTES If compressor flange interferes with sliding air conditioner back into cabinet bend flange back against the compressor Reinstall shipping brackets only...

Page 7: ...will have screw holes 8 A Lines C Long edge B Screw hole D Short edge Pull cabinet part way out of window Attach right filler board to front of a side mounting angle with two 1 2 hex head screws B A A Right filler board B Side mounting angle C hex head screw C Top View 9 Place cabinet back into the window with right filler board tight against window channel Insert left filler board into window cha...

Page 8: ...gle supports and house 4 Check that cabinet still tilts to the outside so that water will run to the outside 5 Tighten nuts securely do not overtighten with a 7_6 socket and socket wrench Tighten angle support nuts last so angle supports fit tightly against house 6 7 8 A Bolts B Angle supports C Verticalsupports Measure inside width of window frame Cut foam window sash seal with square ends to fit...

Page 9: ...ng is used the wood frame must be set Y2 13 ram into the inside wall AB C i i A Plastered wall C Wood frame B Inside wall D Louvers Installing wood frame 1 Construct wood frame See Location Requirements for dimensions 2 Measure outside width and height of frame to determine wall opening dimensions 3 Cut opening through the wall Remove and save insulation NOTES Dimension for depth depends on wall t...

Page 10: ...e cabinet I A 2 _ seal s trip NOTE Handle air conditioner gently 2 Peel paper from adhesive backing on one of the 2 short air conditioner seals Align left side air conditioner seal against metal flange behind control box Attach long top air conditioner seal over seam in top of air condtioner and right side air conditioner seal so they align with left seal Excessive Weight Hazard Use two or more pe...

Page 11: ... can result in death fire or electrical shock g Plug into a grounded 3 prong outlet 10 Press RESET on the power supply cord AIR CONDITIONERUSE Operating your air conditioner properly helps you to obtain the best possible results This section explains proper air conditioner operation IMPORTANT If you turn the air conditioner off wait at least 3 minutes before turning it back on This prevents the ai...

Page 12: ...n select the fan speed by pressing FAN SPEED Because the fan does not circulate the room air continuously less energy is used but the room air is not circulated as often Use Power Saver when you are asleep or away from home 0 0 0 0 MODE Auto Cool FanOnly Power Saver Fan Speed NOTE The Fan Speed button will operate only when Cool Fan Only or Power Saver mode has been selected 1 Press FAN SPEED unti...

Page 13: ...y or Power Saver NOTE For Auto mode go to Step 4 3 For Cool Fan Only or Power Saver mode adjust FAN SPEED to Turbo High or Low 4 Adjust temperature between 64 F 18 C and 86 F 30 C 5 Wait 3 seconds before turning off air conditioner 6 Press TIMER Timer indicator light will flash Hour indicator light will turn on and display will show remaining hours before air conditioner will turn on 7 Press the p...

Page 14: ...MER Timer indicator light on air conditioner will flash Hour indicator light on air conditioner will turn on and display on air conditioner will show remaining hours before air conditioner will turn off 3 4 Press the plus or minus button to change delay time 1 to 24 hours Press TIMER again or wait 10 seconds Timer indicator light on air conditioner will remain on Hour indicator light on air condit...

Page 15: ...n some models Fan Control Set FAN control to the desired setting When the air conditioner is operating at Low Cool High Cool Turbo Cool Low Heat or Turbo Heat the fan circulates air continuously Turbo Cool for maximum cooling High Cool for normal cooling Low Cool for sleeping comfort Turbo Heat for maximum heating Low Heat for reduced heating Fan Only to move air continuously without cooling or he...

Page 16: ...TE Do not operate the air conditioner without the filter in place 1 Turn off air conditioner 2 Using the indents in top of filter door pull door down Filter door is not removable 3 Slide air filter up and out to remove from the filter door 4 Use a vacuum cleaner to clean air filter If air filter is very dirty wash it in warm water with a mild detergent Do not wash air filter in the dishwasher or u...

Page 17: ...obtained from the product manufacturer and must not be repaired Air conditioner cycles on and off too much or does not cool heat room in cooling heating mode Air conditioner seems to run too much The current air conditioner replaced an older model The use of more efficient components may cause the air conditioner to run longer than an older model but the total energy consumption will be less Newer...

Page 18: ...nance procedures Accessory and repair parts sales Specialized customer assistance Spanish speaking hearing impaired limited vision etc Referrals to local dealers service companies and repair parts distributors Our service technicians are trained to fulfill the product warranty and provide after warranty service anywhere in the United States To locate the authorized service company in your area you...

Page 19: ...ERTENCIA Para reducir el riesgo de incendio choque electrico o lesiones personales al usar su acondicionador de aire siga estas precauciones basicas Conecte a un contacto de pared de conexi6n a tierra de No use un cable electrico de extensi6n 3 terminales Desconecte el acondicionador de aire antes de No quite el terminal de conexi6n a tierra darle servicio No use un adaptador Use dos o mas persona...

Page 20: ...donde se instalara el acondicionador de aire La instalaci6n correcta es su responsabilidad AsegQrese de que usted tenga todo Io necesario para una instalaci6n correcta El lugar debe tenet Tomacorriente puesto a tierra a no mas de 4 pies 122 cm de donde el cable electrico sale del acondicionador de aire NOTA No use un cable electrico de extensi6n Libertad de movimiento del aire a la habitaci6n que ...

Page 21: ...ble de retardo de 30 amperes o cortacircuitos 0selo solamente en un circuito con tomacorriente Qnico M_todo recomendado para la puesta a tierra Este acondicionador de aire debe set puesto a tierra Este acondicionador de aire esta equipado con un cable de suministro de energfa provisto de un enchufe con tres terminales Para reducir a un minimo el peligro de posibles cheques electricos el cable debe...

Page 22: ... 1 Enchufe el cable de suministro de energia en un y la garantia quedaran anulados si se abre el estuche tomacorriente de 3 terminales con conexi6n a tierra resistente a alteraciones 2 Presione RESET Reposici6n INSTRUCCIONES DEINSTALACION Peligro de Peso Excesivo Use dos o mas personas para mover e instalar el acondicionador de aire No seguir esta instrucci6n puede ocasionar una lesi6n en la espal...

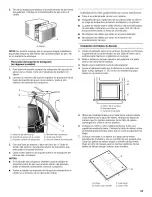
Page 23: ...nstalaci6n o al quitarlo La parte de donde sale el cable electrico del acondicionador de aire debe colocarse a no mas de 4 pies 122 cm de un tomacorriente puesto a tierra de 3 terminales No bloquee las rejillas que estan en el panel delantero No bloquee las rejillas que estan en el exterior del acondicionador de aire Instalacibn del tablero de Ilenado 1 Centre el gabinete vacio en la ventana Soste...

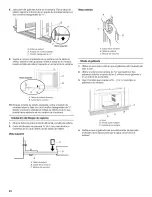
Page 24: ... de los 2 orificios en el gabinete y en el umbral de la ventana 3 Use 2 tornillos para madera 10 12 x 3 4 para fijar el gabinete a la ventana A B A Tabla de relleno derecha B Canal de la ventana 10 Empuje la tabla de relleno izquierda contra el angulo de montaje lateral y fijela con dos tornillos hexagonales de 1 2 Desde el exterior empuje las tablas de relleno todo Io que pueda hacia adelante en ...

Page 25: ...je el obturador con el lade adhesivo contra la parte inferior del marco Baje la vidriera de la ventana F m Vista Frontal Vista Lateral A m B 1 A Ancho del marco C Obturador de espuma del B Marco marco de la ventana D Gabinete 9 Inserte el obturador del riel de la ventana detras de la parte superior del marco de la ventana inferior y contra el cristal de la ventana superior 10 Coloque el soporte de...

Page 26: ...as dimensiones de la profundidad dependen del espesor de la pared y del tipo de moldura No bloquee las rejillas que estan en el gabinete del acondicionador de mire Utilice madera de 1 2 5 cm o mas gruesa para el marco de madera A Ancho exterior B Altura exterior C Profundidad B l 4 Aplique un preservativo de madera a la superficie exterior expuesta 5 Inserte el marco en la abertura en la pared Cua...

Page 27: ...ta entre la base del acondicionador de aire y el gabinete A Tira de obturacidn de 2 NOTA Trate el acondicionador de aire con cuidado 2 Pele el papel del reverso adhesivo de uno de los 2 obturadores cortos del acondicionador de aire Alinee el obturador izquierdo del acondicionador de aire contra la pesta_a de metal que esta detras de la caja de control Fije el obturador superior largo del acondicio...

Page 28: ... Electrico Conecte a un contacto de pared de conexi6n a tierra de 3 terminales No quite la terminal de conexi6n a tierra No use un adaptador No use un cable el6ctrieo de extenei6n No seguir estas inetrucciones puede ocaeionar la muerte incendio o cheque el6ctrico A Muescas _A 9 Conecte a un contacto de pared de conexi6n a tierra de 3 terminales 10 Presione RESET Reposici6n sobre el enchufe del cab...

Page 29: ...cuando este fuera del hogar o durmiendo 0 0 0 0 MODE Auto C001 FanOnly Power Saver Fan Speed Velocidad de ventilacibn NOTA El bot6n Fan Speed Velocidad de ventilaci6n funcionara 0nicamente cuando se ha seleccionado el modo de Cool Enfriamiento Fan Only S61o ventilaci6n o Power Saver Ahorro de energfa 1 Oprima FAN SPEED hasta que se encienda la luz indicadora para la posici6n que usted desea 2 Sele...

Page 30: ...ondicionador de aire se encienda manteniendo los ajustes previos 1 Apague el acondicionador de aire 2 Oprima TIMER La luz indicadora Temporizador destellara La luz indicadora Hour hora se encendera y la pantalla mostrara las horas restantes antes de que se encienda el acondicionador de aire 3 Oprima el bot6n de mas o menos para cambiar el tiempo de retardo de 1 a 24 horas 4 Oprima TIMER nuevamente...

Page 31: ...e de control Temperature temperatura Cada vez que usted oprime o sostiene el bot6n de menos la temperatura baja de a 1 hasta alcanzar los 64 F 18 C NOTA Despues de 3 segundos la luz indicadora Set en el acondicionador de aire se apagara y se encendera la luz indicadora Room La pantalla en el acondicionador de aire mostrara la temperatura actual de la habitaci6n POWER Para seleccionar el modo Oprim...

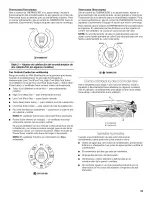
Page 32: ... apagara y se encendera la luz indicadora Room La pantalla en el acondicionador de aire mostrara la temperatura actual de la habitaci6n _ s ss s xy _ _ 1 Quite la pelfcula protectora transparente de la placa del panel delantero en algunos modelos 2 Fije el control de ventilaci6n Vea Control del de ventilaci6n en algunos modelos 3 Fije el Control de Fan Ventilaci6n Vea Control de Fan Ventilaci6n pa...

Page 33: ... Utilice el mode de Power Saver cuando este fuera del hogar o durmiendo NOTA El ventilador funciona en velocidad Low Baja solamente FANCONTROL Thermostat rermostato Gire el control de THERMOSTAT a un ajuste medio Ajuste el funcionamiento del acondicionador de aire girando el control de Thermostat hacia la derecha para un enfriamiento maximo Para un menor enfriamiento gire el control de THERMOSTAT ...

Page 34: ...ci6n sobre c6mo pedir una cubierta resistente vea la secci6n Accesorios S snI nimi nb snu s Su acondicionador de aire necesita mantenimiento anual para ayudar a asegurar un rendimiento constante de la me or calidad durante todo el aio Llame al vendedor autorizado de su Iocalidad para hacer una cita para el chequeo anual El precio del chequeo anual es su responsabilidad A Muescas B Filtro de aire S...

Page 35: ... para enfriar varias habitaciones El filtro esta sucio u obstruido per escombros Limpie el filtro El evaporador interno y los serpentines del condensador externo estan sucios u obstruidos por escombros Vea Mantenimiento Anual Hay demasiado calor o humedad se esta cocinando en recipientes abiertos duchas etc en la habitacibn Use un ventilador para eliminar el calor o la humedad de la habitaci6n Tra...

Page 36: ...que han sido hechas siguiendo las mismas rigurosas especificaciones utilizadas para construir todos los nuevos aparatos electrodomesticos Para Iocalizar partes autorizadas por la fabrica en su Iocalidad Ilame a nuestro Centro para eXperiencia del cliente a su centro de servicio autorizado mas cercano o al Servicio de Fabrica al 1 800 442 1111 en los EE UU Para asistencia adicional Si necesita asis...

Reviews: