Ice Maker
PRODUCT MODEL NUMBERS
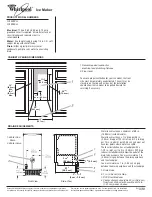
CABINET OPENING DIMENSIONS
DRAIN REQUIREMENTS
GI1500PH
GI1500XH
Electrical:
115-volt, 60 Hz, AC-only, 15 amp
grounded circuit is required. A time-delay fuse or
circuit breaker and separate circuit is
recommended.
Water:
A cold water supply using 1/4 in. O.D. soft
copper tubing with shutoff valve.
Drain:
Either a gravity-drain system or
condensate pump to carry water to an existing
drain.
Because Whirlpool Corporation policy includes a continuous commitment to improve
our products, we reserve the right to change materials and specifications without notice.
Dimensions are for planning purposes only. For complete details, see Installation
Instructions packed with product. Specifications subject to change without notice.
Ref. 2217406
04-29-04
11
1/2
"
(29.2 cm)
15"
(38.1 cm)
24"
(60.1 cm)
9"
(22.9 cm)
28
1/2
"
(72.4 cm)
34"
(86.4 cm)
Min.
34
1/2
"
(87.6 cm)
Max.
3
1/2
"
(8.9 cm)
1. Recommended location for
electrical and plumbing fixtures.
2. Floor level
"
"
"
"
3
5/8
"
(9.2 cm)
23"
(58.4 cm)
2" - 1
1/2
"
(5 cm - 3.8 cm)
1
"
(2.5 cm)
Drain lines must have a minimum of 5⁄8 in.
(15.88 mm) inside diameter.
Drain lines must have a 1 in. drop per 48 in.
(2.54 cm drop per 122 cm) of run or 1⁄4 in. drop
per 12 in. (6.35 mm per 30.48 cm) and must not
have low points where water can settle.
The ideal installation has a standpipe with a
1-1⁄2 in. (3.81 cm) to 2 in. (5.08 cm) PVC drain
reducer installed directly below the outlet of the
drain tube as shown. You must maintain a 1 in.
(2.54 cm) air gap between the drain pump hose
and the standpipe.
You must maintain a 1 in. (2.54 cm) air gap
between the drain pump hose and the standpipe.
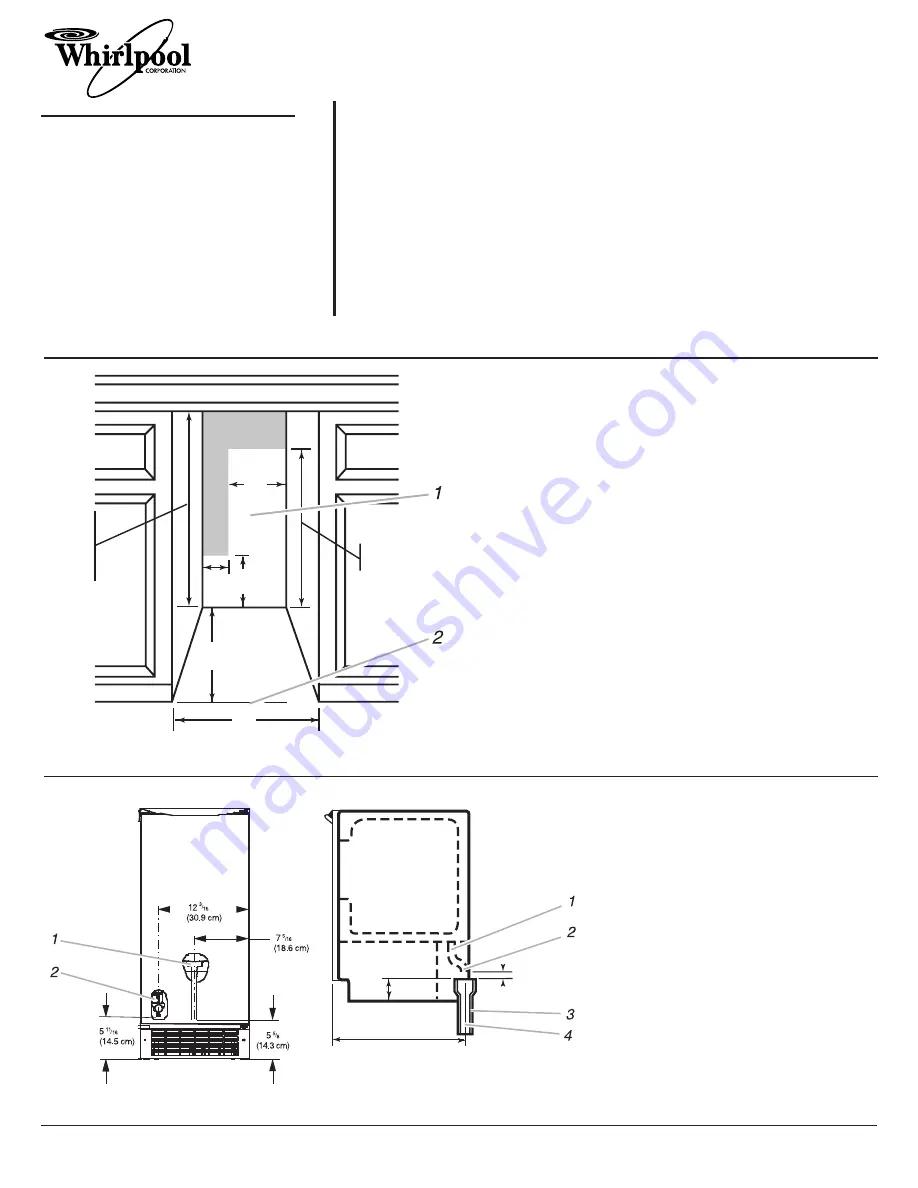
1. Water Pan
Drain
2. Water Valve
1. Drain Hose
2. 1 in. (2.54 cm) Air Gap
3. PVC Drain Reducer
4. Center of drain should be 23 in. (58.4 cm)
from front of door (with or without 3/4 in.
(1.91 cm) panel on door.
®
Front View
Side View
To ensure proper ventilation for your ice maker, the front
side must be completely unobstructed. The unit may be
closed-in on the top and 3 sides, but the installation
should allow the ice maker to be pulled froward for
servicing if necessary.


