2-2
REMOVING A SLIDE SWITCH,
THE INDICATOR LAMP & THE BLOWER MOTOR
NOTE:
Sharp edges may be present.
ELECTRICAL SHOCK HAZARD
Disconnect power before servicing.
Replace all panels before operating.
Failure to do so could result in death or
electrical shock.
WARNING
4.
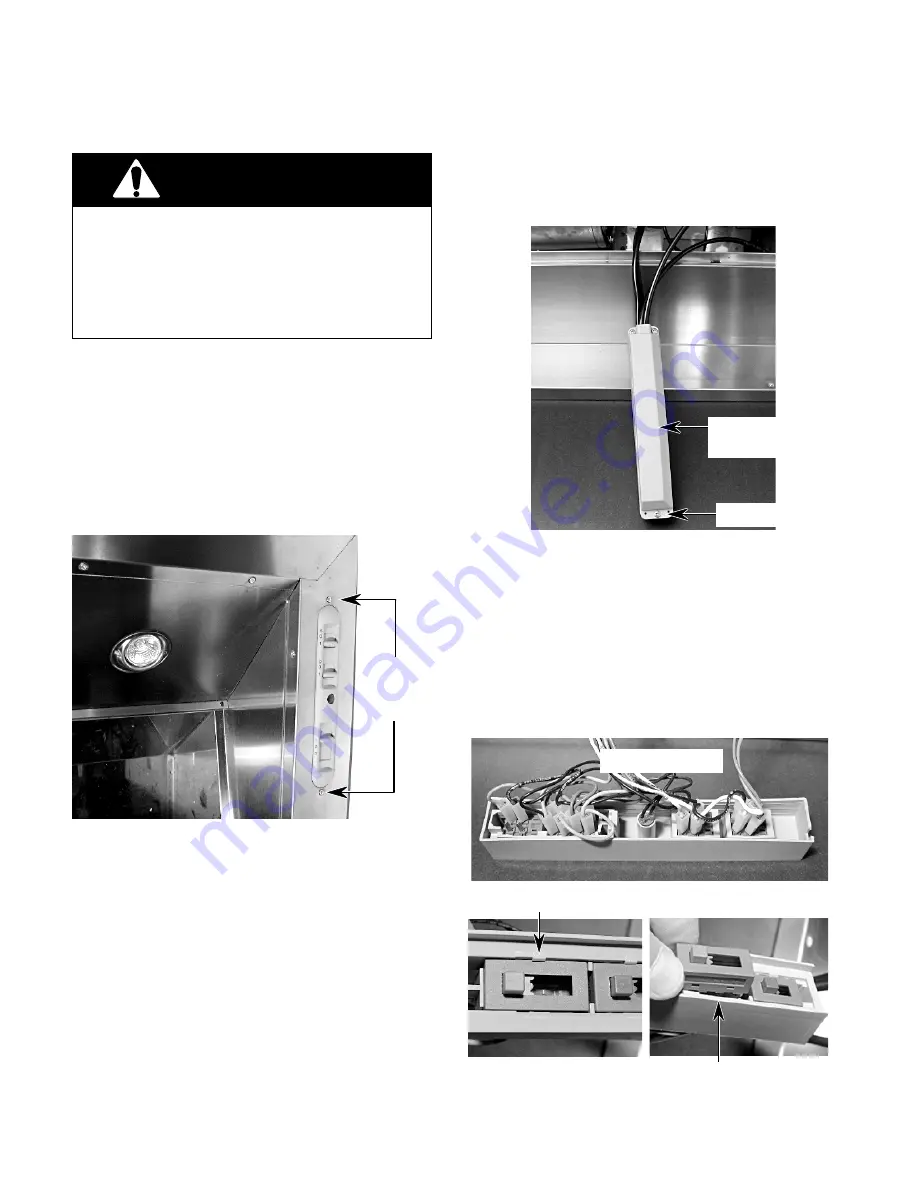
Remove the three mounting screws from
the control assembly cover and remove
the cover.
1.
Disconnect the electrical power to the
hood.
2.
Remove the three filters from the hood.
3.
Remove the two screws from the control
assembly and pull the assembly around
through the filter section to the front.
Control
Assembly
Screws
5.
To remove a slide switch:
a) Disconnect the wire connectors from
the switch terminals.
b) Use a small screwdriver and pry the tab
on the control housing away from the
switch, and push the switch out of the
holder. NOTE: The control assembly
wiring is shown on the next page.
Screw (1 of 3)
Control Housing Tab
Push Switch Out
Of Housing
3 Slide Switches
REASSEMBLY NOTE: Before you reassemble
the control assembly, make sure that:
• You route the wiring carefully so that it
does not become pinched between the
housing sections.
• All of the switch lug wire connectors are
securely over the lugs. Also check to see
that the metal contacts remain inside the
plastic holders and have not been pushed
out.
• The slide switches operate properly be-
fore securing the housing sections.
Control
Assembly Cover
Summary of Contents for 4317332
Page 1: ...TECHNICAL EDUCATION JOB AID 4317332 KAC 30 36 48 ISLAND AND WALL CANOPY RANGE HOODS ...
Page 4: ... iv NOTES ...
Page 12: ...1 8 NOTES ...
Page 28: ......


