2-7
REMOVING THE BALLAST TRANSFORMER
NOTE:
Sharp edges may be present..
ELECTRICAL SHOCK HAZARD
Disconnect power before servicing.
Replace all panels before operating.
Failure to do so could result in death or
electrical shock.
WARNING
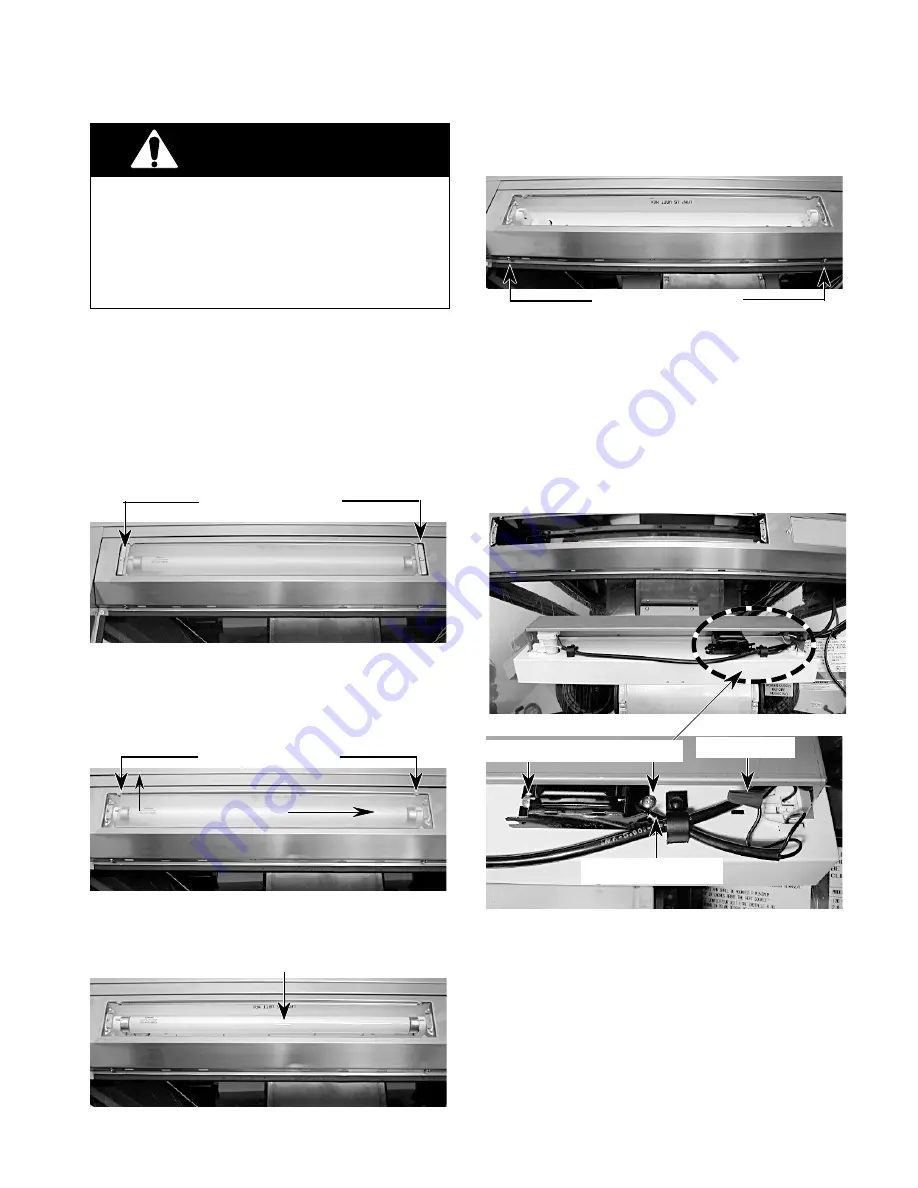
7.
Remove the wire nut from one of the
ballast transformer wires and untwist the
wire ends.
8.
Remove the plastic tubing from the trans-
former wires and cut the second trans-
former wire near the case.
9.
Remove the two screws from the trans-
former and remove the transformer.
1.
Disconnect the electrical power to the
hood.
2.
Remove the three filters from the hood.
3.
Remove the screw from each of the fluo-
rescent lamp lens retainers and remove
the retainers.
Lens Retainers
4.
Slide the fluorescent lamp lens to either
end of the holder and remove it from the
holder tabs.
Slide Lens & Lift
End To Remove
Lens Holder Tabs
6.
Remove the two screws from the fluores-
cent lamp holder and remove the holder.
5.
Remove the fluorescent lamp from the
sockets.
Fluorescent Lamp
Lamp Holder Screws
REASSEMBLY NOTE: You will have to splice
the cut ballast transformer wire, (going to the
fluorescent lamp socket), to either of the two
wires coming from the new transformer, and
secure the ends with a wire nut. Cut the wires
to the appropriate length, as necessary.
Wire Nut
Cut 2nd Wire Here
Ballast Transformer Screws
Summary of Contents for 4317332
Page 1: ...TECHNICAL EDUCATION JOB AID 4317332 KAC 30 36 48 ISLAND AND WALL CANOPY RANGE HOODS ...
Page 4: ... iv NOTES ...
Page 12: ...1 8 NOTES ...
Page 28: ......


