background image

3

IMPORTANT SAFETY INSTRUCTIONS

SAVE THESE INSTRUCTIONS

WARNING: 

To reduce the risk of fire, electrical shock, 

injury to persons, or damage when using the range, follow 

basic precautions, including the following:

■  

WARNING: 

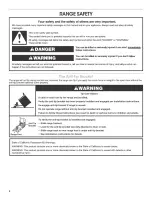
TO REDUCE THE RISK OF TIPPING OF 

THE RANGE, THE RANGE MUST BE SECURED BY 

PROPERLY INSTALLED ANTI-TIP DEVICES. TO CHECK 

IF THE DEVICES ARE INSTALLED PROPERLY, SLIDE 

RANGE FORWARD, LOOK FOR ANTI-TIP BRACKET 

SECURELY ATTACHED TO FLOOR OR WALL, AND 

SLIDE RANGE BACK SO REAR RANGE FOOT IS 

UNDER ANTI-TIP BRACKET. 

■  

CAUTION: 

Do not store items of interest to children in 

cabinets above a range or on the backguard of a range – 

children climbing on the range to reach items could be 

seriously injured.

■  

Proper Installation – Be sure the range is properly installed 

and grounded by a qualified technician.

■  

Never Use the Range for Warming or Heating the Room.

■  

Do Not Leave Children Alone – Children should not be left 

alone or unattended in area where the range is in use. 

They should never be allowed to sit or stand on any part of 

the range.

■  

Wear Proper Apparel – Loose-fitting or hanging garments 

should never be worn while using the range.

■  

User Servicing – Do not repair or replace any part of the 

range unless specifically recommended in the manual. All 

other servicing should be referred to a qualified technician.

■  

Storage in or on the Range – Flammable materials should 

not be stored in an oven or near surface units.

■  

Do Not Use Water on Grease Fires – Smother fire or flame 

or use dry chemical or foam-type extinguisher.

■  

Use Only Dry Potholders – Moist or damp potholders on 

hot surfaces may result in burns from steam. Do not let 

potholder touch hot heating elements. Do not use a towel 

or other bulky cloth.

■  

DO NOT TOUCH SURFACE UNITS OR AREAS NEAR 

UNITS – Surface units may be hot even though they are 

dark in color. Areas near surface units may become hot 

enough to cause burns. During and after use, do not touch, 

or let clothing or other flammable materials contact surface 

units or areas near units until they have had sufficient time 

to cool. Among those areas are the cooktop and surfaces 

facing the cooktop.

■  

Use Proper Pan Size – The range is equipped with one or 

more surface units of different size. Select utensils having 

flat bottoms large enough to cover the surface unit heating 

element. The use of undersized utensils will expose a 

portion of the heating element to direct contact and may 

result in ignition of clothing. Proper relationship of utensil to 

burner will also improve efficiency.

■  

Never Leave Surface Units Unattended at High Heat 

Settings – Boilover causes smoking and greasy spillovers 

that may ignite.

■  

Make Sure Reflector Pans or Drip Bowls Are in Place – 

Absence of these pans or bowls during cooking may 

subject wiring or components underneath to damage.

■  

Protective Liners – Do not use aluminum foil to line surface 

unit drip bowls or oven bottoms, except as suggested in the 

manual. Improper installation of these liners may result in a 

risk of electric shock, or fire.

■  

Glazed Cooking Utensils – Only certain types of glass, 

glass/ceramic, ceramic, earthenware, or other glazed 

utensils are suitable for range-top service without breaking 

due to the sudden change in temperature.

■  

Utensil Handles Should Be Turned Inward and Not Extend 

Over Adjacent Surface Units – To reduce the risk of burns, 

ignition of flammable materials, and spillage due to 

unintentional contact with the utensil, the handle of a 

utensil should be positioned so that it is turned inward, and 

does not extend over adjacent surface units.

■  

Do Not Soak Removable Heating Elements – Heating 

elements should never be immersed in water.

■  

Do Not Cook on Broken Cooktop – If cooktop should 

break, cleaning solutions and spillovers may penetrate the 

broken cooktop and create a risk of electric shock. Contact 

a qualified technician immediately.

■  

Clean Cooktop With Caution – If a wet sponge or cloth is 

used to wipe spills on a hot cooking area, be careful to 

avoid steam burn. Some cleaners can produce noxious 

fumes if applied to a hot surface.

■  

Use Care When Opening Door – Let hot air or steam 

escape before removing or replacing food.

■  

Do Not Heat Unopened Food Containers – Build-up of 

pressure may cause container to burst and result in injury.

■  

Keep Oven Vent Ducts Unobstructed.

■  

Placement of Oven Racks – Always place oven racks in 

desired location while oven is cool. If rack must be moved 

while oven is hot, do not let potholder contact hot heating 

element in oven.

■  

DO NOT TOUCH HEATING ELEMENTS OR INTERIOR 

SURFACES OF OVEN – Heating elements may be hot even 

though they are dark in color. Interior surfaces of an oven 

become hot enough to cause burns. During and after use, 

do not touch, or let clothing or other flammable materials 

contact heating elements or interior surfaces of oven until 

they have had sufficient time to cool. Other surfaces of the 

appliance may become hot enough to cause burns – among 

these surfaces are oven vent openings and surfaces near 

these openings, oven doors, and windows of oven doors.

For self-cleaning ranges –

■  

Do Not Clean Door Gasket – The door gasket is essential 

for a good seal. Care should be taken not to rub, damage, 

or move the gasket.

■  

Do Not Use Oven Cleaners – No commercial oven cleaner 

or oven liner protective coating of any kind should be used 

in or around any part of the oven.

■  

Clean Only Parts Listed in Manual.

■  

Before Self-Cleaning the Oven – Remove broiler pan and 

other utensils.

For units with ventilating hood –

■  

Clean Ventilating Hoods Frequently – Grease should not 

be allowed to accumulate on hood or filter.

■  

When flambeing foods under the hood, turn the fan on.

For smart enabled ranges and ovens:  

■  

Remote operation – This appliance is configurable to allow 

remote operation at any time. Do not store any flammable 

materials or temperature sensitive items inside, on top or 

near surface units of the appliance.

Summary of Contents for 6660155

Page 1: ......

Page 2: ......

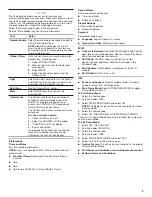
Page 3: ...luminum foil to line surface unit drip bowls or oven bottoms except as suggested in the manual Improper installation of these liners may result in a risk of electric shock or fire Glazed Cooking Utensils Only certain types of glass glass ceramic ceramic earthenware or other glazed utensils are suitable for range top service without breaking due to the sudden change in temperature Utensil Handles S...

Page 4: ......

Page 5: ......

Page 6: ......

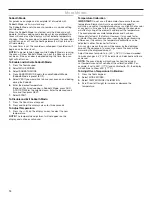
Page 7: ... For more information see the Convection Cooking section KEEP WARM Keep warm Food must be at serving temperature before placing it in the warmed oven 1 Select KEEP WARM 2 Select the desired temperature by scrolling left to right or manually by selecting the grid in the upper right corner and entering the desired temperature into the keypad 3 Press START 4 Press the Cancel keypad when finished RAPI...

Page 8: ... away Input the manufacturer s maximum recommended time and temperature For more information see the Frozen Bake section POULTRY Chicken Pieces Whole Chicken Poultry food items do not require preheat Insert food right away SEAFOOD Fish Fillet Fish Sticks Fish Fillet and Fish Sticks require preheat Insert food when preheat is complete BAKED GOODS Biscuits Croissants Baked Goods require preheat Inse...

Page 9: ...ected by the oven control lockout Preferences Times and Dates Set time and date preferences NOTE If user is connected to Wi Fi time and date will be set automatically Your Meal Times Adjust when breakfast lunch dinner is shown Time Date Time Format AM PM vs 24 Hour Military Time Sound Volume Set sound volume preferences Timers and Alerts Buttons and Effects Display Settings Set the screen brightne...

Page 10: ...ven Cancel keypad 2 Press and hold the display screen for three seconds To Adjust Temperature 1 Press the 25 on the display screen to select the new temperature NOTE The temperature adjustment will not appear on the display and no tones will sound Temperature Calibration IMPORTANT Do not use a thermometer to measure the oven temperature Elements will cycle on and off as needed to maintain a consis...

Page 11: ......

Page 12: ......

Page 13: ......

Page 14: ......

Page 15: ......

Page 16: ......

Page 17: ......

Page 18: ......

Page 19: ... not soak knobs When replacing knobs make sure knobs are in the Off position On some models do not remove seals under knobs Cleaning Method Soap and water Pull knobs straight away from control panel to remove CONTROL PANEL AND OVEN DOOR EXTERIOR To avoid damage to the control panel do not use abrasive cleaners steel wool pads gritty washcloths or abrasive paper towels Cleaning Method Glass cleaner...

Page 20: ...er This is normal operation The element may cycle on and off to keep the cooktop from overheating Oven will not operate Delay Start is set See the Cook Time section Control is locked See Control Lock in the Tools section The range is in Demo Mode Demo Mode will deactivate all oven elements See Info in the Tools section Electronic oven control set incorrectly See the Tools and More Modes sections O...

Page 21: ...umber 4396923 Premium Broiler Pan and Roasting Rack Order Part Number W10123240 Problem Possible Causes and or Solutions Oven cooking results not as expected Range is not level Level the range See the Installation Instructions The set temperature was incorrect Double check the recipe in a reliable cookbook Oven temperature needs adjustment See Oven Temperature Control in the Electronic Oven Contro...

Page 22: ...cts or damage caused by the use of non genuine Whirlpool parts or accessories 6 Conversion of products from natural gas or propane gas 7 Damage from accident misuse abuse fire floods acts of God or use with products not approved by Whirlpool 8 Repairs to parts or systems to correct product damage or defects caused by unauthorized service alteration or modification of the appliance 9 Cosmetic damag...

Page 23: ......

Page 24: ......

Page 25: ...e foncée Les endroits près des éléments de surface peuvent devenir assez chauds pour causer des brûlures Pendant et après l utilisation ne pas toucher les éléments chauffants et ne pas laisser les vêtements ou autres matériaux inflammables entrer en contact avec ces éléments de surface ou les endroits près des éléments avant qu ils soient suffisamment refroidis Ces endroits comprennent la table de...

Page 26: ...en contact avec les éléments chauds ou les surfaces intérieures chaudes du four avant qu ils aient eu assez de temps pour refroidir D autres surfaces de l appareil peuvent devenir assez chaudes pour causer des brûlures Ces surfaces comprennent les ouvertures de l évent du four et les surfaces près de ces ouvertures les portes du four et les hublots des portes du four Pour les cuisinières avec prog...

Page 27: ......

Page 28: ......

Page 29: ......

Page 30: ...it pour saisir la température de cuisson à l aide du clavier 3 Appuyer sur START mise en marche pour commencer le préchauffage Une tonalité se fait entendre une fois le préchauffage terminé 4 Appuyer sur la touche annulation une fois l opération terminée Pour plus d informations consulter la section Cuisson par convection KEEP WARM maintien au chaud Maintien au chaud Les aliments doivent être à la...

Page 31: ... Les volailles ne nécessitent pas de préchauffage Insérer les aliments immédiatement SEAFOOD fruits de mer Filet de poisson Bâtonnets de poisson Le filet de poisson et les bâtonnets de poisson nécessitent un préchauffage Insérer les aliments lorsque le préchauffage est terminé BAKED GOODS produits de boulangerie Biscuits Croissants Les produits de boulangerie nécessitent un préchauffage Insérer le...

Page 32: ...s du four Préférences Heures et dates Régler les préférences pour l heure et la date Vos heures de repas Régler quand petit déjeuner déjeuner dîner s affiche Date Format de l heure AM PM ou 24 hour heure militaire Volume sonore Régler les préférences pour le volume sonore Minuteries et alertes Boutons et effets Réglages de l écran Régler la luminosité de l écran Luminosité de l affichage Régional ...

Page 33: ......

Page 34: ......

Page 35: ......

Page 36: ......

Page 37: ......

Page 38: ... et au gril ou brûleurs s allument et s éteignent par intermittence Pour les cuisinières à convection le ventilateur fonctionne pendant le préchauffage et peut s allumer et s éteindre par intermittence pendant de courts intervalles dans le mode Bake cuisson au four afin de produire un meilleur résultat Ce comportement est automatique lorsque le four est utilisé Avant la cuisson au four et le rôtis...

Page 39: ......

Page 40: ......

Page 41: ......

Page 42: ...rêt Sur certains modèles ne pas enlever les joints sous les boutons Méthode de nettoyage Savon et eau Tirer les boutons en ligne droite hors du tableau de commande pour les enlever TABLEAU DE COMMANDE ET EXTÉRIEUR DE LA PORTE DU FOUR Afin d éviter d endommager le tableau de commande ne pas utiliser de nettoyants abrasifs de tampons en laine d acier de chiffons de lavage rêches ou d essuie tout abr...

Page 43: ...les à vitrocéramique les commandes du four sont verrouillées Voir Control Lock verrouillage des commandes dans la section Guide des caractéristiques Chaleur excessive autour des ustensiles de cuisson sur la table de cuisson L ustensile de cuisson n a pas la dimension correcte Utiliser un ustensile de cuisson d un diamètre comparable à la surface de cuisson à l élément ou au brûleur de surface L us...

Page 44: ...tout résidu de vinaigre La cuisinière n est pas d aplomb Les dépôts minéraux s accumulent sur les surfaces sèches du fond du four durant le programme de nettoyage Régler l aplomb de la cuisinière Voir les Instructions d installation Utiliser un chiffon imbibé de vinaigre pour enlever les dépôts Utiliser ensuite un chiffon humide pour enlever complètement tout résidu de vinaigre La cuisson au four ...

Page 45: ...ffresh modèles en acier inoxydable Commander la pièce numéro W10355016 Nettoyant pour cuisine et appareils électroménagers affresh Commander la pièce numéro W10355010 Ensemble de nettoyage pour four à technologie AquaLift Commander la pièce numéro W10423113RP Grattoir pour table de cuisson modèles avec vitrocéramique Commander la pièce numéro WA906B Nettoyant et poli pour granite Commander la pièc...

Page 46: ... valable à compter de la date d achat initial par le consommateur Une preuve de la date d achat initial est exigée pour obtenir un dépannage dans le cadre de la présente garantie limitée 1 Usage commercial non résidentiel ou par plusieurs familles ou non respect des instructions de l utilisateur de l opérateur ou des instructions d installation 2 Visite d instruction à domicile pour montrer à l ut...

Page 47: ...ou en cas de dépannage ou de réparation nécessaire sur ce gros appareil ménager autre que les responsabilités énoncées dans la présente garantie Si vous souhaitez une garantie plus étendue ou plus complète que la garantie limitée fournie avec ce gros appareil ménager adressez vous à Whirlpool ou à votre détaillant pour obtenir les modalités d achat d une garantie étendue LIMITATION DES RECOURS EXC...

Page 48: ......

Page 49: ......

Page 50: ... esas áreas están la superficie de cocción y las superficies que están frente a la superficie de cocción Use cacerolas de tamaño apropiado La estufa está equipada con una o más unidades exteriores de tamaño distinto Seleccione utensilios que tengan el asiento liso lo suficientemente grande para cubrir el elemento calefactor de la unidad exterior El uso de utensilios de menor tamaño expondrá una po...

Page 51: ...ción del horno y las superficies cercanas a estos orificios puertas del horno y ventanas de las puertas del horno Para estufas con función de autolimpieza No limpie la junta de la puerta La junta de la puerta es esencial para un buen cierre Se debe tener cuidado de no frotar dañar o mover la junta No use productos de limpieza para hornos No se debe usar productos comerciales de limpieza para horno...

Page 52: ......

Page 53: ......

Page 54: ......

Page 55: ... introduciendo la temperatura de asado por convección en el teclado 3 Seleccione START Inicio para empezar a precalentar 4 Presione la tecla cancelar cuando haya finalizado Para obtener más información vea la sección Cocción por convección KEEP WARM Mantener caliente Mantener caliente Los alimentos deberán estar a la temperatura para ser servidos antes de colocarlos en el horno calentado 1 Selecci...

Page 56: ...s alimentos de pollo no requieren que precaliente el horno Inserte los alimentos inmediatamente SEAFOOD marisco Filetes de pescado Palitos de pescado Los filetes de pescado y palitos de pescado requieren que precaliente el horno Introduzca el alimento cuando termine de precalentar BAKED GOODS productos horneados Galletas Medialunas Los alimentos horneados requieren que precaliente el horno Introdu...

Page 57: ...l del horno Preferencias Horas y fechas Ajuste las preferencias de hora y fecha Sus horarios de comidas Ajuste cuando aparezca desayuno almuerzo cena Hora Fecha Formato horario AM PM o 24 horas horario militar NOTA Si el usuario está conectado a una red Wi Fi la hora y la fecha se ajustan automáticamente Volumen de sonido Ajuste las preferencias de volumen de sonido Temporizadores y alertas Teclas...

Page 58: ...ivar y salir del modo Sabbath de día de descanso 1 Presione la tecla cancelar el horno 2 Mantenga presionada la pantalla durante tres segundos Para regular la temperatura 1 Presione 25 en la pantalla para seleccionar la nueva temperatura NOTA El ajuste de temperatura no aparecerá en la pantalla y no sonará ningún tono Calibración de la temperatura IMPORTANTE No use un termómetro para medir la temp...

Page 59: ......

Page 60: ......

Page 61: ......

Page 62: ......

Page 63: ......

Page 64: ......

Page 65: ......

Page 66: ......

Page 67: ...a a colocar las perillas asegúrese de que estén en la posición Off Apagado En algunos modelos no retire los obturadores que hay debajo de las perillas Método de limpieza Agua y jabón Tire de las perillas en sentido recto para retirarlas del panel de control PANEL DE CONTROL Y EXTERIOR DE LA PUERTA DEL HORNO Para evitar daños en el panel de control no use productos de limpieza abrasivos estropajos ...

Page 68: ...ión Herrmientas Se ha fijado incorrectamente el control electrónico del horno Consulte las secciones Herramientas y Otros modos La temperatura del horno está demasiado alta o demasiado baja La temperatura del horno debe regularse Consulte las secciones Herramientas y Otros modos Las luces indicadoras del horno destellan Se ha encendido o restablecido la energía a la estufa Consulte las secciones H...

Page 69: ...e la sección Colocación de las parrillas y los utensilios para hornear No hay suficiente circulación de aire alrededor de los utensilios para hornear Consulte la sección Colocación de las parrillas y los utensilios para hornear Los alimentos tienen un dorado más oscuro causado por un utensilio de horneado de color mate u oscuro Baje la temperatura del horno 25 F 15 C o mueva la parrilla a una posi...

Page 70: ...de cerámica Pida la pieza número W10391473 Limpiador affresh para acero inoxidable modelos de acero inoxidable Referencia para pedido W10355016 Limpiador affresh para cocina y electrodomésticos Referencia para pedido W10355010 Kit de limpieza de hornos AquaLift Pida la pieza número W10423113RP Raspador para superficies de cocción modelos con vidrio de cerámica Pida la pieza número WA906B Limpiador...

Page 71: ...rincipal se use en el país en el que se ha comprado Esta garantía limitada entrará en vigor a partir de la fecha de la compra del consumidor original Se requiere una prueba de la fecha de compra original para obtener servicio bajo esta garantía limitada 1 Uso comercial no residencial o familiar múltiple o uso diferente del indicado en las instrucciones del usuario del operador o de instalación pub...

Page 72: ...reparación de este electrodoméstico principal aparte de las declaraciones incluidas en esta garantía Si usted desea una garantía con una duración más prolongada o más completa que la garantía limitada que se incluye con este electrodoméstico principal deberá dirigirse a Whirlpool o a su distribuidor acerca de la compra de una garantía extendida LIMITACIÓN DE RECURSOS EXCLUSIÓN DE DAÑOS INCIDENTALE...

Page 73: ......

Page 74: ...74 Notes ...

Page 75: ...75 Notes ...

Page 76: ... 2018 Whirlpool Used under license in Canada All rights reserved Utilisé sous licence au Canada Tous droits réservés Usado en Canadá bajo licencia Todos los derechos reservados W11085352E 02 18 ...

Reviews: