background image

Summary of Contents for 7898VAD

Page 1: ...TN 37311 In this Owner s Guide you will find a wealth of information regarding all aspects of your range By Be sure to includethe model and serial numbers of your following the instructions carefully you will be able to range For your convenience we have provided space fully enjoy and properly maintain your new range below to record this information IMPORTANT INFORMATION For future reference we su...

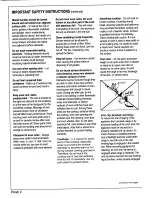
Page 2: ...oor coverings such as orhanging garments should never be Topreventdamageto range cushioned vinyl Usecare when moving worn while using theappliance range onthis type offloor covering Never operate a surface unit without a User servicing Donotrepair or pan inplace andnever allow a pan to Afterappliance isinstalled Be replace anypartoftheappliance boil dry certain allpacking materials are unless spec...

Page 3: ...ay aredarkincolor Areasnearsurface t _ __ c o _ t _ _ cause container toburstandresult in elements andinterior surfaces ofoven injury maybecome hotenough tocause burns During andafteruse donot Keepovenvent ducts touch orletclothing orotherflammable unobstructed Theventislocatedat materials contactheatingelements the right rearelement forcoilcooktops areasnearelements orinterior oratthebaseofthebac...

Page 4: ...ler pan oven racks andother utensils Slide in anddrop in Children climbing ontheappliance to discard thefoodanditscontainer The models Usten forafan A fannoise reach items could beseriously injured food could becontaminated should beheard during acleaning Children must betaught thatthe Important safety notice and cycle If not cancel clean cycle andcall appliance andutensils inoronitcanbe warning T...

Page 5: ...nUnuousbeepsignalsthe 2 Press OVEN TEMP Enter oven endofthe timingoperationand End temperaturewith SET knob 2 TurnSET knobclockwise to select briefly appears in the display The HI broil or counterclockwise to selectLo broil time of day will automatically To delaythe start of cooking reappear inthe display 1 PressCOOK TIME Entercooking See page 16 for additional To cancel PressTIMER and holdfor tim...

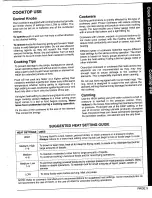
Page 6: ... gentleboil Water boilsat the same Do not use woks equipped with round metal rings The temperature whether boiling gently or vigorously If a ring which is designed to support the wok above the highsetting is used excessive spattering will occur and element willtrap heat andmay damage the elementand food may stick or burn onto the bottomof the pan the cooktop Ifa higherheat setting isusedtobringliq...

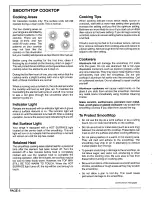
Page 7: ...ing the elementwill cycle on andoff Itis normal glass if you slide them across the smoothop Remove to see a red glow through the smoothtop when the any metal marks immediately using Cooktop Cleaning element cycles on Creme Glass ceramic earthenware porcelain over metal Indicator Light heat proof glass or glazed cookware mayscratchthe Rangesare equippedwithanindicator lightwhichglows smoothtopcookt...

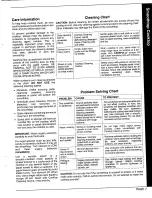
Page 8: ... bleaches rust removers or Tiny scratches Coarse particles dUst scratches are notremovable and ammonia may damage the finish of or abrasions salt and sand between effect Cooking In time the the smoothtop cookware bottom and Scrafcheswill become smoother and Glass cleaners containing ammonia C0 kt0p In_rrect less visible Be Sure C0okware harmcloththeor smoothtOP sponge will leave an cleaning materi...

Page 9: ...ents setting once food begins cooking Do not use oversized cookware Pan should not extend more than 2 inches Surface elements are self cleaning from the element Do not immerse elements in water Clean bowls after each use with soap and water When an element is turned on it will cycle on and off Remove stubborn stains with baking soda paste and to maintain the heat setting plastic scouring pad Porce...

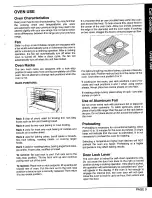
Page 10: ...er cookware To catch spillovers place a piece of foil a little larger than the pan on the rack below the pan Do not place aluminum foil across the bottom of Rack 5 top of oven used for broiling thin non fatty the oven foods such asfish and toasting bread Rack 4 usedfor two rack baking or most broiling Preheating Rack 3 used for most one rack baking of cookies and Preheating is necessary for conven...

Page 11: ...illappearin the displaywhen the SET knob is turned one click in either direction The 2 TurnSETknobuntil2 30 2hoursand30minutes temperaturecan be set from 170to 550 isdisplayed Theovenwillturnonwithinafewseconds TheON 3 Press STOP TIME oad indicator word and 75 or the actual oven 4 TurnSET knob until6 00 6 o clock is displayed temperature whicheverishigher willappear inthe display 5 Press OVEN TEMP...

Page 12: ...l reappear temperature willappear inthe display to showthat the oven has beenset for adelay start cooking operation in the display TIMED BAKE ON indicator words will remain in the display to show that the oven has been 8 The ovenwill automatically turn on at the presettime set for Automatic Oven Cooking and TIMED BAKE ON will appear to indicate that the food is cooking 6 After a few seconds the ov...

Page 13: ...e limitations Do not use a large cooking sheet pan or other large bakeware Large bakeware will block the air flow and affect cooking results 3oo _50 For optimum results use the lower oven for critical 3 Allow the oven to preheat for 10 to 15 minutes cooking and delicate baking 4 Place the food in the center of the oven allowing a minimumof two inches betweenthe utensil s and the Do not use the upp...

Page 14: ...ltswill be affected if air Check the cooking progress at the minimum time flow is blocked recommended in the recipe If necessary continue check ng at intervalsuntil the food is done If the oven Cookware material plays an importantpart in baking doorisopenedtoofrequently heatwillescapethe oven results Always usethe typeand sizeof pancalledfor in this can affectbakingresu tsand wastes energy the rec...

Page 15: ...ncorrect rack position Temperature set too high don t brown evenly Oven door not closed properly Doorgasket not sealing properly Cakes crack on top Batter overmixed Incorrect use of aluminum foil Temperature set too high Oven not preheated Too much leavening Pans darkened dented or Incorrect rack position warped I Foroptimum results bakeon 0he i ack_Ifbakingcakes on Cake not done in middle Tempera...

Page 16: ...roasting Rub into the surface of the roast ff added before cooking NOTE For more information on cooking meat and poultry contact the USDA Meat and Poultry Hotline at 1 800 535 4555 Roasting Chart Thawed Meats Only Approximate Oven Approximate Weight TemPerature in F Intexnal Roasting Time Cut of Meat pounds not preheated Temperature min per pound Beef Rib Roast cut side down 4 to 8 325 140 rare 25...

Page 17: ...me of day will meat from curling This also reduces smoking and reappear in the display spattering Use HI BROIL for most broil operations Select Lo Place oven rack in the correct rack position when oven is BROIL when broiling longer cooking foods such as cool For darker browning place meat closer to the broil poultry The lower temperature allows food to cook to the element Place meat further down i...

Page 18: ...im bakingSoda water and Water Do not UseOVenCleaners abrasive or Caustic agentS They Will damage the finish i Oven and Coil Elements are sell cleaning Soil will burn off as elementsare used Do not Elements spray oven cleaner on elements stectrical hook up or connection Do not immerse coil type surface elements in water _ i i Oven racks Soap water Cleansihg clean withsoapy_eter Remove Stub_rn s0ilw...

Page 19: ...ntsuch as indicates that the clean cycle was not Ben Ami or soap and water These To prevent damage to the door and long enough The soilwill be removed areas are not exposed to cleaning lock lever do net force the dooropen during the next clean cycle temperatures and should be cleaned when the LOCK indicator is to prevent soil from baking on during displayed Ifthe oven racksdo not slidesmoothly the...

Page 20: ...a delayed door will appear in the display and continous clean operation beeps will sound if the oven door is not locked If the door is not locked or the clean time is not 7 At the end of a clean cycle continuous beeps will entered within 30 seconds of pressing the CLEAN sound Press the STOP CLEAR pad to cancel the pad the program will automatically be cancelled beeps 5 Press CLOCK pad and the curr...

Page 21: ...TLY reduce in size tapping stain with a wooden or plastic utensil Brush away any loose soil that flakes off Varnish type stains usually need to be softened with asmall amount of water FACTORSAFFECTING LENGTH OF CLEANING or damp cloth Remaining soil will gradually reduce with TIME continued oven use at normal baking temperatures Thehighertheoventemperature thefasterthecleaning DO NOT USE ANY TYPE O...

Page 22: ...ulb and replace Restore power check lightoperationpriorto replacing glass paneland reset clock On microwave oven model Refer to the separate microwaveovenuseandcarebookletfor instructionson removingthe cooktoplightbulb Remove fluorescent tube and replace with an 18 watt fluorescent tube Snap top trim back into place and restore power Reset the clock Oven Light To turn on the oven light Push the ro...

Page 23: ...lide drawer to the closed position To remove lift off door Open the door to the stop position openedabout 6 inches and graspthe doorwith both hands at eachside Donot use thedoor handleto lift Leveling Legs the door Lift up evenly until the door clears the hinge Some floors are not level 1 I arms For proper baking your range must be level Leveling legs are Located on each corner of the base of the ...

Page 24: ...e slitsfor fat drainage Is the range plug loose or disconnect from the electricaloutlet Oven light does not operate If the range has coil elements are they properly Is the bulb loose or burned out plugged into the receptacles Is the light switch in the On position Were appropriate utensils used See Cookware or Cooking Tips Sections Oven will not self clean Are the surface element controlsproperlys...

Page 25: ...yed During Normal Oven Cooking If a fault code appears in the display and continuous 3 Press and hold the OVEN TEMP pad for several beeps sound press the STOP CLEAR pad Then seconds until 00 appears inthe display reprogram the cooking operation If 00 does not appear in the display press the STOP CLEAR pad and begin again If the fault code reappears in the display call an authorized servicer Do not...

Page 26: ... as the model and serial numbers of the directory under appliance for the authorized service appliance center nearest you Be sure to include your name address and phone number along with the model and Major Appliance Consumer Action Panel serial numbers of the appliance See inside front cover 20 North Wacker Drive for location of your model and serial numbers Chicago IL 60606 If you are not satisf...

Page 27: ...ent not b Instruct the consumer on the proper use of the authorized by Maytag Customer Service or an authorizedservicer product c Misuse abuse accidents or unreasonable use c Transport the appliance to a servicer d Incorrect electricalcurrent voltage or supply 6 CONSEQUENTIAL OR INCIDENTAL DAMAGES SUSTAINED BYANY PERSONAS A RESULTOFANY e Improper settingof any control BREACH OF THESE WARRANTIES So...

Reviews: