

Quick Reference
Table of Contents:
If range does not operate:
Check that the circuit breaker is not tripped
or the house fuse blown.
Check that the power supply cord is plugged
into the wall receptacle.
Check that gas line is turned on.
See Use and Care Guide for troubleshooting list.
If you need assistance:
If you have questions about operating, cleaning
or maintaining your range:
Refer to Use and Care Guide.
Call the Consumer Assistance Center. Check
your Use and Care Guide for a toll-free
number to call or call the dealer from whom
you purchased this range. The dealer is
listed in the Yellow Pages of your phone
directory under “Appliances — Household —
Major — Service and Repair.”
If you need service:
Maintain the quality built into your range by
calling an authorized service company.
To obtain the name and number of an
authorized service company:
Contact the dealer from whom you
purchased your range; or
Look in the Yellow Pages of your telephone
directory under “Appliances — Household —
Major — Service and Repair;” or
Call the Consumer Assistance Center.
The toll-free number is listed in your Use
and Care Guide.
When you call, you will need:
The range model number.
The range serial number.
Both numbers are listed on the model/serial
rating plate located on the frame behind the
broiler drawer.
Part No. 8523781
© 2002 Whirlpool Corporation
Printed in U.S.A.
Pages
2
2
2
3
3
4 - 7
7 - 8
Installation Instructions
IMPORTANT:
Installer:
Leave Installation Instructions with the homeowner.
Homeowner:
Keep Installation Instructions for future reference.
Save
Installation Instructions for local electrical inspector's use.
Part No. 8523781
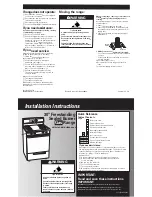
Moving the range:
CLOCK
8.8:88
TIMER
TIMER
When moving range, slide range onto cardboard
or hardboard to prevent damaging the floor
covering.
If removing the range is necessary for cleaning
or maintenance:
1. Shut off the gas supply to the range.
2. Slide range forward away from the wall, just
far enough to disconnect the gas and electric
supply lines.
3. Slide range forward to complete cleaning or
maintenance.
Benton Harbor, Michigan 49022
IMPORTANT:
Read and save these instructions.
If you need assistance:
Check your Use and Care Guide for a toll-free number to call or call
the dealer from whom you purchased this range. The dealer is listed
in the Yellow Pages of your phone directory under “Appliances —
Household — Major — Service and Repair.”
Call when you:
Have questions about range installation or operation.
Need to obtain the name and number of an authorized
service company.
When you call, you will need:
The range model number.
The range serial number.
Both numbers are listed on the model/serial rating plate located on
the frame behind the broiler drawer.
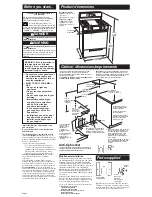
Before you start
Product dimensions
Cabinet dimensions/requirements
Electrical requirements
Gas supply requirements
Installation steps
Gas conversions
If range does not operate
If you need assistance/service
Moving the range
Back cover
Back cover
Back cover
30" Freestanding
Sealed Burner
Gas
Range
with standard clean oven
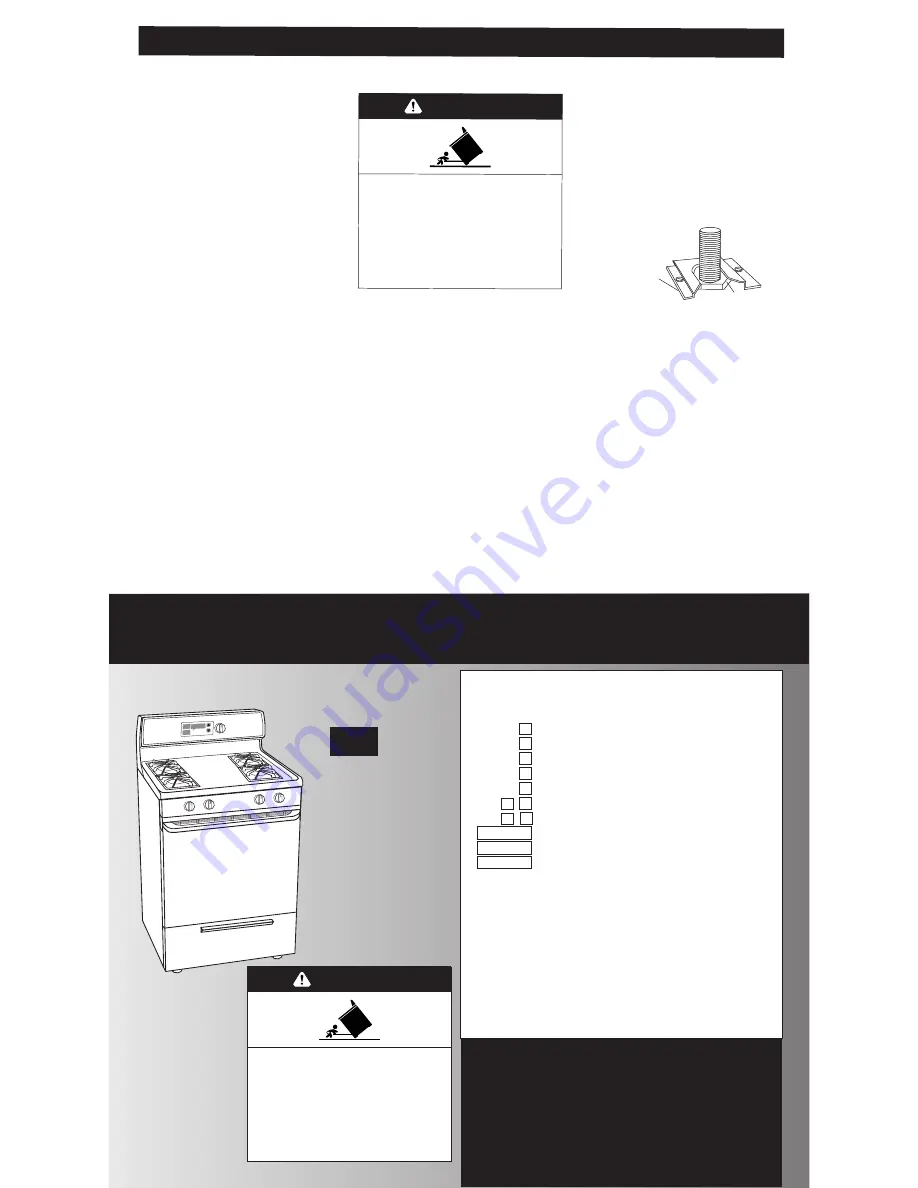
Tip Over Hazard
A child or adult can tip the range and be
killed.
Connect anti-tip bracket to rear range foot.
Reconnect the anti-tip bracket, if the range
is moved.
Failure to follow these instructions can
result in death or serious burns to children
and adults.
WARNING
Tip Over Hazard
A child or adult can tip the range and be
killed.
Connect anti-tip bracket to rear range foot.
Reconnect the anti-tip bracket, if the range
is moved.
Failure to follow these instructions can
result in death or serious burns to children
and adults.
WARNING
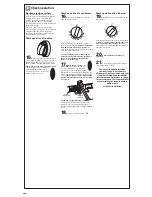
anti-tip
bracket
range foot
4.
Making sure the anti-tip bracket is installed:
• Look for the anti-tip bracket securely attached
to floor.
• Slide range back so rear range foot is under
anti-tip bracket.
5. Check that range is level.
6. Reconnect gas line to range and check for
leaks.
7. Plug power supply cord into outlet.


