background image

Summary of Contents for 947596 B

Page 1: ... 9 Self Service Check List 16 Service Information 16 Handle thk air conditioner with metal fins on the front and rear coils NOW Is a good time to fill in the spaces below You will need this information if you call for service or ask questions about your air conditioner Model and serial numbers are on a plate attached to the front of the unit You can see it after removing the plastic front panel Mo...

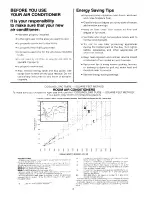
Page 2: ... easy means of computing capacity 101 mremes I expmsure shadmg nsulalmn and buddmg conslrucbon AtlAM Codmg LOad Esllmale Form FL 1 must be used COOLING CAPACllY REOUIREO BTU HI3 INSTRUCTIONS 1 Determine the area 10 be cooled in square feel and locate lhat point on the left side of chart 2 Move horizontally across to the center line of Band A I3 or C according lo the condltion of the celling in the...

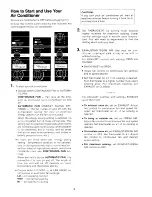
Page 3: ...mperature and thermostat setting l Choose erther LO MED or HI FAN SPEED on continuous or automatic fan settings LO for sleeping comfort MED for normal cooling HI for maximum cooling least two minutes before turning it back on or 2 3 Set THERMOSTAT by turning knob towards higher numbers for maximum cooling Lower number settings result in warmer room tempera ture You will need to experiment to find ...

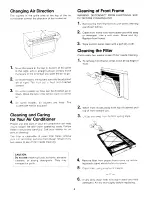
Page 4: ...r helps remove dust lint and other particles from the air Check every two weeks to see if filter needs cleaning Do not use cleaning flulds solvents abrasive c leaners or strong detergents They may damage the parts Lpmmp p Cleaning of Front Frame WARNING DISCONNECT FROM ELECTRICAL SUP PLY BEFORE CLEANING UNIT 1 2 3 Remove the front frame from unit when cleaning as shown below Clean front frame with...

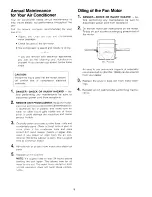
Page 5: ...uld damage the insulation and cause serious trouble 3 Carefully clean and hose out the base coils and condensate pans Clean at least once a year or more often if the condenser coils and pans collect dart sand leaves insects or algae Also clean If you detect an odor from the air con ditioner While the cabinet is open this is a good time to oil the fan motor 4 Remove foil or plastic from motor and e...

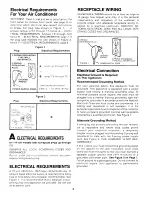
Page 6: ...OWER SUPPLY CORD LE Electrical Connection Electrical Ground Is Required on This Appliance Recommended Grounding Method For your personal safety this appliance must be grounded This appliance is equipped with a power supply cord having a 3 prong grounding plug To minimize possible shock hazard the cord must be plugged into a mating 3 prong grounding type wall receptacle grounded in accordance with ...

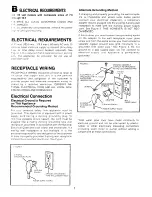
Page 7: ...odes and ordinances If a mating wall receptacle is not available it is the personal responsibility and obligation of the customer to have a properly grounded S prong wall receptacle installed by a qualified electrician See Figure 1 3 PRONG GROUNDING PLUG 3 PRONG GROUNDING TYPE WALL RECEPTACLE POWER SUPPLY CORD Alternate Grounding Method If changing and properly grounding the wall recepta cle is im...

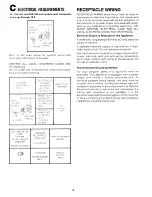
Page 8: ...ation of the customer to provide proper and adequate recep tacle wiring installed by a qualified electrician OB SERVE NATIONAL ELECTRICAL CODE AND ALL LOCAL GOVERNING CODES AND ORDINANCES Electrical Ground is Required on this Appliance A three wire single phase 60 hertz AC only electrical supply is required A separate electrical supply is required on a sepa rately fused circuit Do not fuse ground ...

Page 9: ...t the condition of the window where the air conditioner will be Installed Be sure it will support the weight of the unit CAUTION l Be sure air conditioner does not fall out of window during installation l Handle the air conditioner with care Watch out for the sharp metal fins on the front and rear coils l Do not use the water condensate for drinking purposes It may not be sanitary THIS APPLIANCE M...

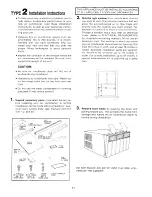
Page 10: ... have approximately a one half bubble l 4 downward tilt to the outside for proper water drainage If necessary reposition or shim cabinet to provide the proper tilt or side to side leveling 6 Pull out sliding curtains while holding air con ditioner in window Extend curtains on both sides until they engage window channels Pulling slightly inward allows curtains to slide easily Mark and make z pilot ...

Page 11: ...de with a screwdriver saw small level pocket knife tape measure and drill with 3 z drill bit SEAL 4 WIDEI 4 SHEET 7 SHEET 5 WOOD PLASTIC DRAIN CUP SPOUT ROUND HEADI HEX HEADI ROUND HEADI THIS APPLIANCE MUST BE INSTALLED ACCORDING TO ALL APPLICABLE CODES AND ORDINANCES 2 Pick the right window First decide what room s you want to cool Then choose a window that will allow the air conditioned air to f...

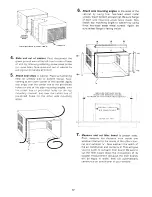
Page 12: ...g angles to the sides of the cabinet by using four hex head sheet metal screws Insert bottom screws first Be sure flange of each side mounting angle faces inside Now attach top mounting angle to cabinet by using three hex head sheet metal screws Again be sure tallest flange is facing inside MEASURE DISTANCE FROM INSIDE ONE WINDOW CHANNEL TO INSIDE OF THE OTHER AND SUBTRACT 6 DIVIDE BY TWO I 7 Meas...

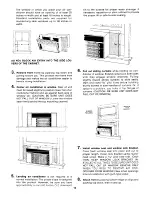
Page 13: ... channel Now maneuver other filler board into other window channel Reaching through win dow opening push filler boards from outside as far toward you as they will go Extend the mounting slides outward into the window chan nels on both sides Pull the cabinet toward you to position the side mounting slides as far forward In the window channels as possible Now mark and make a 3 X pilot hole for each ...

Page 14: ...le OPTIONAL During high humidity condensate may drip from the outside of your air zonditioner onto the ground below If your atr czonditioner is installed where this is undesirable JOU can direct the water to a more suitable spot by simply attaching a 5 s inside diameter thin walled hose to the drain spout at rear of cabinet 14 Insert air conditioner into cabinet Do not push against sharp fins and ...

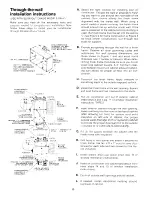
Page 15: ...hrough the wall for a finish frame Observe all local governing codes and ordinances For wall opening dimensions use those shown in Figure 1 and add wood frame thickness use 1 lumber or heavier When deter mining finish frame thickness be sure you do not cover side cabinet louvers A 4 minimum clear ance between louvers on cabinet sides and adjoin ing wall allows for proper air flow into air con diti...

Page 16: ...2ska Hawall CI I 800 253 1121 Whirlpool IORPDEAT Ck Benlon Harbor Mlchlgan Automalic Washers Clothes Dryers Freezers Relngerator Freezers Ice Makers Dishwashers Built m Ovens and Surlace Unlls Ranges MIcrowave Ovens Compaclors Aoom Air Condilioners Oehumidiliers Cenlral Heahng and Air Condilioning Systems If you move To make sure that your appliance IS correctly Installed and to insure Its continu...

Reviews: