background image

14

Tones

Tones are audible signals, indicating the following:

Basic Functions

One tone

Valid pad press

Oven is preheating (long tone)

Function has been entered

Reminder (on some models), repeating each minute after the 
end-of-cycle tones

Three tones

Invalid pad press

Four tones

End of cycle

Style 1 - Electronic Oven Control

Reminder Tones:

 The audible tones at the end of a cycle may be 

set to beep once or continue to beep once per minute. Press and 
hold BAKE for 5 seconds to cycle on and off. “Repeating Alarm 
Off” or “Repeating Alarm On” will be displayed in the scrolling 
text.

Sound: 

All audible tones can be turned off. Reminder tones are 

still active when all sounds are disabled. Press and hold CLOCK 
for 5 seconds to cycle on and off. “All Sounds Off” or “All Sounds 
On” will be displayed in the scrolling text.

Tone Pitch: 

The tone pitch can be set to “Low” or “High.” Press 

and hold BROIL for 5 seconds to cycle on and off. “Low” or 
“High” will be displayed in the scrolling text.

End of Cycle Tones:

 The End of Cycle Tone can be turned on or 

off. Press and hold BROIL for 5 seconds to cycle on and off. “On” 
or “Off” will be displayed in the scrolling text.

Key Press Tone:

 This feature disables or enables the tone that 

accompanies a valid key press. Press and hold “WARM” for 
5 seconds to cycle on and off. “Key Press Tone On” or “Key 
Press Tone Off” will be displayed in the scrolling text.

Style 2 - Electronic Oven Control

Reminder Tones:

 The audible tones at the end of a cook time or 

timer may be set to beep once for “Off” or continue to beep once 
per minute for “rEP On.” Press and hold TIMER SET/OFF for 
5 seconds to cycle on and off. “Off” or “rEP On” will momentarily 
appear on the display.

Sound: 

All audible tones can be turned off. Press and hold 

COOK TIME for 5 seconds to cycle on and off. “Off” or “Snd On” 
will momentarily appear on the display.

Volume: 

The tone volume can be set to “Lo” or “Hi.” Press and 

hold START TIME for 5 seconds to cycle on and off. “Lo” or “Snd 
HI” will be momentarily appear on the display.

Styles 3 & 4 - Electronic Oven Controls

Reminder Tones:

 The audible tones at the end of the Timer may 

be set to beep once or continue to beep. Press and hold TIMER 
for 5 seconds to enter Options mode. ”Opt” will appear on the 
display. Use TEMP/HOUR to cycle through the options until you 
reach “b” or “b1” (depending on your model). Cycle on and off 
using TIMER. Press CANCEL to exit the mode.

Fahrenheit and Celsius

The temperature is preset at Fahrenheit, but can be changed to 
Celsius. 

Style 1 - Electronic Oven Control 

To change:

 Press and hold PRECISE CLEAN for 5 seconds, and 

“TEMPERATURE UNIT CELSIUS” will appear in the display. 
Repeat to change back to Fahrenheit. 

To exit mode, press OFF/CANCEL.

Styles 2, 3 & 4 - Electronic Oven Controls 

To change:

 Press and hold BROIL for 5 seconds. A tone will 

sound and “°C” or “°F” will appear on the display. Repeat to 
change back to Fahrenheit. 

To exit mode, press OFF/CANCEL.

Timer

The Timer can be set in hours or minutes up to 12 hours and 
59 minutes, and counts down the set time. The Timer does not 
start or stop the oven.

To Set:

1.

Press TIMER SET/OFF or TIMER. The timer indicator light will 
light up on some models. If no action is taken after 5 minutes, 
the display will return to the time of day.

2.

Depending on your model, press the HOUR or MIN, TEMP/
TIME or TEMP/HOUR “up” or “down” arrow pads to set the 
length of time.

3.

Press TIMER SET/OFF or TIMER. When the set time ends, 
end-of-cycle tones will sound; then, if enabled, reminder 
tones will sound every minute on some models.

4.

Press TIMER SET/OFF or TIMER twice to cancel the Timer 
and reminder tones.

NOTE:

 Do not press the OFF/CANCEL pad because the oven 

will turn off.

On some models, to display the time of day for 5 seconds when 
the timer is counting down, press CLOCK.

Oven Control Lockout 

(on some models)

The Control Lock, Control Lockout or Lockout button (depending 
on your model) shuts down the control panel pads to avoid 
unintended use of the oven.

When the control is locked, only the CLOCK SET, OVEN LIGHT 
(on some models) and TIMER pads will function.

To Lock/Unlock Control: 

Before locking, make sure the oven 

and Cook Timer are off. Press and hold “Control Lockout” key for 
5 seconds. A single tone will sound, and “Loc” or “Lockout” will 
appear on the display.

Repeat to unlock. “Loc” or “Lockout” will disappear from the 
display.

Summary of Contents for 9763001

Page 1: ...n performance parts accessories or service call 1 800 253 1301 or visit our website at www whirlpool com Table of Contents 2 9763001A To the installer Please leave this instruction book with the range To the consumer Please read and keep this book for future reference ...

Page 2: ...rol Lockout on some models 14 12 Hour Shut Off 15 Oven Temperature Control 15 OVEN USE 15 Aluminum Foil 15 Positioning Racks and Bakeware 15 Split Oven Rack on some models 16 Bakeware 16 Meat Thermometer 16 Oven Vent 17 Baking and Roasting 17 Choice Bake Function on some models 17 Broiling 18 Convection Cooking 18 Hold Warm Feature on some models 20 Timed Cooking on some models 21 Sequence Program...

Page 3: ...ructions instructions DANGER WARNING Tip Over Hazard A child or adult can tip the range and be killed Connect anti tip bracket to rear range foot Reconnect the anti tip bracket if the range is moved See the installation instructions for details Failure to follow these instructions can result in death or serious burns to children and adults Anti Tip Bracket Making sure the anti tip bracket is insta...

Page 4: ...ese pans or bowls during cooking may subject wiring or components underneath to damage Protective Liners Do not use aluminum foil to line surface unit drip bowls or oven bottoms except as suggested in the manual Improper installation of these liners may result in a risk of electric shock or fire Glazed Cooking Utensils Only certain types of glass glass ceramic ceramic earthenware or other glazed u...

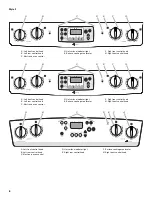
Page 5: ...Style 2 A Left front control knob B Left rear control knob C Electronic oven control D Hot surface indicator light E Right rear control knob F Surface cooking area locator G Right front control knob H Warm zone button A B C D E F H G A Left front control knob B Left rear control knob C Electronic oven control D Hot surface indicator light E Right rear control knob F Surface cooking area locator G ...

Page 6: ...nt control knob B Left rear control knob C Electronic oven control D Hot surface indicator light E Surface cooking area locator F Right rear control knob G Right front control knob A Left front control knob B Left rear control knob C Electronic oven control D Hot surface indicator light E Right rear control knob F Surface cooking area locator G Right front control knob A B C D E F G A B C D E F G ...

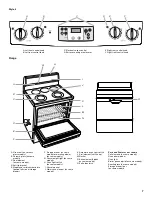
Page 7: ... side of storage drawer F Storage drawer on some models or warming drawer on some models G Console night light on some models H Oven light switch on some models I Console panel J Warm zone element on some models K Automatic oven light switch L Broil element not shown M Gasket N Bake element hidden on some models O Self clean latch Parts and Features not shown Coil elements on some models Oven door...

Page 8: ...warm One hour is the recommended maximum time to maintain food quality Do not use it to heat cold foods The Warm Zone element can be used alone or when any of the other surface cooking areas are being used SETTING RECOMMENDED USE HI Start food cooking Bring liquid to a boil Medium High Between MEDIUM and HI Hold a rapid boil Quickly brown or sear food MEDIUM Maintain a slow boil Fry or sauté foods...

Page 9: ...es on cookware or bakeware could leave scratches or marks on the cooktop Do not cook popcorn in prepackaged aluminum containers on the cooktop They could leave aluminum marks that cannot be removed completely Do not allow objects that could melt such as plastic or aluminum foil to touch any part of the entire cooktop Do not use the cooktop as a cutting board Use cookware about the same size as the...

Page 10: ... Service for instructions on ordering For instructions on ordering contact your local U S Government Agricultural Department Extension Office Companies that manufacture home canning products can also offer assistance Cookware IMPORTANT Do not leave empty cookware on a hot surface cooking area element or surface burner Ideal cookware should have a flat bottom straight sides and a well fitting lid a...

Page 11: ...A B C D E G H I J F K L M N O P SET TIMER BROIL CHOICE WARM DRAWER START TIME STOP TIME COOK TIME DELAY MIN HR SEC MIN AM PM ON FC DOOR LOCKED CONVECT BAKE WARM REVIEW PROGRAM STEP 1 2 3 4 SET TIMER BROIL CHOICE WARM DRAWER START TIME STOP TIME COOK TIME DELAY MIN HR SEC MIN AM PM ON FC DOOR LOCKED CONVECT BAKE WARM REVIEW PROGRAM STEP 1 2 3 4 A Auto clean B Control lockout C Oven display D Clock ...

Page 12: ...play D Start E Cancel off F Temperature time G Oven settings H Control lockout I Auto clean on some models J Timer A Oven light B Start time C Oven display D Clock E Timer set off F Off cancel G Start H Temperature time I Oven settings J Control lockout K Cook time A B C D E F G H I J A B C D E G H I J F K ...

Page 13: ...itchen timer If the Start pad is not pressed within 5 seconds after pressing a function pad the START or PUSH indicator light will appear on the display on some models If the Start pad is not pressed within 5 minutes after pressing a function pad the oven display will return to the time of day mode and the programmed function will be canceled Off Cancel The Off Cancel pad stops any function except...

Page 14: ...nes The audible tones at the end of the Timer may be set to beep once or continue to beep Press and hold TIMER for 5 seconds to enter Options mode Opt will appear on the display Use TEMP HOUR to cycle through the options until you reach b or b1 depending on your model Cycle on and off using TIMER Press CANCEL to exit the mode FahrenheitandCelsius The temperature is preset at Fahrenheit but can be ...

Page 15: ...rrow pad s to increase or to decrease the temperature in 10 F 5 C amounts The adjustment can be set between 30 F 15 C and 30 F 15 C 3 Press START OVENUSE Odors and smoke are normal when the oven is used the first few times or when it is heavily soiled IMPORTANT The health of some birds is extremely sensitive to the fumes given off Exposure to the fumes may result in death to certain birds Always m...

Page 16: ...sed to determine doneness A meat thermometer is not supplied with this appliance Insert the thermometer into the center of the thickest portion of the meat or inner thigh or breast of poultry The tip of the thermometer should not touch fat bone or gristle After reading the thermometer once push it into the meat 1 3 cm more and read again If the temperature drops cook the meat or poultry longer Che...

Page 17: ... in the display in the lower text line When the preheat conditioning temperature is reached a tone will sound and the selected temperature will appear on the display Styles 2 3 4 Electronic Oven Controls After START is pressed the oven will enter a timed preheat conditioning On some models PrE will appear on the display On some models the time countdown will appear on the display On some models bo...

Page 18: ... food 3 7 cm or more from the broil element Times are guidelines only and may need to be adjusted for individual tastes Recommended rack positions are numbered from the bottom 1 to the top 5 For diagram see the Positioning Racks and Bakeware section Place up to 9 patties equally spaced on broiler pan grid ConvectionCooking Styles1 3 ElectronicOvenControl During convection cooking the fan provides ...

Page 19: ...een will scroll in this order SET TEMP OR TIME then OR PUSH START then PUSH AGAIN then FOR NEXT Each time the CONVECT keypad is pressed the display will move to the next preset for Cookies Meats Casseroles or Frozen The following instructions are applicable for each preset 2 Press the TEMP up or down arrow pads to enter a temperature other than the preset convection temperature The convection bake...

Page 20: ...149 C 300 F 149 C 325 F 163 C 140 F 60 C 160 F 71 C 170 F 77 C 140 F 60 C 160 F 71 C 170 F 77 C 140 F 60 C 160 F 71 C 170 F 77 C 165 F 74 C Veal Rack Position 2 Loin Rib Rump Roast medium well done 25 35 30 40 325 F 163 C 160 F 71 C 170 F 77 C Pork Rack Position 2 Loin Roast boneless Shoulder Roast 30 40 35 40 325 F 163 C 325 F 163 C 160 F 170 F 71 C 77 C 160 F 170 F 71 C 77 C Ham Rack Position 2 ...

Page 21: ... Cooking allows the oven to be set to turn on at a certain time of day cook for a set length of time and or shut off automatically Delay start should not be used for food such as breads and cakes because they may not bake properly Style 1 Electronic Oven Control To Set a Timed Cook 1 Press the desired cook function The indicator text will light up 2 Set the temperature optional 3 Press the TEMP up...

Page 22: ...perature other than the one displayed 3 Press COOK TIME The cook time oven indicator light will light up 4 Press TEMP HOUR or TEMP TIME up or down arrow pad to enter the length of time to cook 5 Press START TIME The start time delay oven indicator light will light up 6 Press TEMP HOUR or TEMP TIME up or down arrow pad to enter the time of day to start 7 Press START When the start time is reached t...

Page 23: ...r either review or modification If the programmed sequence has not been started see To Program Steps 2 3 and 4 of the Sequence section to program a step to replace the canceled cook function 2 Press START The first step will show on the display and the program sequence will begin Changes can be made during a programmed cook function however changes cannot be made after a programmed cook function h...

Page 24: ...n any of the inside surfaces until the oven has completely cooled down Applying a cool damp cloth to the inner door glass before it has completely cooled could result in the glass breaking To stop the self cleaning cycle at anytime press OFF CANCEL If the temperature is too high the oven door will remain locked and cool and locked will be displayed The oven light will not function during the self ...

Page 25: ...e DOOR LOCKED and CLEAN indicator lights will turn off 5 When the oven is completely cooled remove ash with a damp cloth To Delay Start Self Clean 1 Press AUTO CLEAN 2 Press the TEMP HOUR or TEMP TIME or arrow pads to enter the desired self clean cycle time 3 Press START TIME 4 Press the TEMP HOUR or TEMP TIME or arrow pads to enter the desired start time 5 Press START The oven door will automatic...

Page 26: ...l Hold scraper as flat as possible on surface and scrape Repeat for stubborn spots Polish entire cooktop with creme and paper towel Metal marks from aluminum and copper Cooktop Cleaner Clean as soon as cooktop has cooled down Rub creme into surface with a damp paper towel or soft cloth Continue rubbing until white film disappears The marks will not totally disappear but after many cleanings they w...

Page 27: ...nia to 1 gal 3 75 L water Soak for 20 minutes then scrub with scouring or steel wool pad Oven cleaner Follow product label instructions Porcelain enamel only Dishwasher Do not clean in the Self Cleaning cycle STORAGE DRAWER on some models Make sure drawer is cool and empty before cleaning For more information see Storage Drawer section Cleaning Method Mild detergent Drawer Liner on some models Rem...

Page 28: ...ot repeat the removal and installation procedures StorageDrawer The storage drawer can be removed Before removing make sure drawer is cool and empty To Remove 1 Pull the storage drawer straight back past the drawer stop notch and the end of the side rails 2 Lift up the back of the drawer and pull the drawer out To Replace 1 Lift up the back of the drawer and place it inside the range in its fully ...

Page 29: ...ug into a grounded outlet Has a household fuse blown or has a circuit breaker tripped Replace the fuse or reset the circuit breaker If the problem continues call an electrician Cooktop will not operate Is the control knob set correctly Push in knob before turning to a setting On ceramic glass models is the oven control lockout set See Oven Control Lockout section Excessive heat around cookware on ...

Page 30: ...e Assistance or Service section Self Cleaning cycle will not operate Is the oven door open Close the oven door all the way Has the function been entered See Self Cleaning Cycle section On some models has a delay start Self Clean cycle been set See Self Cleaning Cycle section Has a delay start been set See Timed Cooking section Oven cooking results not what expected Is the appliance level Level the...

Page 31: ...distributors and service companies Whirlpool designated service technicians are trained to fulfill the product warranty and provide after warranty service anywhere in the United States To locate the Whirlpool designated service company in your area you can also look in your telephone directory Yellow Pages For further assistance If you need further assistance you can write to Whirlpool Corporation...

Page 32: ...s purchased DISCLAIMER OF IMPLIED WARRANTIES LIMITATION OF REMEDIES CUSTOMER S SOLE AND EXCLUSIVE REMEDY UNDER THIS LIMITED WARRANTY SHALL BE PRODUCT REPAIR AS PROVIDED HEREIN IMPLIED WARRANTIES INCLUDING WARRANTIES OF MERCHANTABILITY OR FITNESS FOR A PARTICULAR PURPOSE ARE LIMITED TO ONE YEAR OR THE SHORTEST PERIOD ALLOWED BY LAW WHIRLPOOL SHALL NOT BE LIABLE FOR INCIDENTAL OR CONSEQUENTIAL DAMAG...

Reviews: