background image

Summary of Contents for ACM184XS0

Page 1: ... assistance installation and service call 1 800 807 6777 or visit our website at_ www whirlpool ca ACONDICIONADOR DE AIREPARA HABITACION i 1 I_i iI d e so L IIdI_QO Si tiene preguntas respecto a las caracterfsticas funcionamiento rendimiento partes accesorios o servicio tecnico Ilame al 1 800 253 1301 o visite nuestro sito web en www whirlpooLcom Table of Contents Jndice 2 1188018B ...

Page 2: ...stalaci6n a traves de la pared 31 Colocaci6n del acondicionador de aire para la instalaci6n a traves de la pared 34 COMO USAR SU ACONDICIONADOR DE AIRE 36 C6mo poner en marcha su acondicionador de aire Control digital 36 C6mo poner en marcha su acondicionador de aire Control rotativo 39 C6mo cambiar la direcci6n del aire 40 Sonidos normales 40 COMO CUIDAR SU ACONDICIONADOR DE hIRE 41 Limpieza del ...

Page 3: ... Tray center C Tray sides 2 D Support legs 2 E 8 18x _ hex H Hexnuts 4 head screws 4 L Carriage bolts 4 F Flatwashers 4 J 10 12x1 slot G Lock washers 4 head wood screws 2 Parts Supplied Check that all parts are included in parts package Air Conditioner Installation i B C D A Window lock bracket B 8 x _ pan head screws 6 C 8 x _ round head screws 3 D 10 x _ pan head screws 3 E Side curtains 2 F Top...

Page 4: ...w Follow the requirements for the type of plug on the power supply cord Power supply cord Wiring requirements 115 volt 103 5 min 126 5 max 0 12 amps 15 amp time delay fuse or circuit breaker Use on single outlet circuit only 230 volt 207 min 253 max 0 6cm 0 12 amps _ _ 15 amp time delay fuse or circuit breaker Use on single outlet circuit only Recommended grounding method This air conditioner must...

Page 5: ...use the power supply cord as an off on switch The power supply cord is designed as a protective device A damaged power supply cord must be replaced with a new power supply cord obtained from the product manufacturer and must not be repaired The power supply cord contains no user serviceable parts Opening the tamper resistant case voids all warranty and performance claims INSTALLATION INSTRUCTIONS ...

Page 6: ... cm deep Assemble SMART MOUNT _ Tray 1 To assemble the tray frame insert tab on tray back into slot on tray side Check to see that the tab is engaged and the 2 pieces are aligned Insert 2 8 18 x 1 4 hex head screws to secure 2 Repeat with other tray side C A Tray back B 8 18 x _ hex head screws C Tray side Attach Support Legs 1 Determine the correct slots on the tray side from the type of exterior...

Page 7: ...o adjust angle when installed s A A 10 12 x 1 _ slot head wood screws NOTE If the exterior of building can be damaged by support legs place a board between the wall and support legs 3 With tray center pushed away from the windowsill place a level on the angled edge on top of the tray side Be sure level is against notch on tray side A B A Angled edge on top of the tray side B Notch 4 Adjust SMART M...

Page 8: ...ht hand curtain outward so you may insert the first screw through the middle hole of the curtain Using a 8 x pan head screw screw curtain to middle hole in air conditioner cabinet NOTE This screw is required to correctly attach curtain top to bottom to the air conditioner cabinet i m A A 8 x _ pan head screw 6 While the right hand curtain is still extended insert screws into top and bottom slots o...

Page 9: ...ide to provide proper drainage for the air conditioner Correct Installation E A B A Window sash B Top channel C Air conditioner If your air conditioner looks like either of the illustrations in the Incorrect installation graphic SMART MOUNT tray needs adjustment 3 A Window sash B Top channel C Air conditioner If the bottom of the air conditioner does not sit against the bottom of the SMART MOUNT t...

Page 10: ... lock bracket Electrical Shock Hazard Plug into a grounded 3 prong outlet Do not remove ground prong Do not use an adapter Do not use an extension cord Failure to follow these instructions can result in death fire or electrical shock 5 Plug into a grounded 3 prong outlet 6 Press RESET on the power supply cord plug Option 1 Wood Metal or Plastic Molding When you are using a wood metal or plastic mo...

Page 11: ...k by 2 5 cm wide wood strip on the bottom of the opening against the inside edge 8 A 17 43 8 cm B 2 5 cm wide C _ 2 cm thick D Indoor side of wall opening Center the tray back in the opening and align it with the inside edge of the opening Using the 2 inside screw holes in the tray back mark screw locations for mounting the SMART MOUNT _ tray A Inside screw holes B Indoor side of wall opening 9 Re...

Page 12: ...tighten The leg must be able to move freely to adjust angle when installed A _s y C iii ii A Hex nut D Tray center B Lock washer E Carriage bolt C Flat washer 5 Insert second carriage bolt through tray side and attach other end of support leg NOTE Do not tighten The leg must be able to move freely to adjust angle when installed A _D A Hex nut C Flat washer B Lock washer D Carriage bolt 6 Install s...

Page 13: ...cates the angled edge on top of the tray side is leveL B Place level on angled edge against notch on tray side Tighten the hex nut just enough to hold tray center in place Repeat with other side Tighten hex nuts securely with 7_6 wrench Handle air conditioner gently Be sure your air conditioner does not fall out of the opening during installation or removal Do not block the louvers on the front pa...

Page 14: ... the top channel to secure the air conditioner into the wall opening Complete Installation 1 Trim and seal around the air conditioner on the inside and the outside NOTE Allow for removal of the air conditioner at a later time for routine annual maintenance Electrical Shock Hazard Plug into a grounded 3 prong outlet Do not remove ground prong Do not use an adapter Do not use an extension cord Failu...

Page 15: ...sing FAN SPEED Fan Only Only the fan runs You can select the fan speed by pressing FAN SPEED but you cannot adjust the Temperature control setting Display shows the current room temperature Power Saver Fan runs only when cooling is needed You can select the fan speed by pressing FAN SPEED Because the fan does not circulate the room air continuously less energy is used but the room air is not circu...

Page 16: ...er indicator light will remain on Hour indicator light will turn off and Room indicator light will turn on Display will show current room temperature To set the Timer to turn on the air conditioner changing the previous settings 1 Turn on air conditioner 2 Adjust Mode to Auto Cool Fan Only or Power Saver NOTE For Auto mode go to Step 4 3 For Cool Fan Only or Power Saver mode adjust FAN SPEED to Tu...

Page 17: ...change delay time 1 to 24 hours Press TIMER again or wait 10 seconds Timer indicator light on air conditioner will remain on Hour indicator light on air conditioner will turn off and Room indicator light on air conditioner will turn on Display on air conditioner will show the current room temperature To set Timer to turn on air conditioner keeping previous settings 1 Turn off air conditioner 2 Pre...

Page 18: ...gh Cool or Turbo Cool the fan circulates air continuously Turbo Cool for maximum cooling High Cool for normal cooling Low Cool for sleeping comfort Fan Only to move air continuously without cooling NOTE Fan runs on Turbo speed only Power Saver on some models fan runs only when cooling is needed Because the fan does not circulate the room air continuously less energy is used but the room air is not...

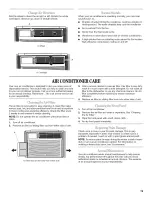
Page 19: ...e maximum efficiency 4 Replace air filter by sliding filter back into either side of unit The air filter is removable for easy cleaning A clean filter helps remove dust lint and other particles from the air and is important for best cooling and operating efficiency Check the filter every 2 weeks to see whether it needs cleaning NOTE Do not operate the air conditioner without the filter in place 1 ...

Page 20: ... latch and remain in to resume operation Electrical overloading overheating cord pinching or aging can trip Reset button will pop out the power supply cord After correcting the problem press and release RESET listen for click Reset button will latch and remain in to resume operation NOTE A damaged power supply cord must be replaced with a new power supply cord obtained from the product manufacture...

Page 21: ...ement parts in your area call us or your nearest Whirlpool designated service center Please record your model s information Whenever you call to request service on your appliance you need to know your complete model number and serial number You can find this information on the model and serial number label See Electrical Requirements for model and serial number location Please record the model and...

Page 22: ...SEGURIDAD DELACONDICIONADOR DEAIRE Su seguridad y la seguridad de los demas es muy importante Hemos incluido muchos mensajes importantes de seguridad en este manual yen su electrodomestico Lea y obedezca siempre todos los mensajes de seguridad Este es el simbolo de advertencia de seguridad Este sfmbolo le llama la atencion sobre peligros potenciales que pueden ocasionar la muerte o una lesion a us...

Page 23: ...lanas 4 B Barra central de la bandeja G Arandelas de presidn 4 C Barras lateralesde la bandeja 2 H Tuercashexagonales 4 D Patas desoporte 2 L Pemos de carruaje 4 E Tomilles de cabeza hexagonal J Temillos para madera de cabeza 8 18x _ 4 ranurada 10 12x 1_ 2 IMPORTANTE Observe todos los c6digos y reglamentos aplicables Verifique el lugar donde se instalara el acondicionador de aire AsegL_rese de que...

Page 24: ... circuito con tomacorriente Qnico M_todo recomendado para la puesta a tierra Este acondicionador de aire debe set puesto a tierra Este acondicionador de aire esta equipado con un cable de suministro de energfa provisto de un enchufe con tres terminales Para reducir a un minimo el peligro de posibles cheques electricos el cable debe set enchufado en un contacto apropiado de pared de tres terminales...

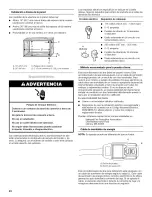
Page 25: ... del fabricante del producto y no debe ser reparado El cable de suministro de energia no contiene piezas que pueda arreglar el usuario Todos los reclamos de desemper_o y la garantia quedaran anulados si se abre el estuche resistente a alteraciones INSTRUCCIONES DEINSTAIACION 3 Utilice 3 tornillos de cabeza plana 10 x para fijar el canal superior al acondicionador de aire Peligro de Peso Excesivo U...

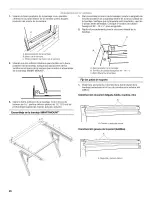
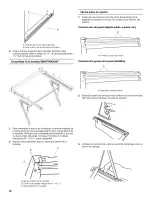
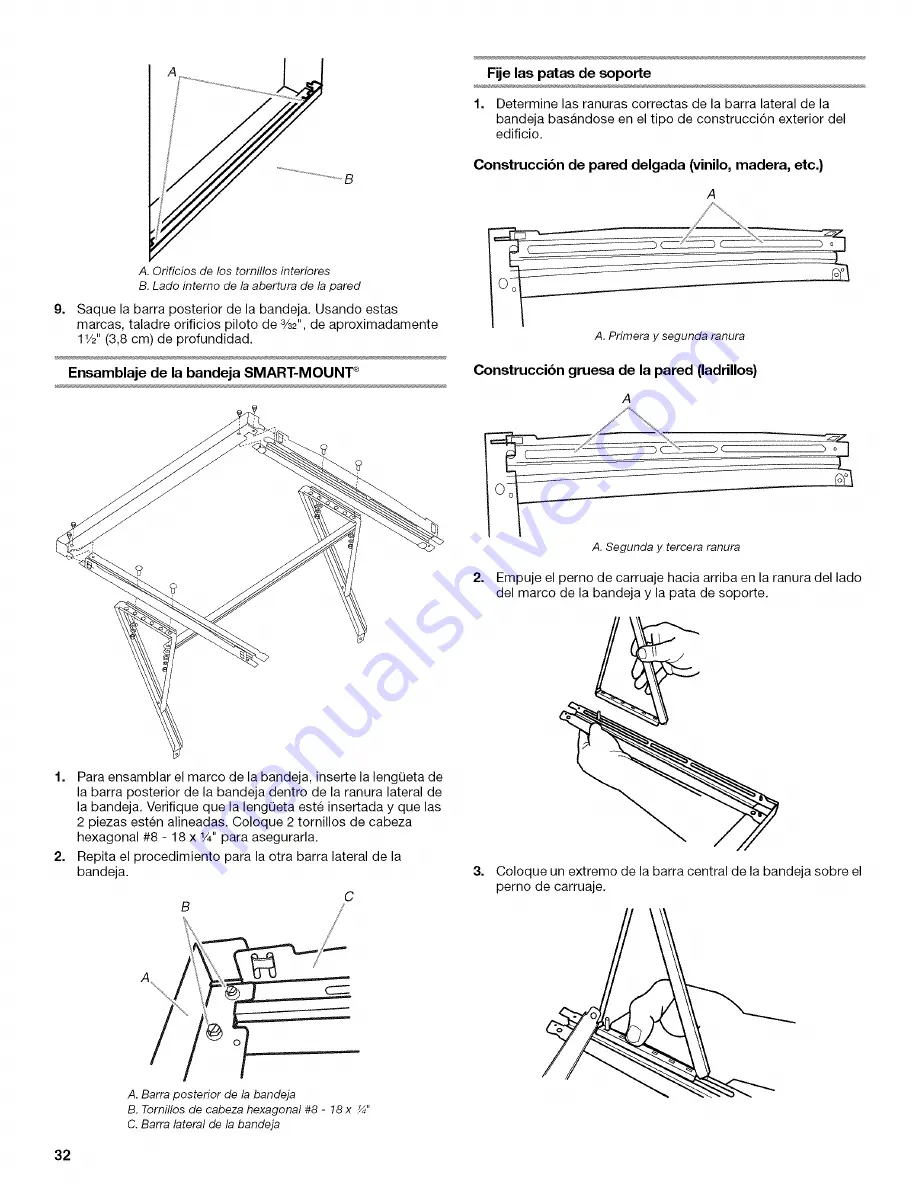
Page 26: ...so anterior Ensamblaje de la bandeja SMART MOUNT _ 2 Para ensamblar el marco de la bandeja inserte la lengQeta de la barra posterior de la bandeja dentro de la ranura lateral de la bandeja Verifique que la lengQeta este insertada y que las 2 piezas esten alineadas Coloque 2 tornillos de cabeza hexagonal 8 18 x W para asegurarla Repita el procedimiento para la otra barra lateral de la bandeja C A B...

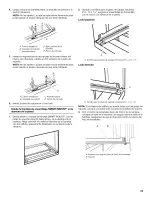
Page 27: ...ja y ajuste el otto extremo de la pata de soporte NOTA No las apriete La pata se debe mover libremente para poder ajustar el angulo despues de que este instalada J D A Tuercahexagonal C Arandela plana B Arandela de presidn D Pemo de carruaje Instale la pata de soporte en el otro lado A Tornillos para madera de cabeza ranurada 10 12x 1 _ NOTA Si el exterior del edificio se puede daSar con las patas...

Page 28: ...el marco derecho de la cortina en las gufas superior e inferior para cortinas del acondicionador de aire 5 Extienda la cortina derecha hacia fuera de manera que pueda insertar el primer tornillo a trav_s del orificio del medio de la cortina Usando un tornillo de cabeza plana 8 x atornille la cortina al orificio del medio en el gabinete del acondicionador de aire NOTA Se requiere este tornillo para...

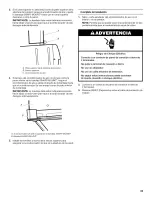
Page 29: ... necesita un ajuste Instalacibn incorrecta A B i A Marco de la ventana B Pies sobre la base del acondicionador de aire detrbs del ado posterior del marco de la ventana Si el marco de la ventana no cierra a escuadra contra ia superficie posterior de la ranura superior saque el acondicionador de aire y ajuste la bandeja SMART MOUNT _ hasta que el marco de la ventana cierre a escuadra contra ia parte...

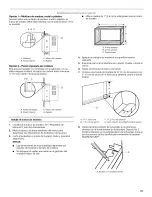
Page 30: ... la ventana superior A Marco de la ventana inferior B Obturador de espuma 2 Coloque el soporte de seguridad de la ventana en la parte superior de la ventana inferior y contra el marco de la ventana superior 3 Utilice una broca de barrena de 2 para perforar un orificio para comenzar a traves del orificio en el soporte yen el marco de la ventana 4 Fije el soporte de seguridad de la ventana al marco ...

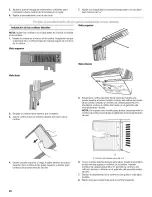
Page 31: ...slamiento NOTAS Las dimensiones de la profundidad dependen del espesor de la pared y del tipo de moldura No bloquee las rejillas que estan en el gabinete del acondicionador de mire Utilice madera de 1 2 5 cm o mas gruesa para el marco de madera A Ancho exterior B Altura exterior C Profundidad T B l 4 Aplique un sellador de madera a la superficie exterior expuesta 5 Inserte el marco en la abertura ...

Page 32: ...uesa de la pared ladrillos A A Segunday tercera ranura 2 Empuje el perno de carruaje hacia arriba en la ranura del lado del marco de la bandeja y la pata de soporte 1 Para ensamblar el marco de la bandeja inserte la lengQeta de la barra posterior de la bandeja dentro de la ranura lateral de la bandeja Verifique que la lengQeta este insertada y que las 2 piezas esten alineadas Coloque 2 tornillos d...

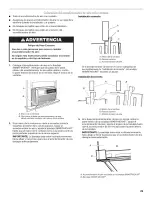
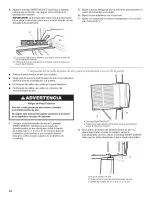
Page 33: ...andela plana B Arandela de presidn D Perno de carruaje 6 Instale la pata de soporte en el otro lado Instale la bandeja de ensamblaje SMART MOUNT _ en la abertura de la pared Desde adentro coloque la bandeja SMART MOUNT con las patas de soporte mirando hacia abajo en la abertura de la ventana Haga coincidir los orificios laterales de la bandeja con los orificios previamente taladrados en la abertur...

Page 34: ... estan en el panel delantero No bloquee las rejillas que estan en el exterior del acondicionador de aire Peligro de Peso Exceeivo Use dos o m_s personas para mover e instalar el acondicionador de aire No seguir esta instrucci_n puede ocasionar una lesi6n en la espalda u otro tipo de leeiones Coloque el acondicionador de aire en la bandeja SMART MOUNT _ Verifique que las patas del acondicionador de...

Page 35: ...deja SMART MOUNT _ saque el acondicionador de aire y ajuste el angulo de la bandeja hasta que el acondicionador de aire encaje contra la parte inferior de la bandeja IMPORTANTE La bandeja debe estar inclinada levemente hacia abajo y hacia fuera para que el acondicionador de aire desagQe adecuadamente 0 Peligro de Choque Electrico Conecte a un contacto de pared de conexi6n a tierra de 3 terminales ...

Page 36: ...ad de ventilaci6n Turbo 72 F 22 C por 3 segundos Cuando se encienda todas las otras veces mostrara los ajustes previos per 3 segundos y luego mostrara la temperatura de la habitaci6n Mode Modo 1 2 Oprima MODE Modo hasta que se encienda la luz indicadora para la posici6n que usted desea Seleccione Auto Automatico Cool Enfriamiento Fan Only S61o ventilaci6n o Power Saver Ahorro de energfa Auto Autom...

Page 37: ...ondicionador de aire tiene que estar Encendido 1 Oprima TIMER Temporizador La luz indicadora Temporizador destellar La luz indicadora Hour hera se encendera y la pantalla mostrara las horas restantes antes de que se apague el acondicionador de aire Timer 2 3 Oprima el bot6n de mas o de menos para cambiar el tiempo de retardo de 1 a 24 horas Oprima TIMER nuevamente o espere 10 segundos La luz indic...

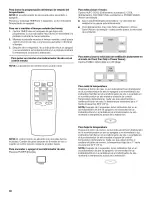
Page 38: ... Q Q TFMP TIME NOTA El control remote se alimenta con dos pilas AA no incluidas Cambie las pilas despues de 6 meses de uso o cuando el control remoto comienza a perder fuerza Para encender o apagar el acondicionador de aire Presione POWER Energia Para subir la temperatura Presione el bot6n de mas La luz indicadora Room habitaci6n en el acondicionador de aire se apagara y se encendera la luz indica...

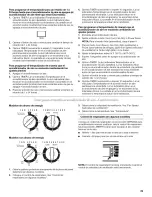
Page 39: ... Ajuste el Modo a Auto Cool Cool Fan Only o Power Saver NOTA Para el modo Auto automatico vaya al paso 4 3 Para el modo Cool fresco Fan Only 61o ventilaci6n o Power Saver ahorro de energfa ajuste Fan Speed velocidad de ventilaci6n a Turbo High alta o Low baja 4 Ajuste la temperatura entre 64 F 18 C y 86 F 30 C 5 Espere 3 segundos antes de apagar el acondicionador de aire 6 Oprima TIMER La luz indi...

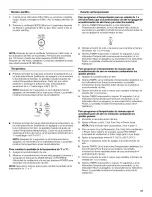
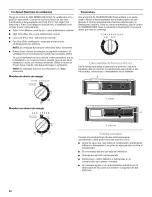
Page 40: ...SPEED Temperatura Gire el control de TEMPERATURE Temperatura a un ajuste medio Ajuste el funcionamiento del acondicionador de aire girando el control de temperatura hacia la derecha para un enfriamiento maximo Para un menor enfriamiento gire el control de TEMPERATURE hacia la izquierda Experimente y busque el ajuste que mas le convenga TEMPERATURE Cooler Warmer 1 4 Gire la rueda para dirigir el ai...

Page 41: ...ntura durante el invierno instale una cubierta resistente sobre el gabinete del acondicionador de aire Para informaci6n sobre c6mo pedir una cubierta resistente vea Accesorios Su acondicionador de aire necesita mantenimiento anual para ayudar a asegurar un rendimiento constante de la mejor calidad durante todo el a_o Llame al vendedor autorizado de su Iocalidad para hacer una cita para el chequeo ...

Page 42: ...re de la sala continuamente Para mayor comodidad use Low High o Turbo El acondicionador de aire no tiene el tama_o adecuado para su habitaci6n Verifique la capacidad de enfriamiento de su acondicionador de aire para habitaci6n Los acondicionadores de aire para habitaciones no estan diseSados para enfriar varias habitaciones El filtro esta sucio u obstruido por desechos Limpie el filtro El evaporad...

Page 43: ... del producto y ofrecer servicio una vez que la garantfa termine en cualquier lugar de los Estados Unidos Para Iocalizar a una compa_ia de servicio designada por Whirlpool en su Area tambien puede consultar la secci6n amarilla de su gufa telef6nica Para obtener mas asistencia Si necesita asistencia adicional puede escribir a Whirlpool Corporation con sus preguntas o dudas a Whirlpool Brand Home Ap...

Page 44: ...red Trademark TM Trademark of Whirlpool U S A Whirlpool Canada LP Licensee in Canada Todos los derechos reservados Marca registrada TM Marca de comercio de Whirlpool U S A usada bajo licencia de Whirlpool Canada LP en Canada 12 05 Printed in U S A Impreso en EE UU ...

Reviews: