3-5
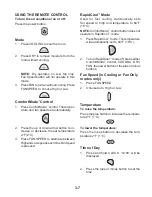
ComfortMode
™
Control
Air conditioner automatically selects cool or
dry depending on room temperature. When in
Dry mode, unit automatically selects fan speed
and temperature. When in Cooling mode, unit
automatically selects temperature, but fan
speed may be selected by user.
1. Press MODE to choose ComfortMode
™
control. Compressor and fan will start au-
tomatically based on room temperature.
RUN indicator light will glow green and air
swing will start.
2. During Cooling mode, fan speed may be
changed. See “Fan Speed.”
3. When WATER FULL indicator light glows
red, air conditioner will turn off automati-
cally. See “Portable Air Conditioner Care”
for directions on draining the air condi-
tioner.
NOTES:
Press the minus button once to decrease the
set temperature by 2
°
F (1
°
C), or press twice
to decrease set temperature by 4
°
F (2
°
C).
Press the plus button once to increase the
set temperature by 2
°
F (1
°
C), or press twice
to increase set temperature by 4
°
F (2
°
C).
Fan Only Mode
Serves only to move air. Fan speed is set by
user.
1. Press MODE to choose Fan Only.
2. Choose fan speed. See “Fan Speed.”
3. Press POWER to start the air conditioner.
The RUN indicator light will glow green.
•
•
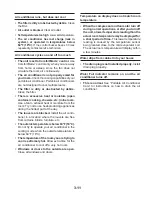
Fan Speed
1. Press FAN to set the fan speed.
2. Choose Auto, High or Low.
Auto—Fan speed set automatically
High—Maximum cooling
Low—Minimum cooling
•
•
•
2. Press the minus button to decrease the
temperature 2
°
F (1
°
C).
Temperature
1. Press the plus button to increase the tem-
perature 2
°
F (1
°
C).
NOTES:
In the Cooling mode, the temperature can be
set between 64
°
F (18
°
C) and 90
°
F (32
°
C).
In Fan Only mode, the temperature cannot
be set.
To change the temperature display from
°
F
to
°
C press and hold the plus and minus
buttons for 3 seconds.
Time Of Day
1. Press and hold TIMER and TIMER OFF.
“12:00” will be displayed.
2. Press the plus or minus button to set the
time (24 hour clock).
•
•
•
NOTE:
Press and hold FAN SPEED for 3
seconds to change vertical airflow direction.
Press and hold FAN SPEED for 3 seconds
again to stop airflow louver at desired airflow
direction.
Summary of Contents for ACP102PR
Page 4: ... iv NOTES ...
Page 10: ...1 6 NOTES ...
Page 26: ...3 12 NOTES ...
Page 60: ...6 2 NOTES ...
Page 61: ...6 3 NOTES ...
Page 62: ...6 4 NOTES ...
Page 64: ......

