GB -2-
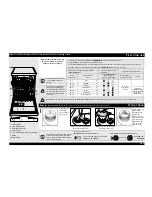
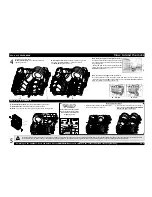
First time use
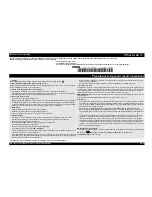
1- salt reservoir
2- rinse aid dispenser
3- detergent dispenser
4- racks system
5,6,7,8- available functions on the panel
9- filters
10- spray arms
1.
Ask your water supply company what the
water hardness is...
2.
...enter this value on your
dishwasher
Suggestions for detergent use
French
degrees °fH
Water hardness
level
3 first PROGRAM LEDs
lit on the panel
(see table of programs)
P1
P2
P3
Gel or Powder
(rinse aid and salt)
Tablets
0 - 9
Soft
1
go to step 1
(see “Daily
check”)
10 - 18
Medium
2
19 - 27
Average
3
28 - 37
Medium-hard
4
if water is
HARD extra salt
needs to be added
(go to step 1,
“Daily check”)
38 - 50
Hard
5
51 - 63
Very hard
6
64 - 90
Extremely hard
7
Water hardness should be set only
before the first wash or if water
hardness has been changed
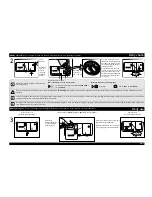
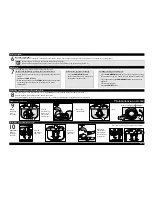
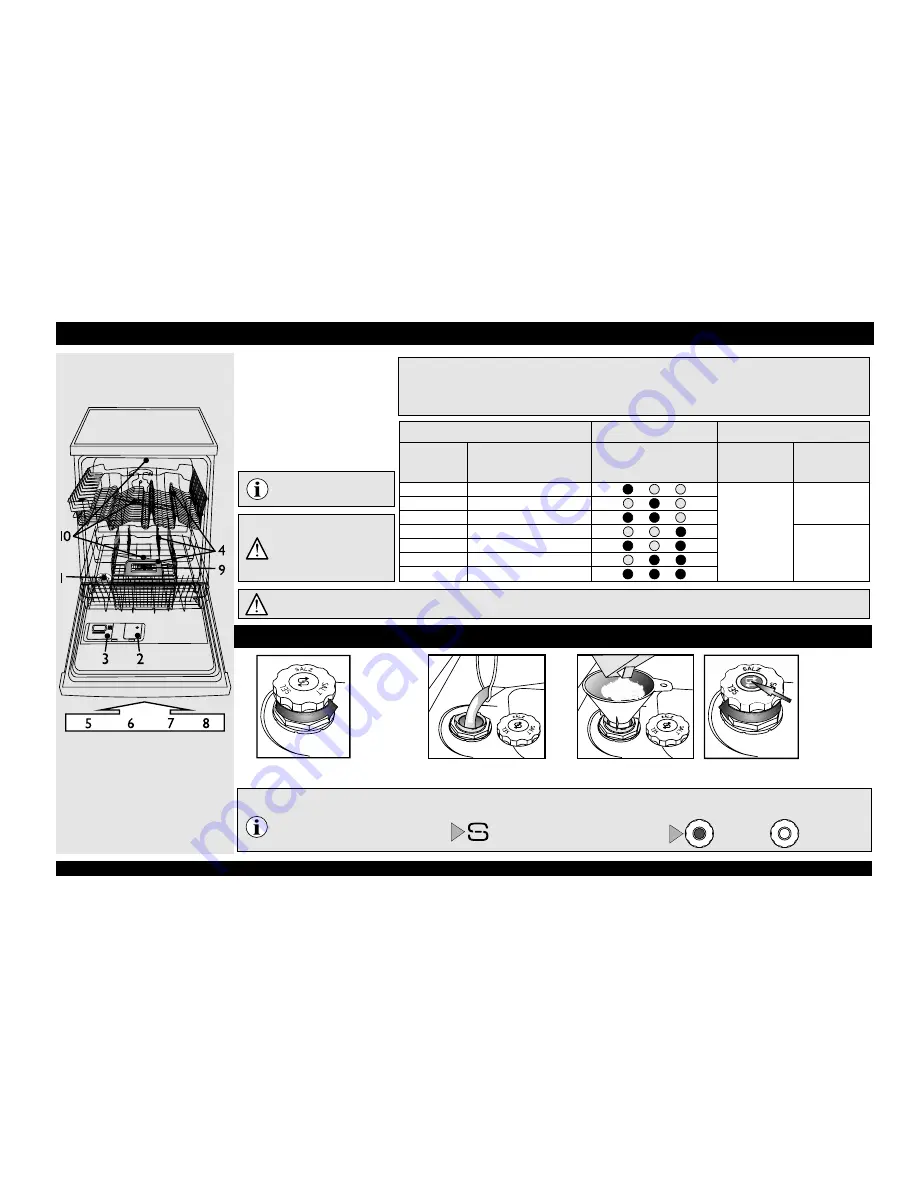
1
Visual indicator
(depending
on the model).
Unscrew cap.
Fill the salt reservoir with water
before the first wash only.
(depending on the model)
The salt level indicator lamp may remain lit
at the end of several wash cycles. If the
water hardness level falls within category
(soft), no salt is required.
Salt indicator on the control panel
Salt indicator on the salt reservoir cap
The indicator lamp lights up when SALT
NEEDS TO BE ADDED.
green: OK.
clear: NEEDS TO
BE ADDED
Daily check
Filling the salt reservoir - Dissolve limescale (not necessary if water hardness level is set to “soft”!)
-
Press and hold together Programs and CANCEL/Off buttons for minimum 3 seconds.
-
Programs LEDs will indicate the water hardness setting.
-
Press the Programs button to increase setting (when the level reaches 7, the next key press will set the level back to 1.
-
Wait 30 seconds (control panel switches off) or press START/Resume button to save setting.
Add salt (never add detergent!)
min. 0.8 kg / max. 1 kg
Water hardness level is factory
set for medium-hard water
(level 4).
Even if you use tablets which
include salt functionality, you
must still add regeneration salt
since such detergents are not
effective enough at softening
hard water.
Screw on the cap.
Salt residual
around the cap
need to be
removed. Some
salt reservoir have
a level indicator
integrated in the
cap (see below
how to check).
At first time use, the salt reservoir has to be filled independently from water hardness level (see description below in step 1 “Daily check”).
How to set water hardness in order to always assure the best cleaning results