
GB -4-
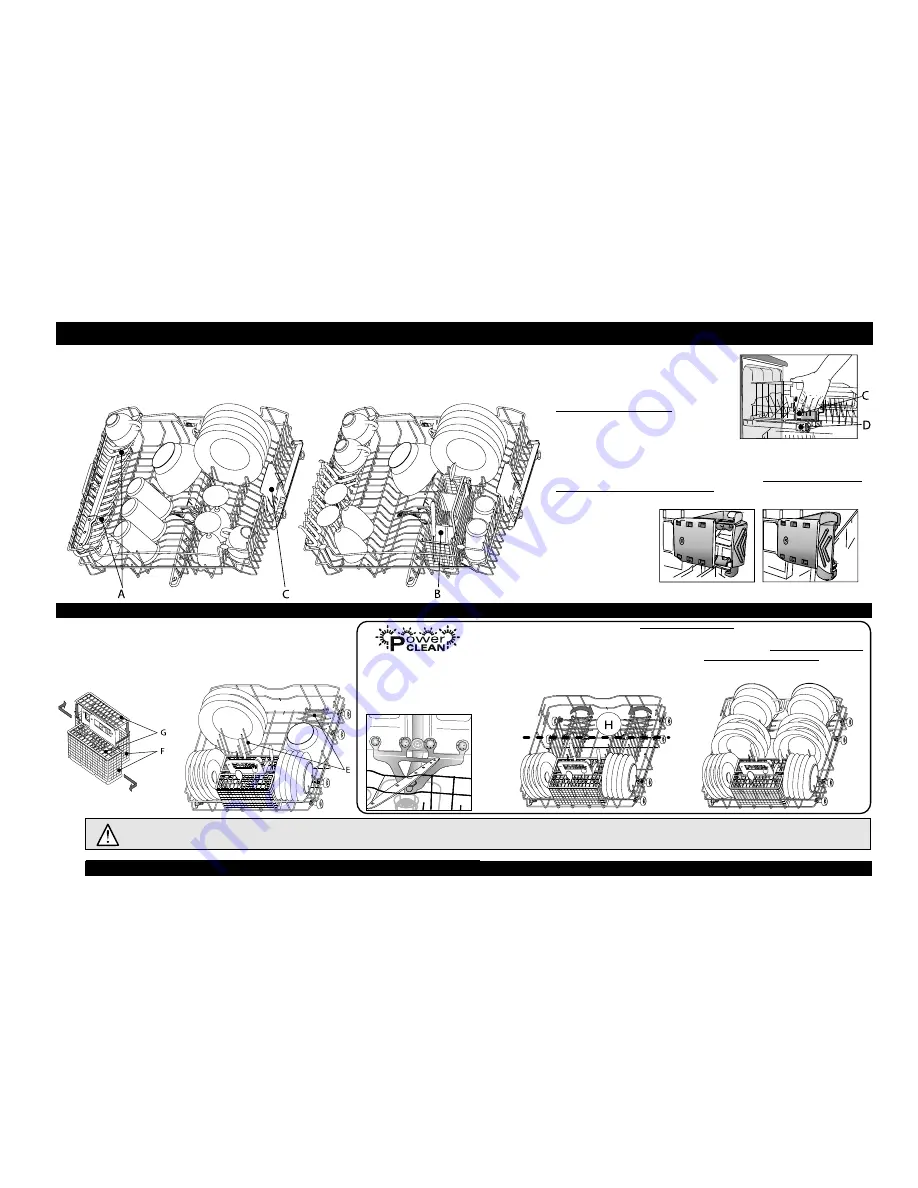
How to load the racks
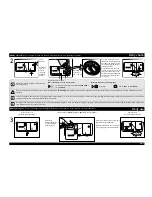
D - OPEN
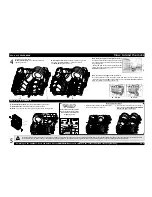
How to load LOWER RACK
4
(depending on the model)
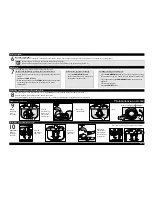
A - Adjustable flaps: in horizontal position for
cups/long utensils.
B - Cutlery basket - half: can be placed in the upper rack
when the “Half load/Multizone” option is selected.
The Grid (G) should be removed.
How to adjust upper rack height (if available).
It could be useful to lift up the upper rack to have
more space in lower rack or bring it down to load
long stem glasses.
- Grasp and take out the two lateral handles (C)
(they must be on the same level) and lift up or take
down the upper rack.
Arrange crockery so that water does not collect in cavities, ensuring that the spray arms turn freely. Only use dishwasher-proof crockery and dishes. Do not use the dishwasher for washing wooden
items, aluminium, tin, silver cutlery or decorated crockery (unglazed). In the baskets, dishes (e.g. plates, bowls, pots) must be placed in a correct way to let water flow down!
D - CLOSED
How to remove the upper rack (if available)
It could be useful to remove the upper rack to load bulky items in the lower rack.
- Open the two retainers (D) to take off the upper rack (when the upper rack is in
place the retainers must always be closed).
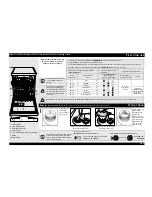
Power Clean uses the special
water jets in the rear of cavity
to wash more intensively the
high dirty items.
How to use Power Clean
1. Adjust the Power Clean area (H) folding down
the rear plate holders to load pots.
2. Load pots and casseroles inclined vertically in
Power Clean area. Pots have to be inclined
towards the power water jets.
E - Vertical plate holders: they can be folded down to load pots.
F - Cutlery basket: slide halves apart to split the basket.
G - Grid: helps to keep the cutlery separate for better washing results.
How to load UPPER RACK
5
Switching on the appliance. Press any button (except CANCEL/Off button) to switch on the control panel and start programming.


