background image

5019 318 33001

AKR 938

vordere Hälfte
front section
partie avant
voorste gedeelte
sección anterior
secção anterior
sezione anteriore

Œ!)

1

 %

31833001.fm5  Page 5  Wednesday, March 28, 2001  4:28 PM

Summary of Contents for AKR 938

Page 1: ...3 mm easily accessible FICHE D INSTALLATION Distance minimale par rapport à la cuisinière 60 cm cuisinière électrique 75 cm cuisinière à gaz mazout ou charbon Pour le montage suivez la numérotation 1Ö2Ö3Ö et les instructions correspondantes Ne branchez pas l appareil tant que l installation n est pas terminée Si l appareil est muni d une fiche branchez la dans une prise conforme aux normes en vigu...

Page 2: ...ma tomada conforme as normas em vigor e coloque a numa zona acessível Se o exaustor não estiver equipado com uma ficha ligação directa com a rede eléctrica aplique um interruptor bipolar segundo as normas com uma distância dos contactos à abertura não inferior a 3 mm acessível SCHEDA INSTALLAZIONE Distanza minima dai fuochi 60 cm fuochi elettrici 75 cm fuochi a gas gasolio o carbone Per il montagg...

Page 3: ... AKR 938 5019 318 33001 31833001 fm5 Page 3 Wednesday March 28 2001 4 28 PM ...

Page 4: ... 5019 318 33001 AKR 938 31833001 fm5 Page 4 Wednesday March 28 2001 4 28 PM ...

Page 5: ... 5019 318 33001 AKR 938 vordere Hälfte front section partie avant voorste gedeelte sección anterior secção anterior sezione anteriore 1 31833001 fm5 Page 5 Wednesday March 28 2001 4 28 PM ...

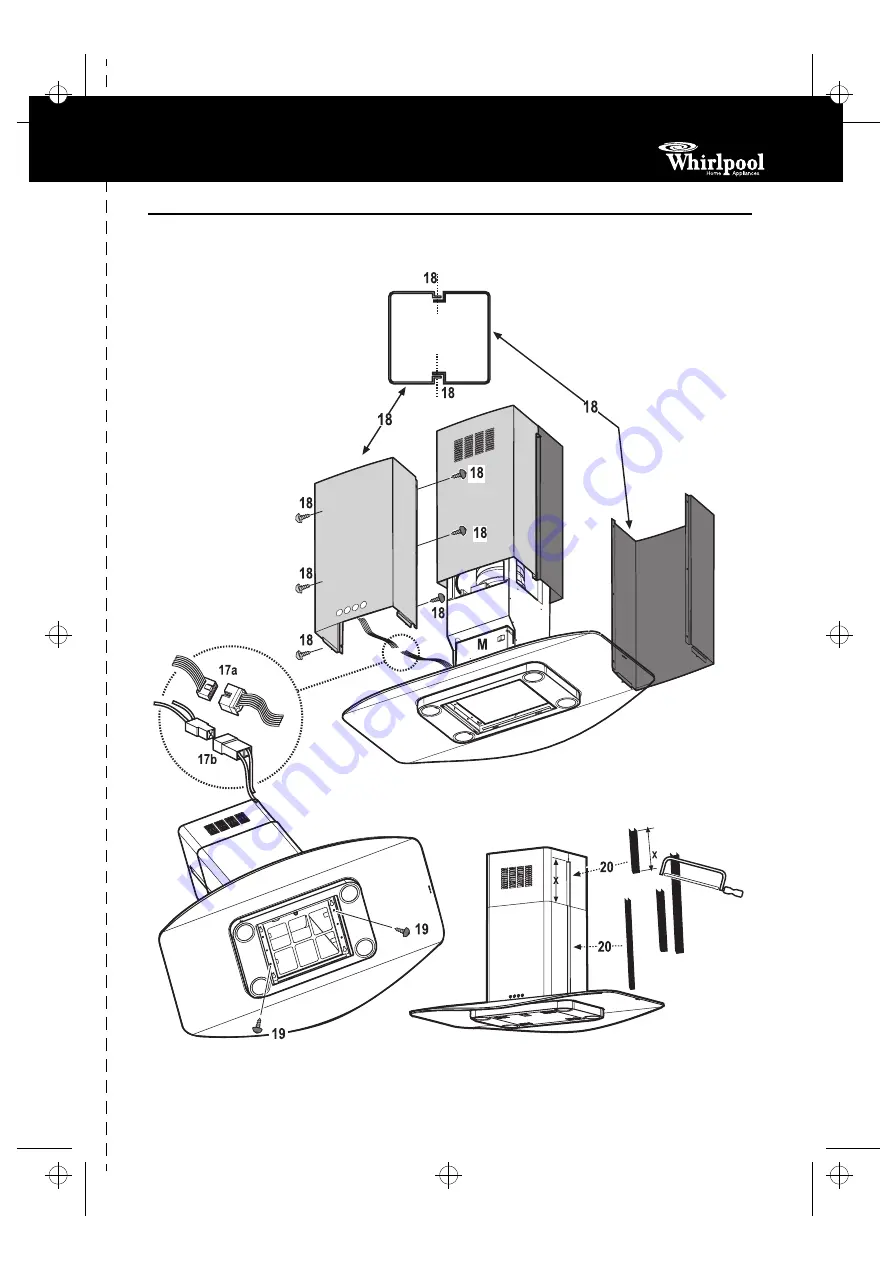
Page 6: ...o hook the hood onto the truss partially tighten 4 screws see illustrations 10 and 12 11 Secure the hood to the truss using two screws this will also help centre the two sections 12 Tighten the 4 screws securing the truss to the hood 13 For extractor versions 13A connect the other end of the exhaust pipe to the flue For filter versions 13F fit deflector F to the truss and secure it to the bracket ...

Page 7: ...lose Carbon filter Fitting and Maintenance Fitting the carbon filter 1 Disconnect the electrical power supply 2 Remove the grease filter f Fig 1 3 Remove the screw and then the filter holder g Fig 3 4 Fit the carbon filter h Fig 3 in the filter holder i Fig 3 5 Refit the filter holder and secure it to the hood with the screw g Fig 3 6 Refit the grease filter Carbon filter maintenance Unlike tradit...

Reviews: