background image

9

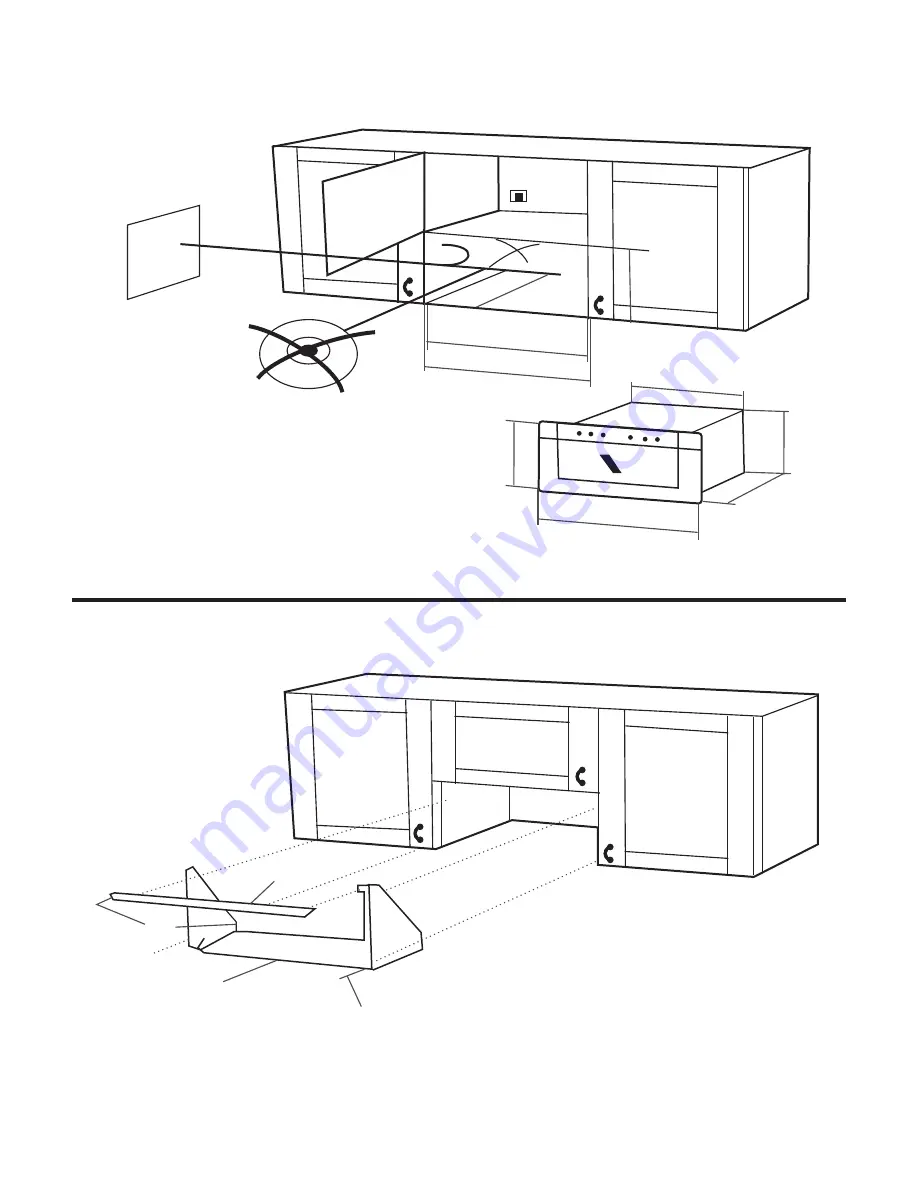
320 -350

560
600

381

x2

380

595

540

350

320

A x 4

E

B

D

Summary of Contents for AMW 497 IX

Page 1: ...Instruction Manual AMW 497 IX ...

Page 2: ... of injury damage and electric shock resulting from improper use of the appliance Carefully observe the following instructions Use protective gloves to perform all unpacking and installation operations The appliance must be disconnected from the power supply before carrying out any installation work Installation and maintenance must be carried out by a compliance with the manufacturer s instructio...

Page 3: ...trols This appliance is intended to be used built in Do not use it freestanding The appliance and its accessible parts become hot during use Care should be taken to avoid touching heating elements Very young 0 3 years and young children 3 8 years shall be kept away unless continuously supervised Children from 8 years and above and persons with reduced physical sensory or mental capabilities or lac...

Page 4: ...rocess Paper can char or burn and some plastics can melt if used when heating foods Use containers suitable for use in a microwave oven only Overheating the liquid beyond boiling point can occur without evidence of bubbling This could result in a sudden boil over of the hot liquid Do not use microwave oven for deep frying because the oil temperature cannot be controlled After heating baby food or ...

Page 5: ...r laboratory use The door seals and the door seal areas must be regularly inspected for damage If these areas are damaged the appliance should not be operated until it has been repaired by a trained service technician Service only to be carried out Overheating the liquid beyond boiling point can occur without evidence of bubbling This could result in a sudden boil over of the hot liquid To prevent...

Page 6: ...leaner to a paper towel f DO NOT SPRAY directly on the oven g AT REGULAR INTERVALS especially if spill overs have occurred remove the turntable the turntable support and wipe the base of the oven clean h THIS OVEN IS DESIGNED to operate with the turntable in place i DO NOT operate the microwave oven when the turntable has been removed for cleaning j USE A SOFT AND DAMP CLOTH with mild detergent to...

Page 7: ...r better before the set cooking time Food requiring prolonged cooking will continue to cook SCRAPPING THE PRODUCT This appliance is marked in conformity with European Directive 2012 19 EU Waste Electrical and Electronic Equipment WEEE By ensuring this product is disposed of correctly you will help prevent potential negative consequences for the environment and human health which could otherwise be...

Page 8: ... and clean the interior with a soft damp cloth DO NOT OPERATE this appliance if it has a damaged mains cord if it is not working properly or if it has been damaged or dropped Do not immerse the mains cord in water Keep the cord away hazards may result IF THE POWER SUPPLY CORD is too short have a outlet near the appliance THE POWER SUPPLY CORD must be long enough for housing to the main power suppl...

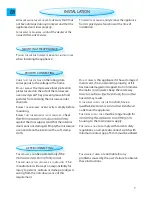
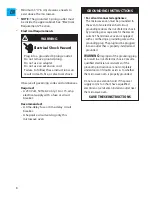
Page 9: ...rical Shock Hazard For all cord connected appliances The microwave oven must be grounded In the event of an electrical short circuit grounding reduces the risk of electric shock by providing an escape wire for the electric current The microwave oven is equipped with a cord having a grounding wire with a grounding plug The plug must be plugged into an outlet that is properly installed and grounded ...

Page 10: ...9 320 350 560 600 381 x2 380 595 540 350 320 A x 4 E B D ...

Page 11: ...10 A X 4 40mm 40mm ...

Page 12: ...11 a b A X 2 A X 2 ...

Page 13: ...f metal or metal parts ALWAYS ENSURE that the turntable is able to turn freely before starting the oven CRISP HANDLE USE THE SUPPLIED SPECIAL CRISP HAN DLE to remove the hot Crisp plate from the oven CRISP PLATE PLACE THE FOOD DIRECTLY ON THE CRISP PLATE Always use the Glass turn table as support when us ing the Crisp plate DO NOT PLACE ANY UTENSILS on the Crisp plate since it will quickly be come...

Page 14: ...CE will increase the time by 30 seconds A BEEP WILL SIGNAL once or twice a minute for 10 minutes when the cooking is fin ished Press the STOP button or open the door to cancel the sig nal NOTE The oven will only hold the settings for 60 seconds if the door is opened and then closed after the cooking is finished COOLING DOWN WHEN A FUNCTION IS FINISHED the oven may carry out a cooling procedure Thi...

Page 15: ...f the clock is not set the display will remain blank until the cooking time is set PRESS THE STOP BUTTON 3 seconds until the left hand digit hour s flicker PRESS THE BUTTONS to set the hours PRESS THE START BUTTON The two right hand digits minutes flicker PRESS THE BUTTONS to set the minutes PRESS THE START BUTTON AGAIN THE CLOCK IS SET and in operation NOTE KEEP THE DOOR OPEN WHILE SETTING THE CL...

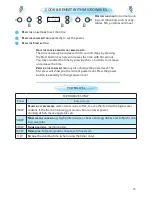
Page 16: ...timer only COOK REHEAT WITH MICROWAVES USE THIS FUNCTION for normal cook ing and reheating such as vege tables fish potatoes and meat ONCE THE COOKING PROCESS HAS BEEN STARTED The time can easily be increased in 30 second steps by pressing the Start button Each press increases the time with 30 seconds You may also alter the time by pressing the buttons to increase or decrease the time PRESSING THE...

Page 17: ... TURN LARGE JOINTS halfway through the defrost ing process FROZEN FOOD IN PLASTIC BAGS plastic films or card board packages can be placed directly in the oven as long as the package has no met al parts e g metal twist ties THE SHAPE OF THE PACKAGE alters the de frosting time Shallow packets defrost more quickly than a deep block SEPARATE PIECES as they begin to defrost Individual slices defrost mo...

Page 18: ...ght of the food PRESS THE START BUTTON MIDWAY THROUGH THE DEFROSTING PROCESS the oven stops and prompts you to TURN FOOD Open the door Turn the food Close the door and restart by pressing the Start button NOTE The oven continues automatically after 2 min if the food hasn t been turned The defrosting time will be longer in this case THIS FUNCTION NEEDS TO KNOW the net weight of the food The oven wi...

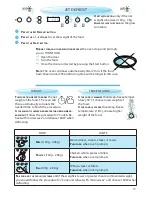
Page 19: ...in operation as this will cause a drop in temperature NOTE PRESSING THE GRILL BUTTON during cooking switches the Grill element on and off The timer will continue to count down when the Grill el ement is turned off ENSURE THAT THE UTENSILS used are heat resistant and ovenproof before grilling with them DO NOT USE PLASTIC utensils when grilling They will melt Items of wood or paper are not suitable ...

Page 20: ...ESS THE GRILL BUTTON PRESS THE POWER BUTTON to set the microwave power PRESS THE BUTTONS to set the time PRESS THE START BUTTON DURING OPERATION you can switch the Grill element on off by pressing the Grill button THE MAX POSSIBLE MICROWAVE POWER LEVEL when using the Grill is limit ed to a factory preset level It is possible to switch the microwaves off by reducing the micro wave power level to 0 ...

Page 21: ...y surface susceptible to heat THE OVEN AND THE CRISP PLATE become very hot when using this function PRESS THE CRISP BUTTON PRESS THE BUTTONS to set the time PRESS THE START BUTTON IT IS NOT POSSIBLE TO CHANGE OR SWITCH the Power level or Grill on off when using the Crisp function ONLY USE the supplied Crisp plate with this func tion Other available Crisp plates on the market will not give the corr...

Page 22: ... DETERGENT water and a soft cloth to clean the interior surfaces front and rear of the door and the door opening DO NOT ALLOW GREASE or food particles to build up around the door DO NOT USE STEAM CLEANING APPLIANCES when cleaning your microwave oven ADDING SOME LEMON JUICE to a cup of water plac ing this on the turntable and boiling for a few minutes can eliminate odors inside the oven FOR STUBBOR...

Page 23: ...against exposure to microwave energy DO NOT REMOVE ANY COVER ENVIRONMENTAL HINTS THE PACKING BOX may be fully re cycled as confirmed by the re cycling symbol Follow lo cal disposal regulations Keep potentially hazardous pack aging plastic bags polysty rene etc out of the reach of chil dren THIS APPLIANCE is marked according to the Euro pean directive 2002 96 EC on Waste Electrical and Electronic E...

Page 24: ...W X D OUTER DIMENSIONS HXWXD 382 X 595 X X320 INNER DIMENSIONS HXWXD 187 X 370 X 290 TECHNICAL SPECIFICATIONS GB 5 0 1 9 3 2 1 0 1 2 4 6 Whirlpool is a registered trademark of Whirlpool USA Whirlpool Sweden AB 2013 All rights reserved Made in Sweden Rev B IN ACCORDANCE WITH IEC 60705 THE INTERNATIONAL ELECTROTECHNICAL COMMISSION has developed a standard for comparative testing of heating performan...

Page 25: ...Mail us at builtinhelpdesk whirlpool com builtinregistration caretelindia com ...

Reviews: