26
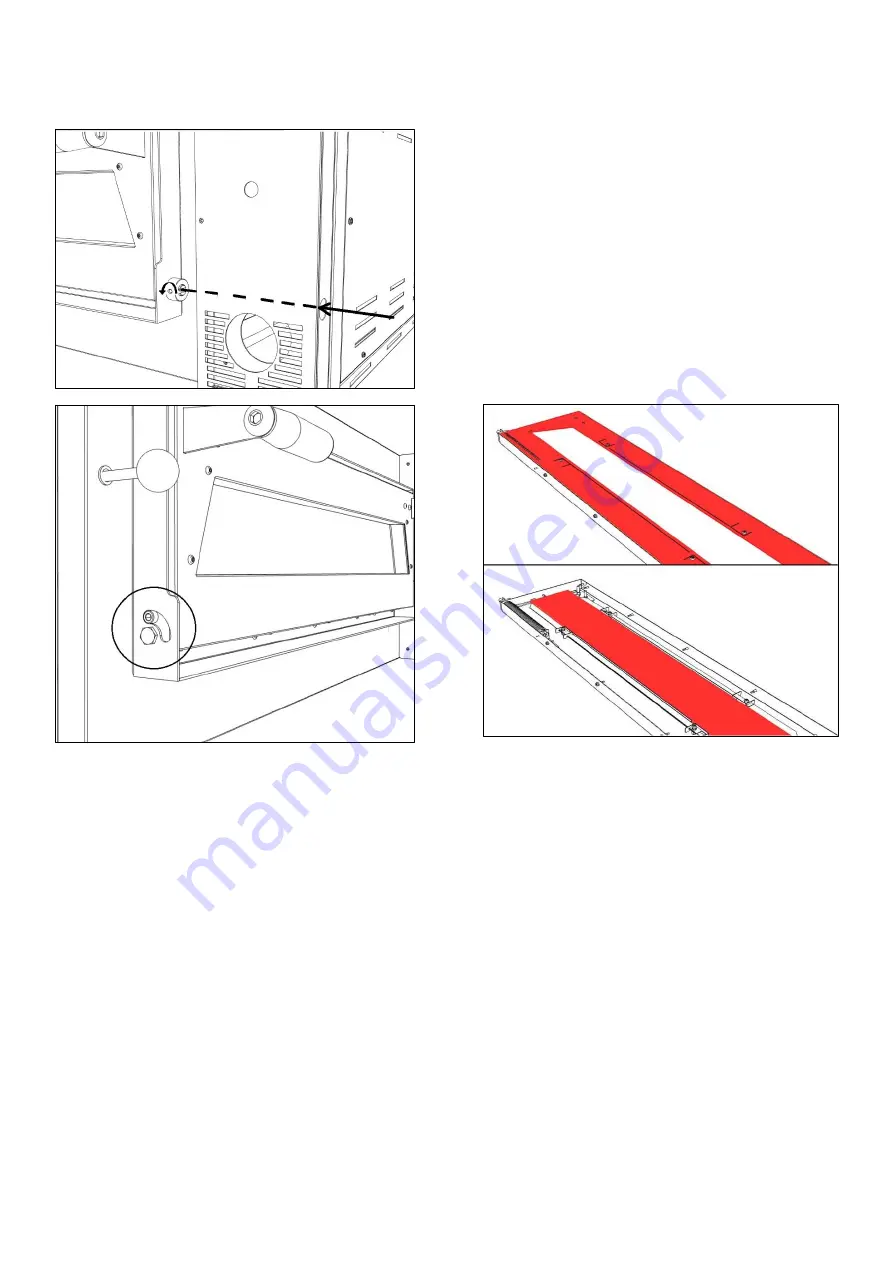
Replacing the door
glass
Remove the front control panel without disconnecting the wires.
Insert a slotted screwdriver into the spring pin.
Loosen the nut that keeps the spring pin locked and turn the
screwdriver anticlockwise to release the spring.
Remove the screws in the left side of the door and remove
Remove the inner door and replace the glass.
it from the door frame.
Carry out the steps in reverse order for the reassembly.
Replacing the heating elements
Once the “
Safety precautions
” have been carried out, replace the heating elements as follows:
•
Remove the right side panel to replace the
top’s heating elements
;
•
Disconnect the power supply wires for the heating elements being replaced;
•
Move the mineral wool aside to access the fixing screws or nuts of the heating elements being replaced;
•
Remove the faulty heating element and replace it with the new one;
•
Carry out the steps in reverse order for the reassembly.
•
Remove the right side panel to replace the
bottom’s heating elements
;
•
Disconnect the power supply wires for the heating elements being replaced;
•
Move the mineral wool aside to access the fixing screws or nuts of the heating elements being replaced;
•
Remove the bottom’s hollow tiles;
•
Remove the faulty heating element and replace it with the new one;
•
Reposition the hollow tiles and carry out the steps in reverse order for the reassembly.
Summary of Contents for ENTRY BASIC
Page 2: ...2 ...
Page 7: ...7 Schemi elettrici POM4 PZ POM6 PZ 400V 3Ph N T ...
Page 15: ...15 ...
Page 20: ...20 Wiring diagrams POM4 PZ POM6 PZ 400V 3Ph N T ...
Page 32: ...32 Schémas de câblage POM4 PZ POM6 PZ 400V 3Ph N T ...
Page 40: ...40 ...
Page 45: ...45 Schaltpläne POM4 PZ POM6 PZ 400V 3Ph N T ...
Page 53: ...53 ...
Page 58: ...58 Esquemas eléctricos POM4 PZ POM6 PZ 400V 3Ph N T ...
Page 66: ...66 ...
Page 71: ...71 Электрические схемы POM4 PZ POM6 PZ 400V 3Ph N T ...
Page 80: ...80 EXPLODED VIEW and SPARE PARTS LIST ...
Page 81: ...81 ...


