Page 1-9
1-9
Cooking Products Service Manual
Original July 1996
4321893
© 1996 Whirlpool Corporation
3.
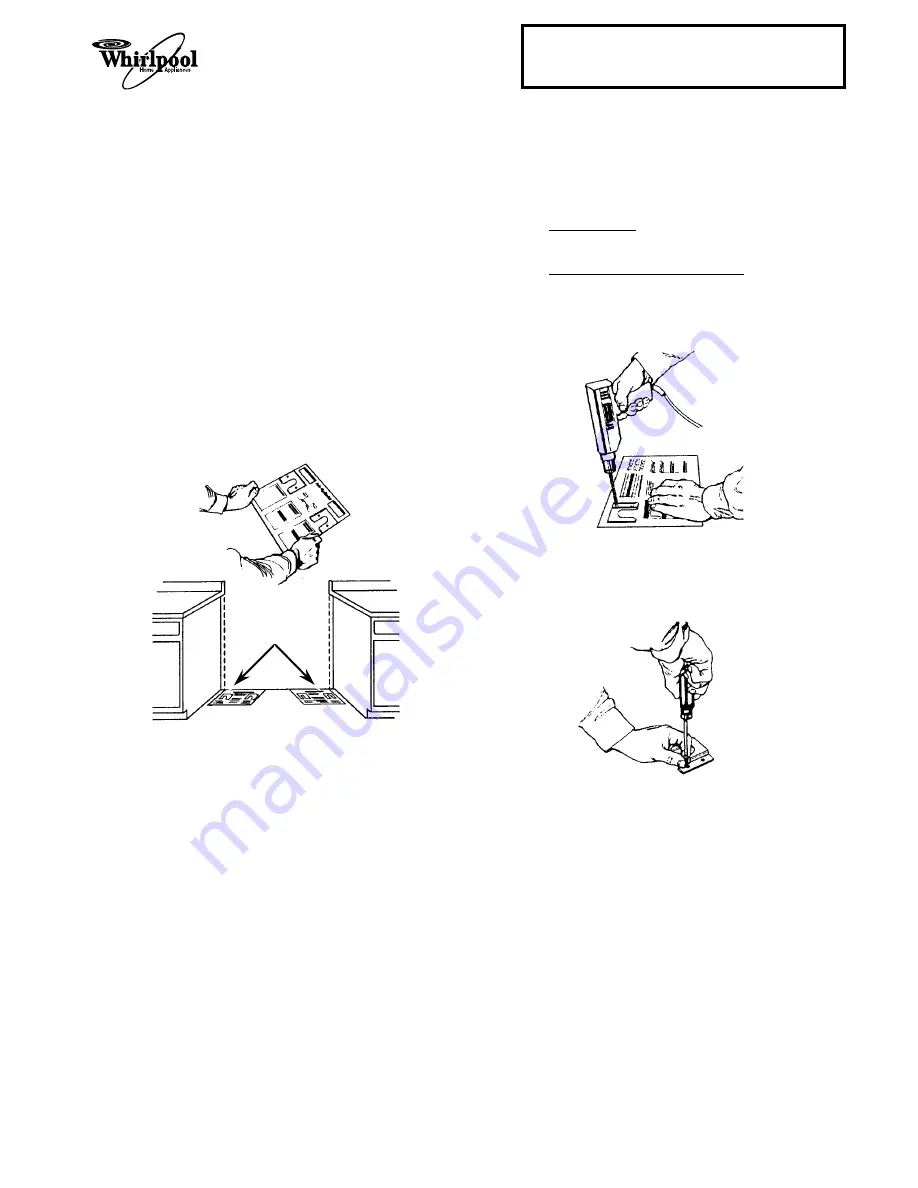
Use a pencil and mark the hole locations for
the anti-tip bracket, and then remove the
template.
4.
Secure the bracket to a solid floor as follows:
a)
Wood floor:
Drill
1
/
8
"
(0.3 cm) diameter
holes at the two hole locations you marked.
b)
Concrete or ceramic floor:
Drill
3
/
16
"
(0.5
cm) diameter holes at each mounting hole
location, then tap the plastic anchors (sup-
plied with range) into the two holes.
5.
Mount the anti-tip bracket to the floor at the
two holes with the two screws that were pro-
vided with the range.
Contact a qualified floor covering installer for the
best procedure for drilling mounting holes through
the floor covering.
TEMPLATE
LOCATIONS
1.
Locate the anti-tip bracket hardware and the
template that were supplied with the range.
NOTE: The anti-tip bracket can be installed to
secure either the right or the left rear leg of the
range.
2.
Detemine the location for the anti-tip bracket,
then place the bracket template on the floor at
the left or right rear cabinet leg position so that
the top edge is against the rear wall molding,
or cabinet, and tape the template in place.
NOTE: If the countertop is not flush with the
cabinet opening edge, align the template to
allow for the overhang.


