Page 3-3
3-3
Cooking Products Service Manual
Original July, 1996
4321893
© 1996 Whirlpool Corporation
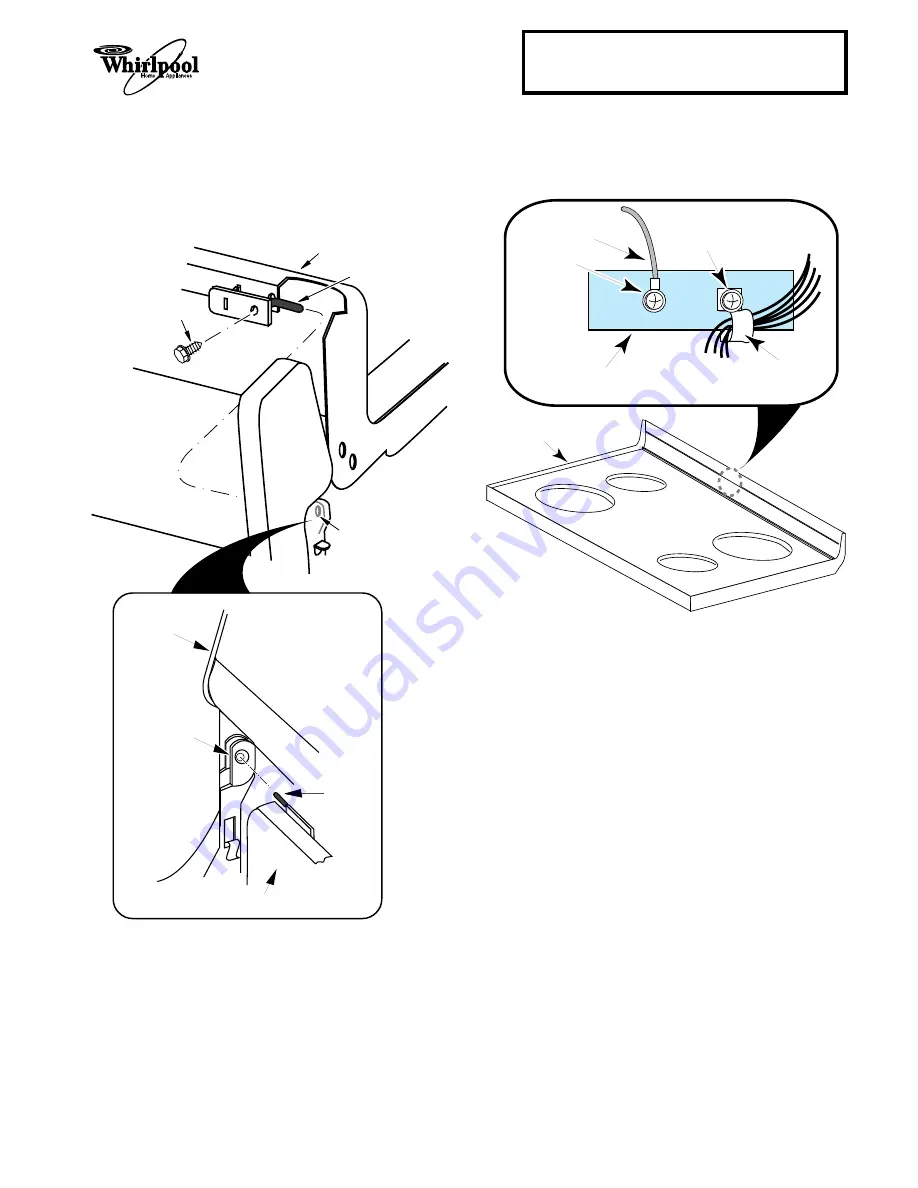
7.
Slide the maintop to the left so that the hinge
pin is free of the right hinge bracket, (see the
inset below), and to the right so that it is free
of the left bracket, then pull the maintop for-
ward so that you can access the back.
HINGE PIN
MOUNTING
SCREW
UPPER
CONSOLE
MAINTOP
INSERT HINGE
PIN IN BRACKET
HOLE IN UPPER
ACCESS PANEL
HINGE
BRACKET
HINGE PIN
UPPER
CONSOLE
MAINTOP
8.
Remove the harness strain relief and the
ground wire from the back of the maintop and
remove the maintop from the range.
MAINTOP
STRAIN
RELIEF
SCREW
SCREW
GROUND
WIRE
BACK OF MAINTOP
9.
Remove the hinge pins from the old maintop
(see the illustration under step 7) and mount
them to the new one.
10. Install the new maintop and reassemble the
range. REASSEMBLY NOTE: When reinstall-
ing the maintop, make sure that it is centered
on the range, and that the rear side flanges fit
into the end caps before lowering it into place.


