background image

19

Was the oven preheated?
See “Baking and Roasting” section.

Is the proper bakeware being used?
See “Bakeware” section.

Are the racks positioned properly?
See “Positioning Racks and Bakeware” section.

Is there proper air circulation around bakeware?
See “Positioning Racks and Bakeware” section.

Is the batter evenly distributed in the pan?
Check that batter is level in the pan.

Is the proper length of time being used?
Adjust cooking time.

Has the oven door been opened while cooking?
Oven peeking releases oven heat and can result in longer 
cooking times.

Are baked items too brown on the bottom?
Move rack to higher position in the oven.

Are pie crust edges browning early?
Use aluminum foil to cover the edge of the crust and/or 
reduce baking temperature.

ASSISTANCE OR SERVICE

Before calling for assistance or service, please check 
“Troubleshooting.” It may save you the cost of a service call. If 
you still need help, follow the instructions below.

When calling, please know the purchase date and the complete 
model and serial number of your appliance. This information will 
help us to better respond to your request.

If you need replacement parts

If you need to order replacement parts, we recommend that you 
use only FSP

®


replacement parts. FSP

®

 replacement parts will fit 

right and work right because they are made with the same 
precision used to build every new ESTATE

®


appliance. 

To locate FSP

®

 replacement parts in your area, call our Customer 

eXperience Center telephone number or your nearest designated 
ESTATE

®

 service center.

Call the Whirlpool Customer eXperience Center 
toll free: 1-800-253-1301.

Our consultants provide assistance with:

Features and specifications on our full line of appliances.

Installation information.

Use and maintenance procedures.

Accessory and repair parts sales.

Specialized customer assistance (Spanish speaking, hearing 
impaired, limited vision, etc.).

Referrals to local dealers, repair parts distributors, and 
service companies. Whirlpool designated service technicians 
are trained to fulfill the product warranty and provide after-
warranty service, anywhere in the United States.

To locate the Whirlpool designated service company in your 
area, you can also look in your telephone directory Yellow 
Pages.

For further assistance

If you need further assistance, you can write to Whirlpool 
Corporation with any questions or concerns at:

Estate Brand Home Appliances
Customer eXperience Center
553 Benson Road
Benton Harbor, MI 49022-2692

Please include a daytime phone number in your correspondence.

Accessories U.S.A.

To order accessories, call the Whirlpool Customer eXperience 
Center toll free at 1-800-442-9991 and follow the menu prompts. 
Or visit our website at www.whirlpool.com and click on “Buy 
Accessories Online.”

Canning Unit Kit

(coil element models)

Order Part Number 242905

Cooktop Cleaner

(ceramic glass models)

Order Part Number 31464

Cooktop Protectant

Order Part Number 31463

Cooktop Care Kit

(includes cleaner, protectant, and applicator pads)

Order Part Number 31605

Cooktop Scraper

(ceramic glass models)

Order Part Number 3183488

Stainless Steel Cleaner & Polish

(stainless steel models)

Order Part Number 31462

All-Purpose Appliance Cleaner

Order Part Number 31662

Split-Rack with Removable Insert

Order Part Number 4396927

Summary of Contents for Estate TES326RD2

Page 1: ...rformance parts accessories or service call 1 800 253 1301 or visit our website at www estateappliances com Table of Contents 2 W10017720 To the installer Please leave this instruction book with the unit To the consumer Please read and keep this book for future reference ...

Page 2: ... Enter 9 Off Cancel 9 Clock 9 Tones 9 Fahrenheit and Celsius 9 Timer 9 Control Lock 10 Oven Temperature Control 10 OVEN USE 11 Aluminum Foil 11 Positioning Racks and Bakeware 11 Split Oven Rack on some models 11 Bakeware 12 Meat Thermometer 12 Oven Vent 12 Baking and Roasting 12 Broiling and Custom Broiling 13 Timed Cooking 13 RANGE CARE 14 Self Cleaning Cycle on some models 14 General Cleaning 15...

Page 3: ...instructions instructions DANGER WARNING Tip Over Hazard A child or adult can tip the range and be killed Connect anti tip bracket to rear range foot Reconnect the anti tip bracket if the range is moved See the installation instructions for details Failure to follow these instructions can result in death or serious burns to children and adults Anti Tip Bracket Making sure the anti tip bracket is i...

Page 4: ...ese pans or bowls during cooking may subject wiring or components underneath to damage Protective Liners Do not use aluminum foil to line surface unit drip bowls or oven bottoms except as suggested in the manual Improper installation of these liners may result in a risk of electric shock or fire Glazed Cooking Utensils Only certain types of glass glass ceramic ceramic earthenware or other glazed u...

Page 5: ...E Right rear control knob F Right front control knob G Surface cooking area locator A Left front control knob B Left rear control knob C Surface heating indicator light D Bake and broil oven control knob E Oven temperature control knob F Oven heating indicator light G Right rear control knob H Right front control knob I Surface cooking area locator A B C D E F G LO 2 3 4 5 6 7 8 HI LO 2 3 4 5 6 7 ...

Page 6: ... glass models H Automatic oven light switch on some models I Gasket J Broil element not shown K Bake element L Self clean latch on some models Parts and Features not shown on some models Coil elements Oven door window Oven light Manual oven light switch L A B C D E F H G I J K WARNING Fire Hazard Turn off all controls when done cooking Failure to do so can result in death or fire SETTING RECOMMEND...

Page 7: ...y part of the entire cooktop Do not use the cooktop as a cutting board Use cookware about the same size as the surface cooking area Cookware should not extend more than 1 3 cm outside the area Use flat bottomed cookware for best heat conduction and energy efficiency Cookware with rounded warped ribbed or dented bottoms could cause uneven heating and poor cooking results Determine flatness by placi...

Page 8: ...on how to order For more information contact your local agricultural department Companies that manufacture home canning products can also offer assistance Cookware IMPORTANT Do not leave empty cookware on a hot surface cooking area element or surface burner Ideal cookware should have a flat bottom straight sides and a well fitting lid and the material should be of medium to heavy thickness Rough f...

Page 9: ...ing on oven temperature Clock This is a 12 hour clock and does not show a m or p m To Set Before setting make sure the oven and Timer are off 1 Press CLOCK 2 Press the TEMP TIME up or down arrow pad to set the time of day 3 Press START ENTER or CLOCK Tones Tones are audible signals indicating the following One tone Valid pad press Oven is preheated long tone Function has been entered Reminder repe...

Page 10: ...e To Adjust Oven Temperature Calibration 1 Press and hold BAKE for 5 seconds until the oven display shows the current calibration for example 00 2 Press the TEMP TIME up or down arrow pad to increase or to decrease the temperature in 10 F 5 C amounts The adjustment can be set between 30 F 15 C and 30 F 15 C NOTE All temperature adjustments will be displayed in Fahrenheit 3 Press START ENTER To Adj...

Page 11: ...k evenly so allow 2 5 cm of space around bakeware and oven walls Use the following chart as a guide SplitOvenRack onsomemodels Split Rack with Removable Insert The split rack with removable insert is a space maximizer When the two are attached they make a full rack The insert can also be removed to provide room for large items such as a turkey and casseroles Do not place more than 25 lbs 11 3 kg o...

Page 12: ...can be set between 170 F 77ºC and 500 F 260ºC When the oven temperature is greater than 170 F 77ºC no preheat conditioning time will be shown in the display The preheat conditioning time will not change if the temperature is reset before the countdown time ends If baking and roasting while the minute timer is counting down the set temperature can be seen for 5 seconds by pressing BAKE 3 Press STAR...

Page 13: ...ature setting can be changed any time before or after pressing START ENTER See Custom Broiling section If broiling while the time is counting down the set broiling temperature can be seen for 5 seconds by pressing CUSTOM BROIL 3 Press OFF CANCEL when finished Custom Broiling If foods are cooking too fast press the TEMP TIME up or down arrow pad until 325 F 163 C shows on the display 1 Press CUSTOM...

Page 14: ...en Remove the broiler pan grid cookware and bakeware and on some models the temperature probe from the oven Remove any foil from the oven because it may burn or melt damaging the oven Remove oven racks to keep them shiny and easy to slide See General Cleaning section for more information Hand clean inside door edge and the 1 3 8 cm area around the inside oven cavity frame being certain not to move...

Page 15: ...sistance or Service section to order The Cooktop Scraper uses razor blades Store razor blades out of the reach of children Light to moderate soil Paper towels or clean damp sponge Clean while the cooktop is still warm You may want to wear oven mitts while cleaning the cooktop Sugary spills jellies candy syrup Cooktop Scraper Clean while the cooktop is still warm You may want to wear oven mitts whi...

Page 16: ... of vegetable oil applied to the rack guides will help them slide Steel wool pad BROILER PAN AND GRID on selected models Cleaning Method Chrome only Mildly abrasive cleanser Scrub with wet scouring pad Solution of cup 125 mL ammonia to 1 gal 3 75 L water Soak for 20 minutes then scrub with scouring or steel wool pad Oven cleaner Follow product label instructions Porcelain enamel only Dishwasher Do...

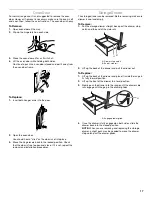
Page 17: ...ot repeat the removal and installation procedures StorageDrawer The storage drawer can be removed Before removing make sure drawer is cool and empty To Remove 1 Pull the storage drawer straight back past the drawer stop notch and the end of the side rails 2 Lift up the back of the drawer and pull the drawer out To Replace 1 Lift up the back of the drawer and place it inside the range in its fully ...

Page 18: ...l Lock set See Control Lock section Oven temperature too high or too low Does the oven temperature calibration need adjustment See Oven Temperature Control section On some models does the cooling fan run during BAKE BROIL or CLEAN It is normal for the fan to automatically run when the oven is in use This helps cool the electronic control Oven indicator lights flash Do the oven indicator lights fla...

Page 19: ... the Whirlpool Customer eXperience Center toll free 1 800 253 1301 Our consultants provide assistance with Features and specifications on our full line of appliances Installation information Use and maintenance procedures Accessory and repair parts sales Specialized customer assistance Spanish speaking hearing impaired limited vision etc Referrals to local dealers repair parts distributors and ser...

Page 20: ... WARRANTY SHALL BE PRODUCT REPAIR AS PROVIDED HEREIN IMPLIED WARRANTIES INCLUDING WARRANTIES OF MERCHANTABILITY OR FITNESS FOR A PARTICULAR PURPOSE ARE LIMITED TO ONE YEAR OR THE SHORTEST PERIOD ALLOWED BY LAW WHIRLPOOL SHALL NOT BE LIABLE FOR INCIDENTAL OR CONSEQUENTIAL DAMAGES SOME STATES AND PROVINCES DO NOT ALLOW THE EXCLUSION OR LIMITATION OF INCIDENTAL OR CONSEQUENTIAL DAMAGES OR LIMITATIONS...

Reviews: