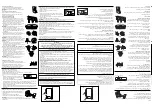
1. Disconnect refrigerator from power supply.
2. Reach behind the control panel to remove bulb.
3. Replace with a 40 watts appliance bulb.
4. Reconnect refrigerator to power supply.
NOTE:
Not all appliance bulbs will fit your
refrigerator. Be sure to replace a bulb with one of the same size and shape.
1.- Disconnect refrigerator from power supply.
2.- Remove the shelf.
3.- Remove the cover pushing it down.
4.- Remove the bulb.
5.- Replace with a 15 watts T25 bulb, base E14. Request
it with our service department or with your nearest original
parts provider
6.- Place the light cover , following reverse procedure from step 3.
7.- Reconnect refrigerator to power supply.
NOTE:
Not all appliance bulbs will fit your refrigerator. Be sure to replace a bulb
with one of the same specifications of step 5.
Before calling the technician
Dispenser lock
Water dispenser can be locked to easy cleaning or to avoid unintended
use.
NOTE:
The dispenser only locks the paddle against its movement.
To lock the dispenser paddle:
Lower the security lever located behind the dispenser paddle until it lays
and makes contact with rear wall of dispenser cavity.
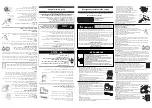
Water dispenser cleaning
To clean water storage bin:
1.
Hold water storage bin with both hands by its sides firmly
and Lift up the front of the bin then pull up to remove
completely from the inner door (see figure 1).
2.
Put water storage bin aside in a flat surface and remove
the lid pulling it up (see figure 2).
3.
To release the valve, turn it counterclockwise (see
figure 3). Clean it carefully.
NOTE
: your refrigerator can have any of two styles
of valve shown in figure 3.
cap of lid in water storage bin, line up the tabs
of the cap strap with the slots in the lid, then
remove the cap carefully (see figure 4).
5.
Use a clean sponge or soft cloth and a mild detergent
in warm water. Rinse with clean water thoroughly to
make sure there are no soap residues. Dry with soft,
clean cloth.
NOTE
: Do not use scouring pads or abrasive cleaners.
Damage may occur, even with one-time or limited use.
IMPORTANT:
Before replacing the water storage bin,
make sure that:
·
Valve has been securely placed again, verify the valve
is in contact with tab placed in the water storage bin
·
The isolating ring is securely placed in the water
storage bin as shown in figure 5.
To replace the water storage bin inside refrigerator:
1.
Screw the valve to water storage bin turning clockwise.
Replace strap of lid cap inside the lid and put lid
again over the bin.
2.
Replace water storage bin holding with both hands by its
sides, lift up front of bin to align side guides with tabs in
inner door, then push firmly down until it has snapped
completely.
NOTE
: Make sure water storage bin has been securely placed
and there is no way to fall down.
Drops collector tray
The drops collector tray is useful to collect spills or last drops during use of water
dispenser.
You need to remove the drops collector tray from the refrigerator
to clean it. Hold the edge and pull straight out (see figure 6). To
replace the tray, put in its position and slide forward.
Figure 1.
Figure 2.
Figure 3.
Figure 4.
Tab
Tab
Figure 5.
Figure 6.
How to use the refrigerator
Sounds you may hear
To change refrigerator light bulb
Your new refrigerator may make sounds that your old one did not.
Do not be alarmed, Most of the new sounds are normal. Hard surfaces like the
floor, walls and cabinets can make the sounds seem louder.
The following describes the kinds of sounds that might be new to you, and what
may be making them.
Slight hum, soft hiss
You may hear the refrigerator's fan motor and moving air.
Clicking or snapping sounds
The thermostat make a definite click when the refrigerator stops running. It also
makes a sound when the refrigerator starts. The defrost timer will click when the
defrost cycle starts.
Water sounds
When the refrigerator stops running, you may hear gurgling in the tubing for a few
minutes after it stops. You may also hear defrost water running into the defrost
water pan.
IMPORTANT
BEFORE CALLING THE TECHNICIAN IT IS VERY IMPORTANT TO VERIFY
THE FOLLOWING INFORMATION:
IF AFTER READING THE USE AND REFERENCE GUIDE YOU HAVE
QUESTIONS,THIS GUIDE MAY OFFER YOU SOME SOLUTIONS TO
PROBLEMS YOU CAN DETECT AND CORRECT YOURSELF IN YOUR HOME
IF THE REFRIGERATOR IS NOT WORKING
Plug firmly into a live circuit. Do not use extension cord.
Check the power supply. It could be damaged. Connect another appliance and
see if it works normally.
Do not connect various appliances at the same time, the electrical installation
will over load .
Verify that the temperature control (on manual control) is in the ON
(ENCENDIDO) position.
Verify (on digital control) that at least, 1 green led indicator is turn ON.
Avoid placing the appliance close to a hot source.
Close the doors completely. Check to see if the gaskets are dirty or sticky.
Level the refrigerator. Remove wood supports and adjust the roller levels (FIGURE 1).
Do not overload the refrigerator . The air circulation will be deficient.
MANUAL CONTROL- Set the temperature control in number 3 or in the middle
position and wait at least 24 hours before making another change of
temperature.
DIGITAL CONTROL- The digital control will let you know if a failure exists in the
refrigerator. The failure is represented by the blinking of the amber lights on the
control panel. If the refrigerator does not work or the amber lights are blinking,
disconnect the refrigerator from power supply, wait 10 minutes and reconnect
refrigerator to power supply. If the amber lights keep blinking, wait 3 hours. If
the lights continue ON after 3 hours, please call the technician.
THE REFRIGERATOR SEEMS TO RUN TOO MUCH
Verify if the condenser has lint or is dirty (FIGURE 1)
Avoid opening the doors constantly or for long periods.
Do not introduce warm food.
IS THE REFRIGERATOR MAKING UNFAMILIAR SOUNDS
Verify there is nothing on top or behind.
The compressor does not work properly, chek if you are using the right voltage.
Verify the light intensity. If it is low, consult with an qualified technician (FIGURE 1).
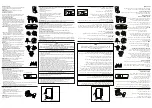
FIGURE 1
CONDEN-
SER
MAGNETIC SEAL
LEVELLING ROLLERS
COMPRESSO
Adjust the temperature control
The temperature control is in the refrigerator. It
controls the temperature in both the refrigerator
and freezer compartments:
When you plug in the refrigerator for the first time:
Set the temperature control to 3 (normal).
Temperature control adjustments range from
1 (warmest) to 5 (coldest) (figure 1).
Turning the temperature control to Apagado (Off)
stops cooling in both the refrigerator and freezer compartments. But it does not
disconnect the refrigerator from the power supply.
Give the refrigerator time to cool down completely before adding food. This could
take several hours.
Adjust the temperature control to have food as cold as you like. The settings
indicated above should be correct for normal, household refrigerator usage.
5
1
3
APAGADO
Frío
Minimo
Normal
Frío
Máximo
Temperature control
Figure 1.
To change freezer light bulb (some models)

