background image

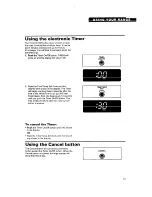
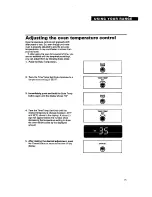
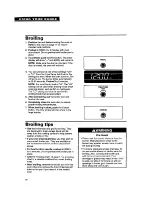
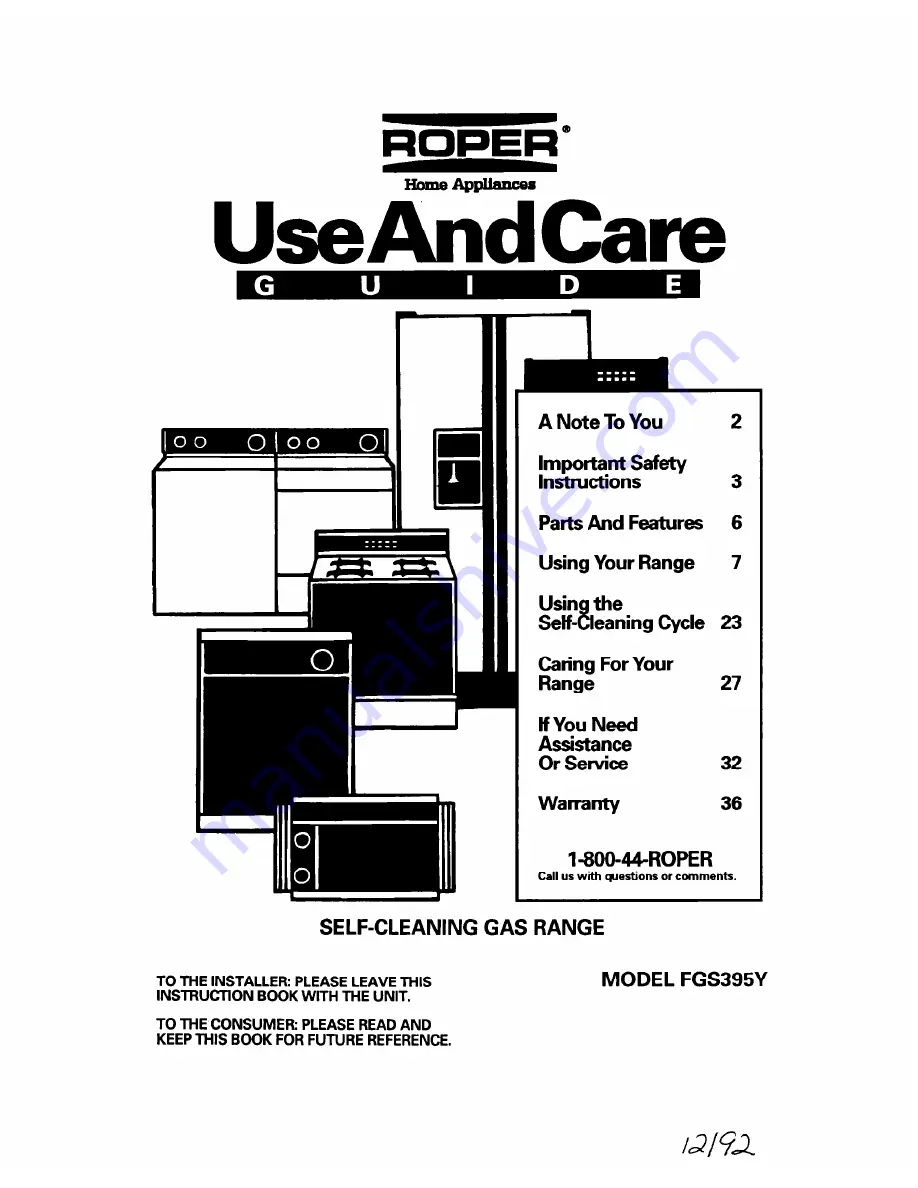
Summary of Contents for FGS395Y

Page 1: ...sin the Setf Eleaning Cycle 23 Caa For Your 27 If You Need ptk tg 32 Warranty 36 l 800 44 ROPER Call us with questions or comments SELF CLEANING GAS RANGE TO THE INSTALLER PLEASE LEAVE THIS MODEL FGS395Y INSTRUCTION BOOK WITH THE UNIT TO THE CONSUMER PLEASE READ AND KEEP THIS BOOK FOR FUTURE REFERENCE ...

Page 2: ...his symbol will help you avoid actions which could cause product damage scratches dents etc and damage to your personal property l ALL RANGES CAN TIP l INJURY TO PERSONS COULD RESULT l INSTALL ANTI TIP DEVICES PACKED WITH RANGE l SEE INSTALLATION INSTRUCTIONS For more information see the The anti tip bracket on page 22 Our toll free number l 800 44 ROPER l 800 447 67371 is available 24 hours a day...

Page 3: ... call your gas supplier from a neighbor s phone Follow the gas supplier s instructions l if you cannot reach your gas supplier call the fire department installation and service must be performed by a qualified installer service agency or the gas supplier General l Gas fuels and their use in appliances can l Install or locate the range only in accordance cause minor exposures to benzene formalde wi...

Page 4: ...and window Do not wear loose or hanging garments when using the range They could ignite if they touch a hot surface burner and you could be burned l Use only dry potholders Moist or damp potholders on surface burners may result in burns from steam Do not let potholder touch surface burners Do not use a towel or bulky cloth for a potholder It could catch on fire l Keep range vents unobstructed l Do...

Page 5: ... in the Seff Cleaning cycle from fiberglass insulation and food decomposition Significant exposure to these substances can cause cancer or reproductive harm Exposure can be minimized by venting with a hood or open window and wiping out excess food spills prior to self cleaning l Do not use oven cleaners No commercial oven cleaner or oven liner protective coating of any kind should be used in or ar...

Page 6: ...n vent Surface burners grates and reflector pans Model and serial number plate under cooktop Lock lever Automatic oven light switch Removable storage drawer Control panel Left front Left rear control knob control knob I I tlectronic oven control Surface burner control panel Broil burner Oven burner not shown Right rear Right front control knob control knob Surf e burner marker NOTE See page 11 for...

Page 7: ... range is equipped with electric ignitors Electric ignitors automatically light the burners each time they are used Push in control knobs and turn them to the LITE position The clicking sound is the ignitor sparking Visually check that burner has lit To stop the clicking sound after the burner lights turn the control knob to the desired setting The control knob has stops for HI MED and LOW However...

Page 8: ...out pan materials and construction will help you select the correct cooking utensils for your needs l NOTE For best results and greater fuel efficiency use only flat bottomed utensils that make good contact with the surface burners Utensils with rounded warped ridged porce lain enamel ware or dented bottoms could cause severe overheating which damages the utensil and or surface burner Woks canners...

Page 9: ...oo large to be placed in oven with rack in lowest position place rack on bottom of oven For proper roasting follow these guidelines l The rack must be level l Use adequate amount of liquid meat juices or water so food does not get overdone l Do not try to pull rack out over door Rack will be at the same level as door when door is opened Personal Injury Hazard l Always position oven rack s in desir...

Page 10: ...nches 4 5 cm of space around each pan and between pans and oven walls There must be a minimum space of 1 inch 2 5 cm l Use only one cookie sheet in the oven at one time Use the following as a guide to determine where to place the pans One pan Place in the center of the oven rack Two pans Place in opposite corners of the oven rack Three or four pans Place in opposite corners on each oven rack Stagg...

Page 11: ...sing the Timer the display will show hours minutes and seconds in the following sequence For settings from O l minute 55 seconds the display will increase in 5 second incre ments and count down each second For settings from 2 10 minutes the display will increase in 1O second increments and count down each second For settings from 10 60 minutes the display will increase in 1 minute increments and c...

Page 12: ...utton until you hear two beeps l Audible signals are now removed To replace audible signals l Push and hold the STOP TIME button until you hear one beep l Audible signals are now replaced Setting the clock 1 Push the Clock button TIME will show in the display 2 Turn the Time Temp Set Knob until the correct time shows in the display 3 Push the Cancel button to start clock opera tion The clock will ...

Page 13: ...splay The Timer will begin counting down 2 seconds after the time is set When time is up you will hear three beeps then one beep every 10 seconds until you push the Timer On Off button The time of day will show after the Timer On Off button is pushed To cancel the Timer 9 Push the Timer On Off button until OO shows in the display OR l Turn the Time Temp Set Knob until the time of day shows in the ...

Page 14: ...350 The temperature will increase or decrease by 5 increments as you turn the Time Temp Set Knob If a bake temperature is not set within 6 seconds of pushing the Bake Temp button BAKE and o will disappear from the display 4 When baking preheat the oven Preheating is not needed when roasting The oven is preheated when you see the set temperature in the small display NOTE The small display will show...

Page 15: ...ese steps 1 Push the Bake Temp button BAKE TEMP 2 Turn the Time lemp Set Knob clockwise to a temperature setting of 55O F 3 Immediately push and hold the Bake Temp button again until the display shows 00 4 Turn the Time lemp Set Knob until the desired temperature change between 35 F and 35 F shows in the display A minus sign will appear before the number when decreasing the temperature setting to ...

Page 16: ...of day will then show in the large display CANCEL Broiling tips l Use the broiler pan and grid for broiling They are designed to drain excess liquid and fat away from the cooking surface to help prevent spatter smoke or fire l If you broil small quantities you may want to use a small broiler pan They are available in the housewares section of many department stores l For best broiling results preh...

Page 17: ...ide when broiling Increase or decrease broiling times or move pan to different rack positions to suit personal preference Use a reliable cook book for additional information when broiling 0 foods not listed in the chart below 0 Fish Whole Steaks Frankfurters 17 ...

Page 18: ... set to the correct time of day See Setting the cloclc on page 12 To delay start and stop automatically 1 Position the oven rack s properly and place the food in the oven 2 Push the Bake Time button BAKE TIME will light up and will show in the display 3 Turn the Time Temp Set Knob until the desired baking roasting time shows in the large display The bake time can be set for any amount of time from...

Page 19: ...OP will go off and ON will light up The display will show the actual oven temperature increasing in 5 increments until the set temperature is reached To start baking roasting now and stop automatically 1 Position the oven rack s properly and place the food in the oven 2 Push the Bake Time button BAKE TIME will light up and I will show in the display 3 Turn the Time Temp Set Knob until the desired ...

Page 20: ...ancel button is pushed Push the Cancel button to return to the time of day To avoid sickness and food waste when delayed time baking roasting l Do not let most UNFROZEN food stand for more than two hours before cooking starts l Do not allow food to remain in oven for more than two hours after the end of cooking cycle NOTE Do not use foods that will spoil while waiting for cooking to start Such foo...

Page 21: ...ight sides and tight fitting lids l Cook with a minimum of liquid or fat to help shorten cooking time l Preheat pans only when recommended and for the shortest time possible l Start food on higher heat settings then set surface unit control on low or off to finish cooking Use retained heat for cooking when possible l Use the more efficient surface burners instead of the oven when possible l Turn o...

Page 22: ...drawer front and push in until melal stops on drawer slide rails clear white stops on drawer guides Lift drawer front again to clear second stop and slide drawer closed The anti tip bracket The range will not tip during normal use How ever tipping can occur if you apply too much force or weight to the open door without the anti tip bracket properly secured To verify the anti tip bracket is engaged...

Page 23: ... We recommend a 3 hour Self Cleaning cycle However you can adjust the cycle time to the amount of soil in your oven You can set the cycle anywhere between 2 and 4 hours See Setting the controls on page 24 The graph at the right is representative of a normal 3 hour Self Cleaning cycle Note that the heating stops when the 3 hour setting is up but it takes longer for the oven to cool enough to unlock...

Page 24: ... electronic control has sufficiently cooled The fan will then automatically turn off Personal Injury and Product Damage Hazard l Do not touch the oven during the Self Cleaning cycle It could burn you Do not use commercial oven cleaners in your oven Cleaners may produce hazard 1 ous fumes or damage the porcelain finish NOTE Do not block the vent during the Self Cleaning cycle Air must move freely f...

Page 25: ...tion 1 Changes can be made at any time by pres sing the Cancel button Push the Clean button and turn theTime Temp Set Knob to the new desired clean and stop time 2 When the oven temperature goes above normal broiling temperatures the oven door cannot be opened The door cannot be opened until the oven temperature goes below normal broiling temperatures approxi mately 1 hour after the cycle is compl...

Page 26: ...oven is cool wipe up any residue or ash with a damp cloth or sponge If any spots remain clean with a mild abrasive cleanser or mildly abrasive pad l Clean the oven before it gets heavily soiled Cleaning a very soiled oven takes longer and results in more smoke than usual l If the Self Cleaning cycle does not get the oven as clean as you expected the cycle may not have been set long enough or you m...

Page 27: ...rols are OFF and the range is cool before cleaning l Do not use oven cleaners bleach or rust removers l Do not obstruct the flow of combustion and ventilation air Failure to follow these guidelines could result in burns electrical shock fire or explosion Surface burner grates and reflector pans 1 Make sure all surface burners are off and the surrounding parts are cool 2 Lift off the surface burner...

Page 28: ...back to unlock them Lower the cooktop into place Replace reflector pans and surface burner grates Surface burners 1 Lift up the cooktop following the instructions above 2 Before cleaning remove screws that hold each of the burners in place The screws prevent the burners from moving during shipment Remove the shipping screws with a Phillips screwdriver and lift the burners up and out This separates...

Page 29: ...mage the finish of the knobs Control panels Sponge and warm l Wash rinse and dry thoroughly soapy water DO NOT USE steel wool or abrasive cleaners OR Paper towel and They may damage the finish spray glass cleaner DO NOT SPRAY cleaner directly on panel Apply cleaner to paper towel NOTE Make sure you have not turned the oven on when cleaning panel If you have push the Cancel button Exterior surfaces...

Page 30: ...urface burners in dishwasher Broiler pan and grid Steel wool pad and clean after each use l Wash rinse and dry thoroughly warm soapy water Oven racks Steel wool pad and warm soapy water OR The Self Cleaning cycle l Wash rinse and dry thoroughly OR l Leave in oven during Self Cleaning cycle NOTE Racks will permanently discolor and become harder to slide if left in oven during Self Cleaning cycle Ap...

Page 31: ...king and from high oven temperatures Because bulb cover is made of glass be careful not to drop it Broken glass could cause injury To replace the oven light 1 Unplug appliance or disconnect at the main power supply 2 Remove the glass bulb cover in the back of the oven by pushing the wire holder to the side and pulling out bulb cover 3 Remove the light bulb from its socket Replace the bulb with a 4...

Page 32: ...cian to reconnect range to gas supply See Installation Instructions A household fuse has blown or a Replace household fuse or reset circuit circuit breaker has tripped breaker Controls are not set correctly Reset controls if needed The flow of combustion a or Remove blockage to airflow to and around ventilation air to the range is range blocked The oven will not operate The electronic control has ...

Page 33: ...age 15 The oven was not preheated as Preheat oven if called for in recipe the recipe calls for The recipe has never been Use only tested recipes from a reliable tested or is not from a reliable source source The pans are not the type or size Refer to a reliable cookbook for recom recommended in the recipe mended pan type and size There is not proper air circulation Allow 1 to 2 inches 4 5 cm on al...

Page 34: ...orrespondence 3 If you need service Contact the dealer from whom you purchased the appliance or the authorized servicer in your area For help finding an authorized servicer in your area call our toll free telephone number in Step 2 4 If you are not satisfied with z atte problem was l Contact the Major Appliance Consumer Action Panel MACAP MACAP is a group of inde pendent consumer experts that voic...

Page 35: ...35 ...

Page 36: ... This Roper appliance is warranted by Whirlpool Corporation Under no circumstances shall it be liable under this warranty for incidental or consequential damages and all implied warranties are limited to the same time period stated in the express warranties for Roper Brand Appliances Some states do not allow the exclusion or limitation of incidental or consequential damages so this limitation or e...

Reviews: