Page 4
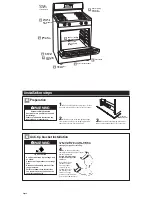
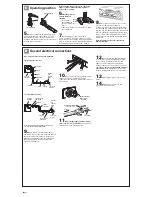
1.
Put on safety glasses and gloves. Do Not
use oven door handle to lift or move the range.
Preparation
A
2.
Remove oven racks and parts package
from inside oven. Remove shipping materials,
tape and protective film from range.
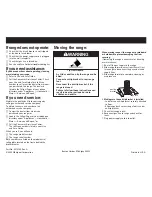
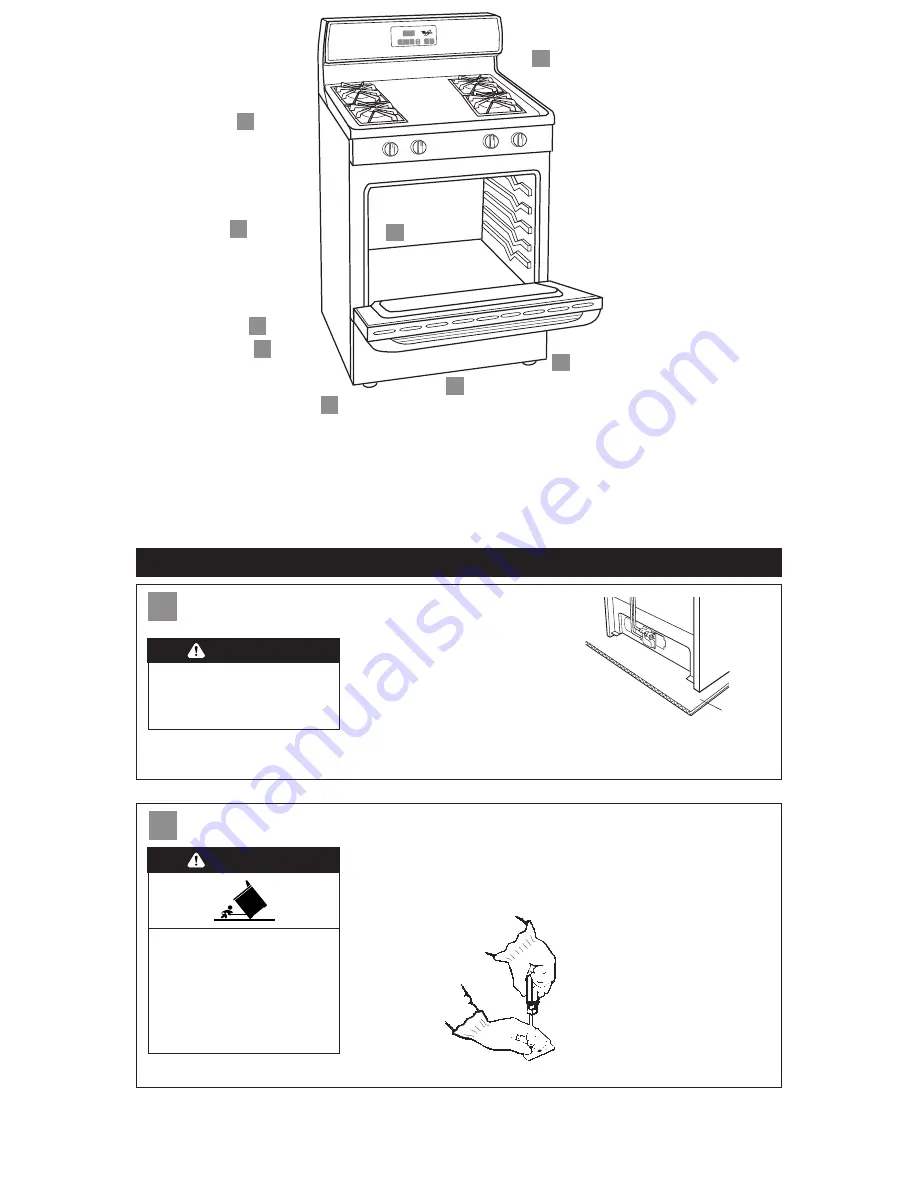
Anti-tip bracket installation
B
8 8 8
B
E
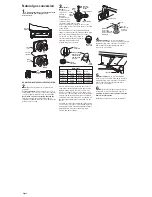
Check cooktop
burners for
proper flame
D
Close storage drawer.
C
Secure range
with anti-tip
bracket
Remove oven
racks and parts
package.
A
Remove shipping
material.
C
Level range
D
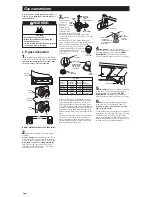
Make proper
gas connection
D
Plug power
supply cord
into grounded
outlet
Electronic
clock/timer
optional on
some models
E
Check burner
operation
Install anti-
tip bracket
3.
Keep cardboard shipping base under
range to prevent damage to floor covering.
Installation steps
Excessive Weight Hazard
Use two or more people to move and
install range.
Failure to follow this instruction can
result in back or other injury.
WARNING
Tip Over Hazard
A child or adult can tip the range and
be killed.
Connect anti-tip bracket to rear range
foot.
Reconnect the anti-tip bracket, if the
range is moved.
Failure to follow these instructions
can result in death or serious burns
to children and adults.
WARNING
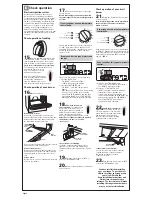
Contact a qualified floor covering installer for
the best procedure for drilling mounting holes
through your type floor covering.
4.
Use the anti-tip bracket
template/instruction sheet to install
the anti-tip bracket.
Anti-tip bracket must be
anchored securely to the
sub floor.
Depending on the
thickness of your
flooring, longer
screws may be
needed to anchor
the bracket to the
sub floor. Longer
screws are available from
your local hardware store.
cardboard
shipping base


