3
Electrical Requirements
Observe all governing codes and ordinances.
Required:
■
A 120 Volt, 60 Hz, AC only, 15- or 20-amp electrical supply
with a fuse or circuit breaker.
Recommended:
■
A time-delay fuse or time-delay circuit breaker.
■
A separate circuit serving only this microwave oven.
Settings
Clock
12-hour (12:00-11:59).
To Set Clock:
1.
Touch CLOCK.
2.
Enter time.
3.
Touch CLOCK or the Start control.
Timer
Timer can be used independently during any cooking program.
To Set Timer:
1.
Touch the Timer control.
2.
Enter time.
3.
Touch the Timer control or the Start control.
Vent Fan
High, low and off. Comes on automatically as cooling fan during
any cook function.
Control Lock
Activate to avoid unintended start. Depending on your model, the
padlock graphic on the control panel is next to either the Start
control or Cancel control. Touch and hold the appropriate control
pad for about 5 seconds until 2 tones sound and padlock icon
appears in the display. Repeat to unlock control.
Tones
Programming tones and signals. Touch and hold number pad “1”
for about 5 seconds to turn off programming tones. Repeat to turn
back on. Touch and hold number pad “2” for 5 seconds to turn off
all tones. Repeat to turn back on.
Demo Mode
Activate to practice using the control without actually turning on
the magnetron. Touch and hold the Timer control for 5 seconds.
The “d” will appear in the display. Repeat to exit Demo Mode.
Features
Cooking Rack (on some models)
Use only for 2-level cooking. To avoid damage to the microwave
oven, always remove rack after 2-level cooking. To avoid damage
to the microwave oven due to soil buildup, clean rack supports
often.
Turntable
Turntable may be turned off (on some models) for manual cooking
only. This is helpful when cooking with plates that are bigger than
the turntable, or when cooking with plates that are side by side.
Turntable cannot be turned off during preset or sensor (on some
models) functions.
Easy Minute Feature (on some models)
Easy Minute feature pads (“1” through “5”) will start the microwave
oven at 100% power for the selected number of minutes.
Progress Bar (on some models)
The progress bar is a visual picture of the estimated running time of
sensor functions.
6th SENSE™ System (on some models)
A sensor in the microwave oven detects moisture released from
food as it heats, and adjusts the cooking time accordingly.
ACCUWAVE
®
Technology (on some models)
This microwave system delivers a constant stream of the selected
microwave power, whereas typical microwave systems deliver only
intervals of 100% and 0% power
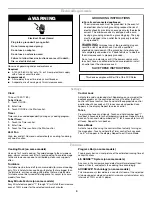
Electrical Shock Hazard
Plug into a grounded 3 prong outlet.
Do not remove ground prong.
Do not use an adapter.
Do not use an extension cord.
Failure to follow these instructions can result in death,
fire, or electrical shock.
WARNING
GROUNDING INSTRUCTIONS
SAVE THESE INSTRUCTIONS
■
For all cord connected appliances:
The microwave oven must be grounded. In the event of
an electrical short circuit, grounding reduces the risk of
electric shock by providing an escape wire for the electric
current. The microwave oven is equipped with a cord
having a grounding wire with a grounding plug. The plug
must be plugged into an outlet that is properly installed
and grounded.
WARNING:
Improper use of the grounding plug can
result in a risk of electric shock. Consult a qualified
electrician or serviceman if the grounding instructions are
not completely understood, or if doubt exists as to whether
the microwave oven is properly grounded.
Do not use an extension cord. If the power supply cord is
too short, have a qualified electrician or serviceman install
an outlet near the microwave oven.
This device complies with Part 18 of the FCC Rules.


