


12
TROUBLESHOOTING
Try the solutions suggested here first in order to avoid the cost of an unnecessary service call.
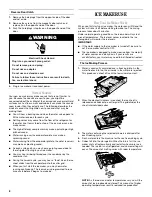
Ice Maker Operation
Your ice maker will not operate
■
Is the power cord plugged in? Plug into a grounded 3 prong
outlet.
■
Is the control set to ON? Be sure that the control is set to
ON.
■
Has a household fuse blown, or has a circuit breaker
tripped? Replace the fuse or reset the circuit breaker. If the
problem continues, call an electrician.
■
Is the room temperature cooler than normal? Room
temperature must be above 55°F (13°C). Otherwise, bin
thermostat may sense cold room temperature and shut off
even though the bin is not full of ice. Also, unit may not restart
once it does shut off.
■
Does the red light come on when the Clean button is
pushed? The ice maker is receiving power but may need
cleaning. See “Cleaning.”
■
Does the ice maker have a drain pump? If there was a large
amount of water added to the ice maker, wait a few minutes
for the drain pump to clear. If there is still water in the bin,
check to see whether the drain hose is kinked.
Ice maker seems noisy
■
Is water being circulated through the ice maker? This is
normal operation. Water is added once per ice-making cycle.
■
Is the water in the reservoir overflowing? This is normal.
This overflow helps to purge minerals that were removed from
the water during the ice making process.
■
Is there a “whooshing” sound? Check the following things:
■
Make sure that the water supply is hooked up and turned
on.
■
Make sure that the drain cap is tight and the water drain
pan pump is securely attached to the water pan.
■
Is there ice between the evaporator plate and the cutting
grid? Check to be sure that the ice maker is level. See
“Leveling.” If the ice maker is level, and the problem persists,
run a cleaning cycle. See “Cleaning.”
Ice Production
Ice maker runs but produces no ice
■
Is the control set to ON? Be sure that the control is set to
ON.
■
Is the water supply connected? Make sure the water supply
is properly connected and turned on.
■
Is the drain cap securely in place? If the drain cap is loose,
water will empty from the water pan, and you will have either
thin ice or no ice. Tighten the drain cap.
■
Is there debris in the drain tube? Clean the drain tube.
■
Is there a kink in the drain line? Be sure that there are no
kinks in the line.
■
Is the service light flashing on and off continually? Call for
service.
Ice maker runs but produces very little ice
■
Is the room temperature hotter than normal? Room
temperatures of more than 90°F (32°C) will normally reduce
ice production.
■
Is the condenser dirty? Dirt or lint may be blocking the
airflow through the condenser. See “Condenser.”
■
Is there scale buildup in the ice maker? If there is white
scale buildup in the ice maker’s water or freezing system, you
should clean the ice maker. See “Interior Components” in the
“Cleaning” section.
■
Is the drain cap securely in place? If the drain cap is loose,
water will empty from the water pan, and you will have either
thin ice or no ice. Tighten the drain cap if it is loose.
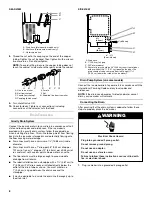
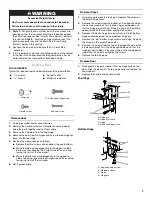
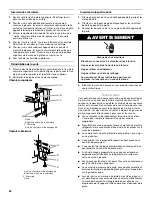
Electrical Shock Hazard
Plug into a grounded 3 prong outlet.
Do not remove ground prong.
Do not use an adapter.
Do not use an extension cord.
Failure to follow these instructions can result in death,
fire, or electrical shock.
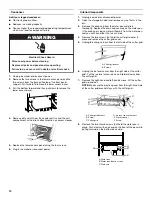
WARNING
WARNING
Electrical Shock Hazard
Disconnect power before servicing.
Replace all parts and panels before operating.
Failure to do so can result in death or electrical shock.


