background image

3

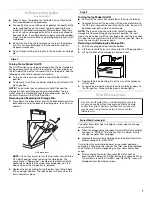
4. On models with notches:

Slide the indicator down into the notches, facing outward.

NOTE: The indicator will not easily slide into the notches 
if the rear bubble has not been popped.

Close the air filter door, and check that the indicator is 
visible through the rectangular hole in the door.

On models without notches:

Store the indicator in a visible place you will easily 
remember - either inside the refrigerator, or elsewhere in 
your kitchen or home.

Replacing the Air Filter

The disposable air filter should be replaced every 6 months, when 
the status indicator has completely changed from white to red. 
To order a replacement air filter, contact us using the 
assistance/service information following the warranty. 
1. Remove the old air filter by squeezing in on the side tabs.

2. Remove the old status indicator.
3. Install the new air filter and status indicator using the 

instructions in the previous sections.

Install Produce Preserver

(on some models)

On some models, your refrigerator's accessory packet includes a 
Produce Preserver, which should be installed prior to use. On 
some models, the Produce Preserver is already installed at the 
factory. 
The Produce Preserver absorbs ethylene, allowing the ripening 
process of many produce items to slow down. As a result, certain 
produce items will stay fresh longer. 

Installing the Produce Preserver (on some models)

The Produce Preserver pouch should be installed in its housing, 
which is located along an interior side wall of the crisper or 
convertible drawer. 

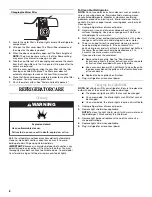
1. Remove the Produce Preserver pouch from its packaging.

2. Lift up on the housing in order to remove it from its mounting 

tab along the wall.

3. Open the housing by pulling up and out on the back of the top 

of the housing.

4. Place the pouch inside the housing, then snap the housing 

back together.

5. Place the housing back on the mounting tab along the wall.

Installing the Status Indicator (on some models)

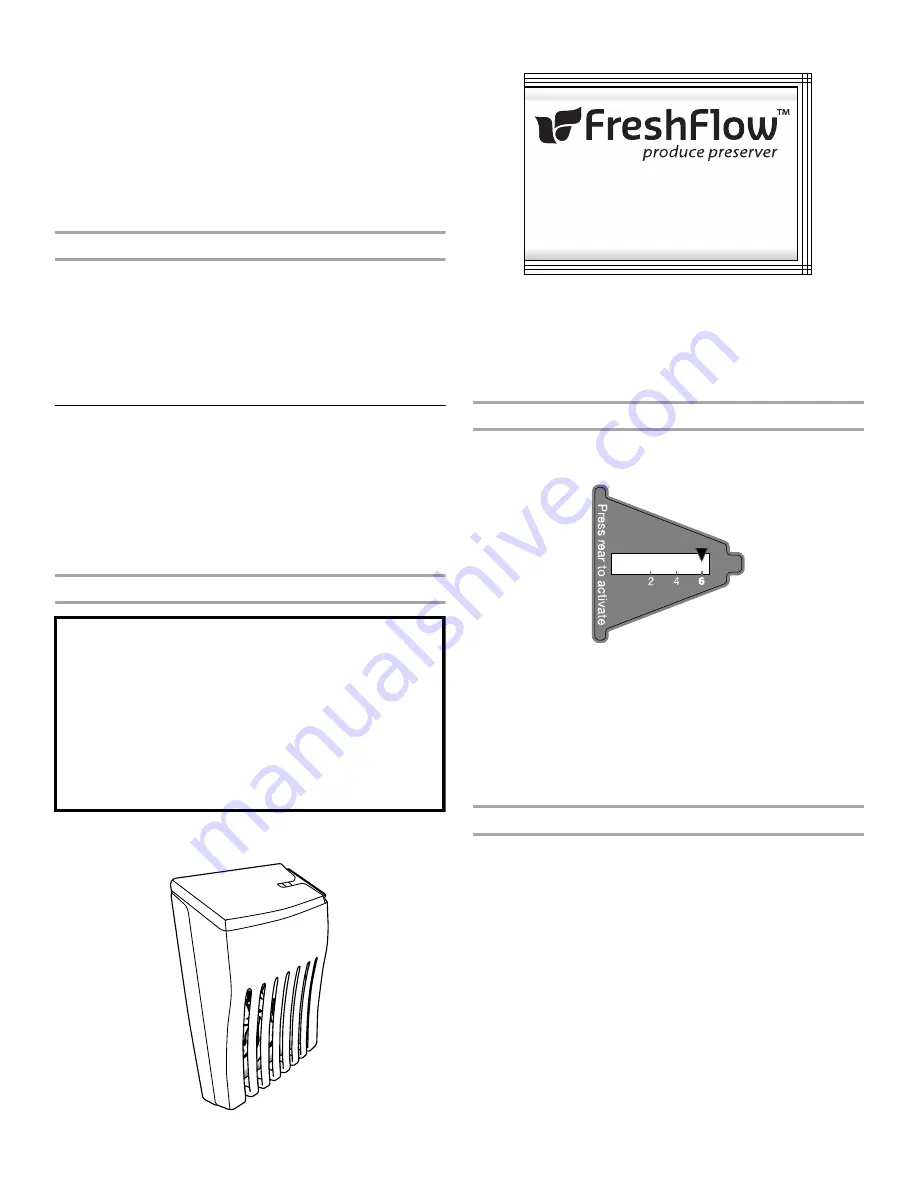
The Produce Preserver comes with a status indicator, which 
should be activated and installed at the same time the pouch is 
installed. 

1. Place the indicator face-down on a firm, flat surface.
2. Apply pressure to the bubble on the back of the indicator, until 

the bubble pops to activate the indicator.

3. Slide open the cap on the Produce Preserver housing.
4. Place the indicator in the top of the housing, facing outward.
5. Slide the cap closed, and check that the indicator is visible 

through the rectangular hole in the cap.
NOTE: The cap will not easily close if the indicator’s rear 
bubble has not been popped.

Replacing the Produce Preserver

The disposable pouch should be replaced every 6 months, when 
the status indicator has completely changed from white to red. 
To order a replacement, contact us using the assistance/service 
information following the warranty. 
1. Remove the old pouch from the Produce Preserver housing.
2. Remove the old status indicator.
3. Install the new pouch and status indicator using the 

instructions in the previous sections.

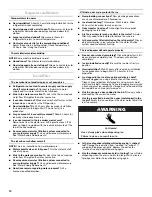
CAUTION: IRRITANT

MAY IRRITATE EYES AND SKIN. DANGEROUS FUMES 
FORM WHEN MIXED WITH OTHER PRODUCTS.

Do not mix with cleaning products containing ammonia, 
bleach or acids. Do not get in eyes, on skin or clothing. Do 
not breathe dust. Keep out of reach of children.

FIRST AID TREATMENT: Contains potassium 
permanganate. If swallowed, call a Poison Control Center or 
doctor immediately. Do not induce vomiting. If in eyes, rinse 
with water for 15 minutes. If on skin, rinse with water.

CA

UTION

IR

R

IT

A

N

T

Read cautions on bac

k.

A

TTENTION

IR

R

IT

A

N

T

Lisez des pr

udences sur le re

v

e

rs

.

CAUTION

IRRITANT

Read cautions on back.

ATTENTION

IRRITANT

Lire les mises en garde au dos.

Whirlpool Corporation, Benton Harbor MI 49022

MONTHS

REPLACE

Summary of Contents for Gold GSC25C6EY

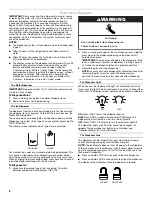
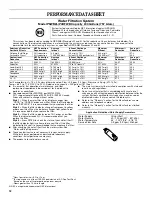
Page 1: ... 11 WATER FILTER CERTIFICATIONS 11 PERFORMANCE DATA SHEET 12 WARRANTY 13 SÉCURITÉ DU RÉFRIGÉRATEUR 14 UTILISATION DU RÉFRIGÉRATEUR 15 ENTRETIEN DU RÉFRIGÉRATEUR 21 DÉPANNAGE 22 ACCESSOIRES 24 FEUILLE DE DONNÉES SUR LA PERFORMANCE 25 GARANTIE 26 REFRIGERATORUSERINSTRUCTIONS W10168325A You can be killed or seriously injured if you don t immediately You can be killed or seriously injured if you don t...

Page 2: ... Refrigerator IMPORTANT Child entrapment and suffocation are not problems of the past Junked or abandoned refrigerators are still dangerous even if they will sit for just a few days If you are getting rid of your old refrigerator please follow these instructions to help prevent accidents Before You Throw Away Your Old Refrigerator or Freezer Take off the doors Leave the shelves in place so that ch...

Page 3: ...e pouch inside the housing then snap the housing back together 5 Place the housing back on the mounting tab along the wall Installing the Status Indicator on some models The Produce Preserver comes with a status indicator which should be activated and installed at the same time the pouch is installed 1 Place the indicator face down on a firm flat surface 2 Apply pressure to the bubble on the back ...

Page 4: ...button for 3 seconds When adjust mode is activated adjusting information will appear on the display screen NOTE To view Celsius temperatures press the LIGHT button when adjust mode is activated To return the display setting to Fahrenheit press LIGHT again When adjust mode is activated the display screen shows the refrigerator set point and FRIDGE appears Press LOCK to raise the set point or press ...

Page 5: ...ntrol panel Dual Evaporator on some models Some models come equipped with a dual sequential evaporation system which includes two separate evaporators for the refrigerator and freezer compartments Dual evaporation results in higher humidity which helps keep foods in the refrigerator from spoiling as quickly and improves food quality and freshness in the freezer due to decreased freezer burn In add...

Page 6: ...ubes are crushed before being dispensed This may cause a slight delay when dispensing crushed ice Noise from the ice crusher is normal and pieces of ice may vary in size When changing from crushed to cubed a few ounces of crushed ice will be dispensed along with the first cubes To Dispense Ice 1 Make sure the desired type of ice is selected To switch between cubed and crushed press ICE TYPE 2 Pres...

Page 7: ...it back into an upright position The release lever will click when the bin is securely in place Style 2 Turning the Ice Maker On Off To turn ON the ice maker simply lower the wire shutoff arm To manually turn off the ice maker lift the wire shutoff arm to the OFF arm up position and listen for the click Ice can still be dispensed but no more can be made NOTE The ice maker has an automatic shutoff ...

Page 8: ...r towels scouring pads or other harsh cleaning tools 1 Unplug refrigerator or disconnect power 2 Hand wash rinse and dry removable parts and interior surfaces thoroughly Use a clean sponge or soft cloth and a mild detergent in warm water 3 Wash stainless steel and painted metal exteriors with a clean sponge or soft cloth and a mild detergent in warm water 4 There is no need for routine condenser c...

Page 9: ...ater dripping on the heater during defrost cycle Popping contraction expansion of inside walls especially during initial cool down Water running may be heard when ice melts during the defrost cycle and water runs into the drain pan Creaking Cracking occurs as ice is being ejected from the ice maker mold The doors will not close completely Door blocked open Move food packages away from door Bin or ...

Page 10: ...urce line Reverse osmosis water filtration system connected to your cold water supply This can decrease water pressure See Water Supply Requirements Questions remain regarding water pressure Call a licensed qualified plumber Off taste odor or gray color in the ice New plumbing connections New plumbing connections can cause discolored or off flavored ice Ice stored too long Discard ice Wash ice bin...

Page 11: ...ser for 2 to 3 seconds after releasing the dispenser lever pad New installation Flush the water system See Prepare the Water System or Water and Ice Dispensers Recently changed water filter Flush the water system See Prepare the Water System or Water and Ice Dispensers The dispenser water is not cool enough on some models NOTE Water from the dispenser is chilled to only 50 F 10 C New installation ...

Page 12: ...th state and local laws and regulations Do not use with water that is microbiologically unsafe or of unknown quality without adequate disinfection before or after the system Systems certified for cyst reduction may be used on disinfected waters that may contain filterable cysts Refer to the Warranty section for the Manufacturer s name address and telephone number Refer to the Warranty section for ...

Page 13: ...emoval and reinstallation of your major appliance if it is installed in an inaccessible location or is not installed in accordance with Whirlpool s published installation instructions 11 Replacement parts or repair labor on major appliances with original model serial numbers that have been removed altered or cannot be easily determined 12 Discoloration rust or oxidation of stainless steel surfaces...

Page 14: ...ISSEMENT DANGER Voici le symbole d alerte de sécurité Ce symbole d alerte de sécurité vous signale les dangers potentiels de décès et de blessures graves à vous et à d autres Tous les messages de sécurité suivront le symbole d alerte de sécurité et le mot DANGER ou AVERTISSEMENT Ces mots signifient AVERTISSEMENT réfrigérateur prendre quelques précautions fondamentales y compris les suivantes Pour ...

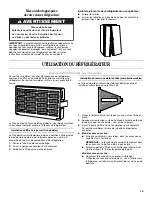
Page 15: ...à air avec aérations en la soulevant Sur certains modèles l arrière de la porte comporte des encoches 4 Modèles avec encoches Faire glisser le témoin vers le bas dans les encoches en l orientant vers l extérieur REMARQUE Le témoin ne glissera pas facilement dans les encoches si la bulle arrière n a pas éclaté Fermer la porte du filtre à air et vérifier que le témoin est visible à travers le trou r...

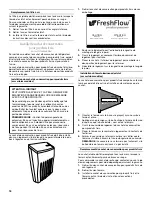
Page 16: ... en même temps que le sachet 1 Orienter le témoin vers le bas en le plaçant sur une surface ferme et plane 2 Appliquer une pression sur la bulle située à l arrière du témoin jusqu à ce que la bulle éclate ceci active le témoin 3 Ouvrir le couvercle du logement du sachet de conservation pour produits frais 4 Placer le témoin sur le sommet du logement en l orientant vers l extérieur 5 Fermer le couv...

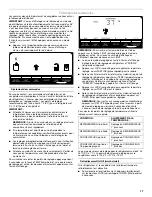
Page 17: ...r visualiser et ajuster les points de réglage appuyer pendant 3 secondes sur la touche TEMP température Lorsque le mode de réglage est activé les données d ajustement apparaissent sur l écran d affichage REMARQUE Pour visualiser les températures en Celsius appuyer sur la touche LIGHT éclairage lorsque le mode de réglage est activé Pour revenir au mode d affichage en Fahrenheit appuyer de nouveau s...

Page 18: ... tout en gardant les portes ouvertes comme lors du nettoyage de l intérieur du réfrigérateur appuyer sur n importe quel bouton sur le tableau de commande Le son de l alarme sera temporairement supprimé mais l icône de porte entrouverte restera affichée sur le tableau de commande du distributeur Évaporateur double sur certains modèles Certains modèles sont équipés d un double système d évaporation ...

Page 19: ...achine à glaçons dans le congélateur lorsqu on appuie sur le levier du distributeur Pour éteindre la machine à glaçons voir Machine à glaçons et bac d entreposage La machine à glaçons peut produire à la fois de la glace concassée et des glaçons Avant toute distribution de glace sélectionner le type de glace préféré avec le bouton ICE TYPE type de glace L écran d affichage indique le type de glace ...

Page 20: ...tion OFF vers la droite REMARQUE La machine à glaçons comporte un système d arrêt automatique pour éviter le débordement du bac d entreposage dans les conditions normales de fonctionnement Le détecteur de la machine à glaçons arrêtera automatiquement la production de glaçons mais le commutateur restera en position ON vers la gauche Pour retirer et réinstaller le bac à glaçons 1 Appuyer sur le levi...

Page 21: ... environ une fois par mois pour éviter une accumulation d odeurs Essuyer les renversements immédiatement IMPORTANT Comme l air circule entre les deux sections toutes les odeurs formées dans une section seront transférées à l autre Vous devez nettoyer à fond les deux sections pour éliminer les odeurs Pour éviter le transfert d odeurs et l assèchement des aliments envelopper ou recouvrir hermétiquem...

Page 22: ...efroidira pas le compartiment plus rapidement Le moteur semble fonctionner excessivement Il se peut que votre nouveau réfrigérateur fonctionne plus longtemps que l ancien grâce à son compresseur à haute efficacité et ses ventilateurs Le réfrigérateur peut fonctionner plus longtemps encore si la température de la pièce est chaude si une importante quantité de nourriture y est ajoutée si les portes ...

Page 23: ...réfrigérateur Minimiser les ouvertures de porte et garder les portes complètement fermées Glaçonseteau La machine à glaçons ne produit pas ou pas suffisamment de glaçons Le réfrigérateur est il connecté à l alimentation en eau et le robinet d arrêt d eau est il ouvert Brancher le réfrigérateur à l alimentation en eau et ouvrir le robinet d arrêt d eau complètement La canalisation de la source d ea...

Page 24: ...é à l alimentation en eau et le robinet d arrêt d eau est il ouvert Brancher le réfrigérateur à l alimentation en eau et ouvrir le robinet d arrêt d eau complètement La pression de l eau est elle inférieure à 30 lb po 207 kPa La pression de l eau du domicile détermine l écoulement d eau du distributeur Voir Spécifications de l alimentation en eau Déformation du conduit de canalisation d eau du dom...

Page 25: ...it d eau doit être installé conformément aux lois et règlements locaux et à ceux de l État concerné Ne pas utiliser pour le filtrage d une eau microbiologiquement polluée ou de qualité inconnue en l absence d un dispositif de désinfection adéquat avant ou après le système Les systèmes certifiés pour la réduction de kyste peuvent être utilisés pour l eau désinfectée qui peut contenir des kystes fil...

Page 26: ...ivant la date d achat 6 Toute perte d aliments ou de médicaments due à une défaillance du réfrigérateur ou du congélateur 7 Le ramassage et la livraison Ce gros appareil ménager est conçu pour être réparé à domicile 8 Les réparations aux pièces ou systèmes résultant d une modification non autorisée faite à l appareil 9 Les frais de déplacement et de transport pour le service du produit si votre gr...

Page 27: ...rigération Pour assistance ou service aux É U composez le 1 800 253 1301 Au Canada composez le 1 800 807 6777 Si vous avez besoin de plus d assistance vous pouvez écrire à Whirlpool en soumettant toute question ou problème à l adresse suivante Aux États Unis Whirlpool Brand Home Appliances Customer eXperience Center 553 Benson Road Benton Harbor MI 49022 2692 Au Canada Whirlpool Brand Home Applian...

Page 28: ...erved Tous droits réservés Registered Trademark TM Trademark of Whirlpool U S A Whirlpool Canada LP Licensee in Canada Marque déposée TM Marque de commerce de Whirlpool U S A emploi sous licence par Whirlpool Canada LP au Canada 1 11 Printed in Mexico Imprimé au Mexique ...

Reviews: