17
Cookware Tips
■
Select a pan that is about the same size as the surface
cooking area. Cookware should not exceed more than 1 in.
(2.5 cm) outside the area.
■
For best results and greater energy efficiency, use only flat-
bottomed cookware that makes good contact with the
surface cooking area. Cookware with rounded, warped,
ribbed (such as some porcelain enamelware), or dented
bottoms could cause uneven heating and poor cooking
results.
■
Cookware designed with slightly indented bottoms or small
expansion channels can be used.
■
Cookware with a non-stick finish has heating characteristics
of the base material.
■
Check for rough spots on the bottom of metal or glass cookware
which will scratch the ceramic glass surface (on some models).
■
Use flat-bottomed cookware for best heat conduction from
the surface cooking area to the cookware. Determine flatness
with the ruler test. Place the edge of a ruler across the bottom
of the cookware. Hold it up to a light. No light should be
visible under the ruler. Rotate the ruler in all directions and
look for any light.
■
Do not leave empty cookware, or cookware that has boiled
dry, on a hot surface cooking area. The cookware could
overheat, causing damage to the cookware or the surface
cooking area.
OVEN SELF-CLEANING
CYCLE
(on some models)
The self-cleaning cycle operates with the easy-to-use electronic
control. To use this cycle properly, follow the step-by-step
instructions in this section.
IMPORTANT: The health of some birds is extremely sensitive to
the fumes given off during the Self-Cleaning cycle. Exposure to
the fumes may result in death to certain birds. Always move birds
to another closed and well ventilated room.
How the Self-Cleaning Cycle Works
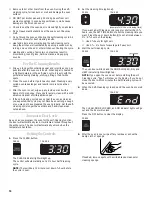
The self-cleaning cycle uses very high heat to burn away soil and
grease. During the cycle, the oven gets much hotter than it does
for normal baking or broiling - approximately 875ºF (468ºC). This
high heat breaks up the soil or grease and burns it away.
Your oven is preset for a 3
¹⁄₂
hour self-cleaning cycle. However,
the cycle time can be adjusted to the amount of soil in your oven.
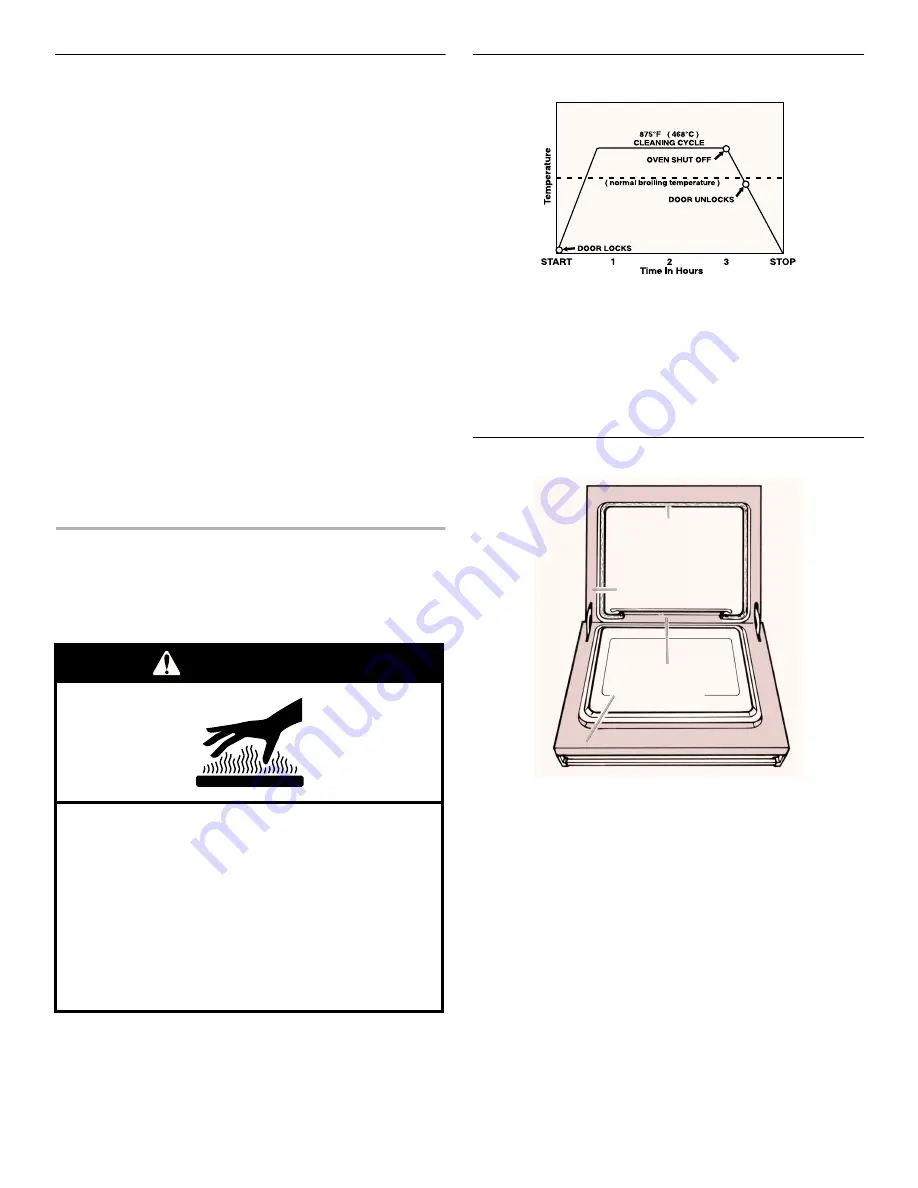
The graph above is representative of a 3-hour self-cleaning cycle.
Note that the heating stops when the 3-hour setting is up, but it
takes longer for the oven to cool enough to unlock the oven door.
Before You Start
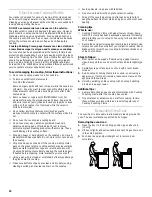
Before you start the self-cleaning cycle, make sure you:
■
Hand-clean the areas shown. They do not get hot enough
during the cleaning cycle for soil to burn away, and could get
baked on during cleaning. Use hot water and detergent or a
soapy steel-wool pad for cleaning.
NOTE: DO NOT clean, move or bend the gasket. Poor
cleaning, baking and roasting may result.
■
Wipe out any loose soil or grease. This will help reduce
smoke during the cleaning cycle.
■
Remove all items from the storage drawer.
■
Remove the broiler pan grid and anything else being stored in
the oven.
■
Remove the oven racks from the oven if you want them to
remain shiny and easy to slide.
NOTE: If oven racks are cleaned in the self-cleaning cycle,
they will become discolored and more difficult to slide.
If you clean racks in the self-cleaning cycle, place them on
the 2nd, 3rd and 4th rack guides.
WARNING
Burn Hazard
Do not touch the oven during the
Self-Cleaning cycle.
Keep children away from oven during
Self-Cleaning cycle.
Do not use commercial oven cleaners in
your oven.
Failure to follow these instructions can result in
burns, or illness from inhaling dangerous fumes.
DO NOT
hand-clean
gasket
Hand-clean frame
Hand-clean door
around edge
Summary of Contents for IJP85801
Page 47: ...47 Notes ...
Page 48: ...10 00 9754170 Printed in U S A Imprimé aux É U ...


