background image

Summary of Contents for MH6700XM

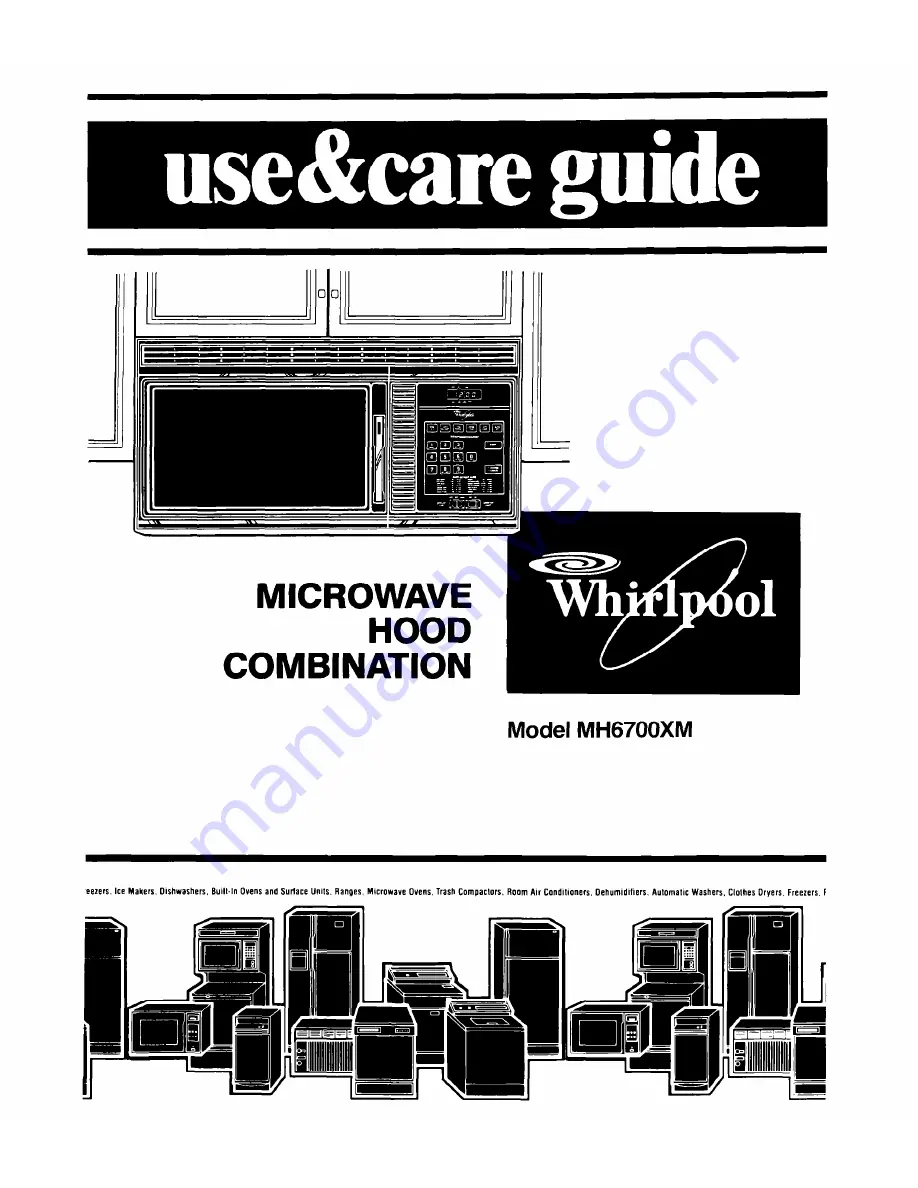
Page 1: ...Model MH6700XM eezers Ice Makers DIshwashers Buill In Ovens and Surlace Umls Ranges Microwave Ovens Trash Compaclors Room AH Cond l oners Oehumidlliers Automatic Washers Clolhes Oryers Freezers f ...

Page 2: ...Oven Cleaning the Grease Filter Replacing the Cooktop and Oven Lights Operating Safety Precautions If You Need Service or Assistance Microwave Oven Warranty Page 15 18 19 21 22 22 22 22 23 23 23 24 25 27 28 01988 Whirlpool Corporation parts Sind fi fl tl1 W S MODEL AND SERIAL Mot III I III TEMPERATURE CONTROL PANEL DEFROST GUIDE EXHAUST FAN AND COOKTOP LIGHT SWITCHES II SPEED FLUORESCENT COOKTOP L...

Page 3: ...enough to support its weight l Has been properly connected to electrical supply and grounded See Installation Instructions l Is not used by children or anyone unable to operate it properly l Is properly maintained l Is used only for jobs expected of a home microwave oven PRECAUTIONS TO AVOID POSSIBLE EXPOSURE TO EXCESSIVE MICROWAW ENERGY DO NOT attempt to oper ate this oven with the door open sinc...

Page 4: ...may result 13 Keep cord away from heated surfaces for electric shock may result 14 Do not let cord hang over edge of table or counter for electric shock may result 15 See door surface cleaning instructions on page 23 16 To reduce the risk of fire in the oven cavity a Do not overcook food Carefully attend appliance if paper plastic or other com bustible materials are placed inside the oven to facil...

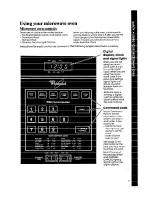
Page 5: ...Digital display clock and signal lights When you are not using the micro wave oven it is an accurate digital clock When you are using the micro I wave oven it dis plays time settings signal lights and shows you what Number Pads you touched While the oven is running a Signal Light or lights will be on to show what the oven is doing Command pads Touch Command Pads to tell the microwave oven what to ...

Page 6: ...Exhaust Fan switch will not turn the fan OFF Press the Cooktop Light switch to the right to turn the light ON Press switch to the left to turn it OFF Setting the clock You can cook without setting the clock but the Display will show a colon for 5 minutes afterthe cooking is done then go blank THIS HAPPENS DO THIS 1 Touch CLOCK SET 2 Touch CHANGE CANCEL Pad once The CLOCK Signal Light will come on ...

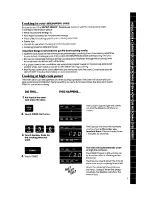
Page 7: ...team during cooking l Most foods continue to cook after they are removed from the oven Cover food and let stand 5 to10 minutes depending on size and density Cooking at high cook power The oven door can be opened any time during operation The oven will automatically stop cooking and maintain the time setting for up to 5 minutes Close the door and touch STARTto continue cooking DO THIS 1 Put food in...

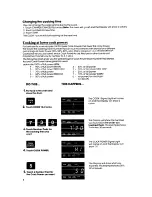
Page 8: ...age of Cook Power each Number Pad stands for and Cook Power name generally used automatic 100 of full power HIGH 9 90 of full power REHEAT 4 40 of full power 8 80 of full power MED HIGH 3 30 of full power MED LOW 7 70 of full power 2 20 of full power 6 60 of full power MEDIUM 1 10 of full power WARM 5 50 of full power DO THIS 1 Put food in the oven and close the door 2 Touch COOK I 2 once 3 Touch ...

Page 9: ...isplay will show the time of day Changing cook powers l Cook Power can be changed at any time during the cooking cycle Touch COOK POWER Touch a number for the new Cook Power Touch START The oven will continue to cook at the new Cook Power OR Touch COCK POWER Touch CHANGE CANCEL Pad once then touch STARTif you wont to change a lower Cook Power to HIGH Cooking in two cycles For best results some rec...

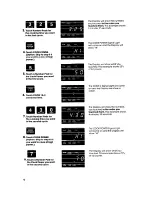
Page 10: ...d for the Cook Power you want in the first cycle 6 Touch COOK I 2 a second time The COOK 2 Signal Light will come on and the Display will show a m colon The Display will show the numbers 7 Touch Number Pads for the cooking time you want in the second cycle 8 Touch COOK POWER Option Skip to step 10 if you want to cook at hlgh power The COOK POWER Signal Light will come on and the Display will show ...

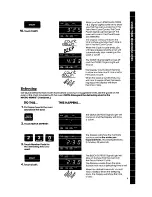
Page 11: ... ing stops the Display will show the time of day Use Quick Defrost to thaw frozen food before cooking For suggested times see the guide on the oven or the chart provided with the oven NOTE Disregard the defrosting chart in the MICRO MENUS dookbook DO THIS 1 Put frozen food in the oven and close the door m 2 Touch QUICK DEFROST 3 Touch Number Pads for the defrosting time you want THIS HAPPENS The Q...

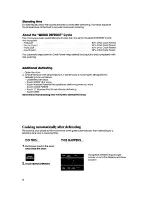
Page 12: ...th less cooking Additional defrosting 1 Open the door 2 Check the food with long tined fork if center area is hard frozen set additional defrosting time as follows Close the oven door Touch COOK I 2 once Touch Number Pads for the additional defrosting time you want Touch COOK POWER Touch 2 Number Pad for additional defrosting Touch START Remember that standing time will further defrost the food Co...

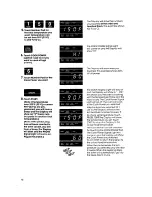
Page 13: ...e COOK 1Signal Light will come on the QUICK DEFROST Signal Light will go off and the Display will show a colon The Display will show the numbers you touched in the order you touched them This example shows 2 minutes 30 seconds The COOK POWER Signal Light will come on and the Display will show HI The Display will show 001 This tells you that the oven will operate at 0 power The COOK 2 Signal Light ...

Page 14: ... to show how much defrosting time is left When the Quick Defrost Cycle ends you will hear a beep the oven light and fan will turn off and Cook 1Cycle will begin at 0 Cook Power The QUICK DEFROST Signal Light will go off the COOK 1and COOK 2 Signal Lights will stay on The Display counts down to show how much standing time is left When the Cook 1Cycle ends you will hear a beep and the oven will auto...

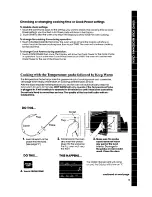
Page 15: ...e Cooking with the Temperature probe followed by Keep Warm The Temperature Probe helps take the guesswork out of cooking roasts and casseroles See page 18 for helpful information on cooking different types of food After the food reaches the temperature you set the oven will automatically keep the food warm for up to 60 minutes KEEP WARM will only operate if the Temperature Probe is plugged in It w...

Page 16: ...how HI The Display will show what you touched This example shows 60 of full power The COOK1 Signal Light will stay on and the Display will show a 9OF This shows you the oven is cooking with the Temperature Probe and the food is cold The Cook Power Signal Light will go off The oven will cook in the Cook Power you selected After the food has reached 9O F 32 C the Display will show the temperature in...

Page 17: ...p of the probe is in muscle but not touching the center of the liquid fat or bone l Casseroles cooked using the Temperature l Dry meat loaf mixtures don t work well Probe should be made from precooked foods Do not use raw meats raw vegetables l Remember that roasts may vary in size and cream sauces in casseroles shape and composition Use the timings for minutes per pound as a guideline as well as ...

Page 18: ...ll continue to cook during the standing time Food temperature will rise 5 to IO during the standing time The following chart shows how to use Temperature Probe in different foods Remove the food and the Temperature Probe from the oven when it reaches the recommended temperature setting unless you wish the oven to hold the food in the Keep Warm Cycle FOOD PROBE PLACEMENT TEMPERATURE SETTING TIPS Ap...

Page 19: ...delay the start of cooking for up to 12 hours 1 DO THIS Make sure the CLOCK is set to correct time of day See page 6 2 Put food in the oven and close the door See CAUTION on page 20 3 Touch AUTO START 4 Touch Number Pads for the time of day you want the food to start cooking 5 Touch COOK l 2 once 160 170 F 150 160 F If soup has additional solid ingredients increase temperature setting 150 170 F Pa...

Page 20: ...n Auto Start you will hear a beep and the oven will automafically start the Cook cycle The AUTO STARTSignal Light will go off and the COOK 1Signal Light will stay on The Display counts down the time to show you how much time is left in the Cook cycle When the cooking time ends you will hear 3 beeps When the beep ing stops the Display will show the time of day CAUTION Use foods that will not go bad...

Page 21: ...ight will come on and the Display will show HI The Display will show 001 This tells you that the oven will Operate at 0 power The COOK1 Signal Light will stay on to show you that the timer is running The Cook Power Signal Light will be off The Display counts down to show you how much time is left During the countdown the oven will be dark and the fan will be off When the set time ends you will hea...

Page 22: ...g Rack when cooking in more than one container The metal rack can be turned upside down to help fit taller containers on the bottom of the oven See the MICRO MENUSOCookbook provided with your oven First Position Second Position Note Do not store the metal rack in the oven Arcing and damage to the oven can result if someone accidentally starts the oven Inserting the rack l Insert the back of the ra...

Page 23: ...uld be removed and cleaned often at least once a month NOTE If your microwave hood combination has an extra charcoal filter from the Recirculating Kit RCH6000 788000 it should be replaced every 12 months 1 For your personal safety turn off the electric power at the main power supply 4 To replace insert the front filter edge into the back of the light lens Push up the back edge of the filter then p...

Page 24: ...ght lens and fluorescent cooktop lamp as described above Pull down on the white con nector plug to disconnect 24 2 Remove the oven light cover screw slide the light cover off and pull the oven light assembly out of the oven cavity 3 Remove the light lens by pul ling the back corners one at a time Grasp lens with both hands and pull again to re lease front edge from clips 4 Replace the light lens 5...

Page 25: ...dding ingredients coffee etc resulting in harm to the oven and possible personal injury For best results stir any liquid several times before heating or reheating USE HOT PADS Microwave energy does not heat contain ers but the hot food does DO NOT heat store or use flammable inflam mable or corrosive materials in or near the oven NEVER lean on the door or allow a child to swing on it when the door...

Page 26: ...ld be slightly firm Wrap in foil and set aside for 5 minutes They will finish cooking while standing Starting a microwave oven when it s empty is not recommended If you experiment put a container of water in the oven It is normal for the inside of the oven door to look wavy after the oven has been running for a while If a fire should start in the oven cavity l keep door closed 0 turn oven off l di...

Page 27: ...y to protect the microwave oven if the tempera ture gets too hot 2 If you need assistance Call Whirlpool COOL LINE service as sistance telephone number Dial free from anywhere in the U S l 800 253 1301 and talk with one of ourtrained Consultants The Consultants can instruct you in how to obtain satisfactory operation from your appliance or if service is necessary recommend a qualified service comp...

Page 28: ... use C Pick up and delivery This product is designed to be repaired in the home D Damage to range product caused by accident misuse fire flood acts of God or use of products not approved by Whirlpool E Any labor costs during the limited warranty WHIRLPOOL CORPORATION SHALL NOT BELIABLE FOR INCIDENTAL OR CONSEQUENTIAL DAMAGES Some states do not allow the exclusion or limitation of incidental or con...

Reviews: