background image

Summary of Contents for MH7110XB

Page 1: ...ur Mlcrowave Hood Combination 8 Using Your Micro wave Oven 20 Caring for Your Microwave Hood Combination 46 Cooking Guide 50 Questions and Answers 54 If You Need Assistance or Service 55 Warranty 60 1 800 253 1301 Call uo with queotiono or CommonIS MICROWAVE HOOD COMBINATION MODEL MH711OXB ...

Page 2: ... Here is a brief explanation of the use of the warning symbol This symbol will help alert you to such dangers as personal injury burns fire and electriil shock Our Consumer Assistance Center number l 800 253 1301 is toll free 24 hours a day If you ever have a question concerning your appliance s operation or if you need service first see If You Need Assistance or Service on page 55 If you need fur...

Page 3: ...ided Installation pool and the like Instructions l Do not immerse cord or plug in water l Some products such as whole eggs in the l Keep cord away from heated surfaces shell and sealed containers for ex l Do not let cord hang over edge of table ample closed glass jars coti explode or counter and should not be heated in this oven l This appliance is suitable for use l Do not heat store or use flamm...

Page 4: ...r storage purposes Do not leave paper products cooking utensils or food in the cavity when not in use l Because of the automatic exhaust fan feature the following cautions must be observed Do not leave the area when using your cooktop at a high setting Accidental fires from boilovers or spattering on the surface unit could spread especially if the exhaust fan is operating Do not allow grease and s...

Page 5: ...ng receptacle near the appli ance SAVE THESE INSTRUCTIONS PRECAUTIONS TOAVOID POSSIBLE EXPOSURE TO 1 EXCESSIVE MICROWAVE ENERGY Do not attempt to operate this oven with the door open since open door operation can result in harmful exposure to micro wave energy It is important not to defeat or tamper with the safety interlocks Do not place any object between the oven front face and the door or allo...

Page 6: ...ral times before heating or reheating Liquids heated in certain containers especially cylindrical containers may become over heated The liquid may splash out with a loud noise during or after heating or when adding ingredients coffee etc resulting in harm to the oven and possible personal injury Never lean on the door or allow a child to swing on it when the door is open Injury could result Use ho...

Page 7: ...er or other printed paper in the oven Fire could result Do not dry flowers fruit herbs wood paper gourds or clothes in the oven Fire could result Do not try to melt paraffin wax in the oven Paraffin wax will not melt in a microwave oven because it allows microwaves to pass through it General information Fuee box If your electrical power line or outlet voltage is less than 110 volts cooking times m...

Page 8: ...ck 17 Control panel features 11 Setting the clock 18 Uslng the exhaust fan 14 Using the Minute Timer 19 How microwave cooking works Mkrowave ovens ars safe Microwave energy E not hot It causes food to make its own heat and it s this heat that cooks the food Microwaves are like TV waves or light waves You cannot see them but you can see what they do Magnetron Mixing antenna Oven cevity A magnetron ...

Page 9: ... time The microwaves disturb water molecules in the food As the molecules bounce around bumping into each other heat is made like rubbing your hands together This is the heat that does the cooking Radio interference Operation of the microwave oven may cause interference to your radio TV or similar equipment When there is interference it may be reduced or eliminated by taking the following measures...

Page 10: ...r countertop or turn on as a night light See page 15 for more information 10 0 6 7 Exhaust Fan and Cooktop Light Switches See pages 14 l 7 for more information 8 Control Panel Touch the pads on this panel to perform all functions See paw 1l 1 3 for more information 9 Vent Grille 10 Cooking Guide Use as a quick refer ence for Auto Cook and Auto Defrost settings 11 Temperature Probe Socket on oven w...

Page 11: ...tors to tell you time of day cooking time settings and cooking functions selected 2 COOK TIME Touch this pad followed by Number Pads to set a cooking time See pages 21 23 and 24 for more informa tion 3 COOK POWER Touch this pad followed by a Number Pad to set the amount of microwave energy released to cook the food The higher the number the higher the microwave power or cooking speed See page 22 f...

Page 12: ...n your microwave oven The oven will automatically heat for a preset time at a preset Cook Power See page 43 for more informa tion 13 DINNER PLATE Touch this pad to reheat a dinner sized plate of refriger ated food The oven will automatically heat for a preset time at preset Cook Powers See page 42 for more informa tion 14 Number Pads Touch Number Pads to enter cooking times Cook Powers temperature...

Page 13: ... Pad 2 for four seconds to disable all signals To turn signals back on Repeat steps under To disable audible signals above NOTE Three tones followed by two tones will sound when audible signals are turned on or off Interrupting cooking You can stop the oven during a cycle by opening the door The oven stops heating and the fan stops but the light stays on To restart cooking close the door and if yo...

Page 14: ...o protect the OR oven It may stay on up to an hour to cool the oven When this occurs the Fan OFF Pad will not turn the fan off 2 Turn off fan when desired To set fan to run for a specific time 1 Start fan TOUCH OR 2 Choose timer NOTE If both the fan and light are operating and the TIMER Pad is touched twice both the fan and light will be controlled by the timer The Display will alternate between F...

Page 15: ...SEE To cancel timer NOTE Canceling the timer will cause the fan to shut off however canceling the fan will not cancel the timer Using the cooktop countertop light The three pads on the bottom right of the control panel control the cooktop countertop light 1 Choose light TOUCH I NIGHT LIGHT I 15 ...

Page 16: ... timer NOTE If both the fan and light are operating and the TIMER Pad is touched twice both the fan and light will be controlled by the timer The Display will alternate between FAN and LIGHT one time before TIME is displayed TOUCH YOU SEE twice within 3 seconds 3 Set time Example for 20 minutes TOUCH YOU SEE 16 ...

Page 17: ...rporation Attention Customer Service Dept 1900 Whirlpool Drive LaPorte IN 48350 Inserting the rack l Do not store the metal rack in the oven Arcing and damage to the oven could resutt if someone accidentally starts the oven First position First position Insert the rack securely into the rack supports on the side walls of the oven l Do not operate the oven with the metal rack stored on the floor of...

Page 18: ...me of day is not set 888 88 will show on the Display until you touch CLOCK NOTES l You can only set the clock if the oven is not cooking food l if you touch in an incorrect time and touch CLOCK three tones will sound Enter the correct time l if you touch OFF CANCEL while setting the clock the Display will show the last time of day set or if no time of day has been set To set time 1 Choose setting ...

Page 19: ...1 minute 30 seconds TOUCH YOU SEE NOTE If you enter more than 4 digits three tones will sound Touch START ENTER to count down the 3digit time m I you have entered or touch OFF CANCEL to clear the Display To start over touch ml TIMER SET and reenter desired time rm 3 Start countdown TOUCH NOTE If you do not do this step within A l three seconds of doing Step 2 START will be displayed You then have ...

Page 20: ...es this oven at 850 watts you may use a reliable cookbook and recipes developed for micro wave ovens previousty rated at 700 800 watts l ALWAYS cook food for the minimum recommended cooking time If necessary touch ADD MINUTE while the oven is operating or after it has completed the cooking cycle see page 44 for more informa tion Then check for doneness to avoid overcooking the food Getting the bes...

Page 21: ...en and close the door 2 Set cooking time Example for 1 minute 30 seconds TOUCH III ml ml YOU SEE 3 Start oven TOUCH YOU SEE At end of cooking time Changing instructions You can change the cooking time after cooking starts by repeating Step 2 21 ...

Page 22: ...ent such as beverages If food contains eggs or cream choose a lower power Heating large quantities of liquids such as water or soup stock Reheating soups or casseroles Cooking and heating vegetables fish meat etc when you need a Cook Power lower than HIGH or when food is cooking too fast Cooking requiring special care such as for high protein sauces cheese and egg dishes and casseroles that need t...

Page 23: ...inutes 30 seconds TOUCH El lzl lol YOU SEE 3 Set Cook Power Example for 50 Cook Power TOUCH YOU SEE 4 Start oven YOU SEE At end of cooking time YOU SEE Changing instructions You can change the cooking time or Cook Power after cooking starts by repeating Steps 2 and or 3 23 ...

Page 24: ...oven can be set to change from one to another automatically for up to two cycles 1 Put food in oven and close the door 2 Set cooking tlme for first cycle TOUCH Example for 7 minutes 30 seconds TOUCH YOU SEE 3 Set Cook Power for first cycle TOUCH YOU SEE Example for 50 Cook Power TOUCH YOU SEE El 4 Repeat Steps 2 and 3 to set cooking time and Cook Power for the second cycle 24 ...

Page 25: ...prepared foods without needing to program times and Cook Powers AUTO COOK has preset times and Cook Powers for five major food categories Casseroles Baked Potatoes Baked Goods FreshlCanned Vegetables and Frozen Vegetables All you do is touch the Number Pad assigned to the desired category and enter the number of items or servings being heated Your microwave oven does the rest NOTE See Microwave co...

Page 26: ... 4 Enter quantity servings Example for 2 servings TOUCH YOU SEE NOTE If the quantity you entered is not correct you can change it by touching AUTO COOK again and starting over 5 Start oven TOUCH YOU SEE At end of cooking time Auto cook chart I I I NUMBER OF SERVINGS ITEMS YOU CATEGORY FOOD CAN COOK I I 1 I Casserole I 1 2 I 2 Baked Potatoes 1 4 3 Baked Goods 1 2 4 Fresh Canned Vegetables 1 4 5 Fro...

Page 27: ...for each food l To defrost items not listed in Auto defrost chart on pages 29 and 30 use 30 Cook Power Refer to a reliable cookbook for defrosting information 1 Put frozen food in oven and close the door 2 Choose AUTO DEFROST TOUCH YOU SEE mm 3 Choose food category 1 for meat 2 for poultry 3 for fish Example for meat TOUCH YOU SEE LIl miliHm Then 4 Enter food s weight in pounds and tenths of a pou...

Page 28: ...e is over Display will prompt you to turn over food Open door turn over food and shield any warm portions NOTE If you do not open the door within two minutes the Display will resume the countdown 7 Restart oven At end of defrosting time 28 ...

Page 29: ...reas Place on a microwavable roasting rack Chuck Roast with aluminum foil Rib Roast Turn over Cover warm areas Place on a microwavable roasting rack with aluminum foil Rolled Rump Turn over Cover warm areas Place on a microwavable roasting rack Roast with aluminum foil Lamb Cubes for Remove thawed portions with Place in a microwavable baking dish Stew Chops fork Return remainder to oven 1 inch thi...

Page 30: ...e in a microwavable baking dish Scallops Separate and rearrange Place in a microwavable baking dish Poultry setting FOOD AT PAUSE SPECIAL INSTRUCTIONS Chicken Whole up to Turn over finish defrosting Place chicken breast side up on a 9 Ibs breast side down Cover microwavable roasting rack Finish warm areas with aluminum defrosting by immersing in cold water foil Remove giblets when chicken is parti...

Page 31: ...ator freezer that does not maintain a tempera ture of 0 F or below always program a lower food weight for a shorter defrosting time to prevent cooking the food l If the food is kept outslde the freezer for up to 20 minutes enter a lower food weight l If the fcxxf Is kept outalde the freezer for more than 20 minutes and for defrosting ready made food defrost by time and power and let stand after de...

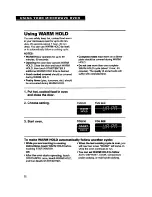
Page 32: ...ls kept warm on a dinner plate should be covered during WARM HOLD l Do not use more than one complete WARM HOLD cycle about 1 hour 40 minutes The quality of some foods will suffer with extended time 1 Put hot cooked food in oven and close the door 2 Choose setting 3 Start oven TOUCH YOU SEE To make WARM HOLD automatically follow another cycle l While you are touching In cooking l When the last coo...

Page 33: ...e Display three tones will sound and the oven you chose between 90 F and 200 F See will not turn on After correcting the problem your Cookbook for helpful information on or removing the probe touch START cooking different types of food ENTER to clear the Display 1 Insert probe into food Insert at least of the Temperature Probe into the food See page 35 2 Place food in oven and plug probe into sock...

Page 34: ...mperature increases by 5 F If the temperature does not change after 20 minutes the Display will show CHECK and PROBE When food reaches the desired temperature To change final food temperature after oven has started 1 Touch PROBE TEMP You will see the current set temperature 2 Reenter desired temperature 3 Touch START ENTER NOTE If you do not touch START ENTER within one minute after entering the n...

Page 35: ...etting in several of the items all the mugs may not heat at the same rate l Dry meat loaf mixtures do not work well l Check pork and poultry with thermometer in 2 3 places to ensure adequate doneness l Roasts may vary in size shape and composition Use the Temperature Probe as a guide Don t l let probe or probe cable touch any part of the oven interiir l let probe touch foil ii used You can keep fo...

Page 36: ...nder Cooking with the temperature probe on page 33 2 Choose setting 3 Choose food category See Auto roast chart on page 37 for categories Example for Category 1 TOUCH YOU SEE Roast Beef rare 111 4 Start oven TOUCH YOU SEE When food temperature reaches 90 F The displayed temperature will change each time food temperature increases by 5 F If the temperature does not change after 20 minutes the Displ...

Page 37: ...at or bone Shield top of roast with alumi num foil sauce or vegetables Cover roast with foil after cooking and let stand a few minutes 4 Roast Pork well Put tip of probe in center of largest muscle but not touching fat or bone Shield top of roast with alumi num foil sauce or vegetables Cover roast with foil after cooking and let stand a few minutes 5 Pouttry Shield the wing tips with aluminum foil...

Page 38: ...aking powder or yeast when using AUTO START They will not rise property To avoid sickness and food waste when using AUTO START l Do not use foods that will spoil while waiting for cooking to start such as dishes with milk or eggs cream soups and cooked meats or fish Any food that has to wait for cooking to start should be very cokl or frozen before it is put in the oven MOST UNFROZEN FOODS SHOULD ...

Page 39: ...obe cooking AUTO COOK PERSONAL CHOICE WARM HOLD 6 Complete entry TOUCH YOU SEE The oven will start cooking at the set time NOTE If the door is opened before the start time is reached the Display will show DO0 R and OPEN for five minutes or until the door is closed whichever comes first You must touch START ENTER to resume AUTO START At end of cooking time time of day 39 ...

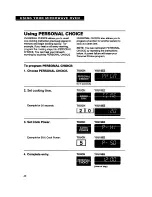
Page 40: ...OICE PERSONAL CHOICE also allows you to program a function for another person to cook at a later time NOTE You can reprogram PERSONAL CHOICE by repeating the instructions below A power failure will erase your Personal Choice program To program PERSONAL CHOICE 1 Choose PERSONAL CHOICE TOUCH YOU SEE mm for 4 seconds 2 Set cooking time Example for 20 seconds TOUCH YOU SEE mm TOUCH YOU SEE 3 Set Cook ...

Page 41: ...of cooking time Using BEVERAGE BEVERAGE lets you heat a beverage by touching just one pad NOTE If you want to change the heating time after choosing BEVERAGE see Adding or subtracting cook time on page 45 1 Place cup of beverage in oven and close the door 2 Choose BEVERAGE To heat a half cup of a beverage To heat a full cup of a beverage TOUCH once TOUCH YOU SEE twice 41 ...

Page 42: ...d Place meat and bulky vegetables to the outside of the plate Cover with wax paper NOTE If you want to change the heating time after choosing DINNER PLATE see Adding or subtracting cook time on page 45 1 Place plate of food in oven and close the door 2 Choose DINNER PLATE TOUCH YOU SEE After 3 seconds At end of first stage 2 tones will sound At end of heating time After one minute 42 ...

Page 43: ... may vary with brand Try several brands to decide which gives best popping results For best results use fresh bags of popcorn NOTE If you want to change the popping time after choosing POPCORN see Adding or subtracting cook time on page 45 Fire Hazard l Do not try to repop unpopped kernels and do not reuse popcorn bags Fire could result l If you remove the rack right after pop ping popcorn use ove...

Page 44: ...ng time in multiples of one minute touch ADD MINUTE repeatedly during cooking l You can enter ADD MINUTE only after closing the door after touching OFF CANCEL or during cooking l If you touch ADD MINUTE during cook ing the oven will cook at the currently selected Cook Power lf you touch ADD MINUTE after cooking is over the oven will ccok at 100 Cook Power l You cannot use ADD MINUTE with POPCORN A...

Page 45: ...crease or decrease the cook time by 10 after choosing the function You can only increase or decrease cook time before cooking starts To increase cook time by 10 To decrease cook time by 10 To reset to the original cook time TOUCH YOU SEE example for auto cook TOUCH YOU SEE TOUCH YOU SEE 45 ...

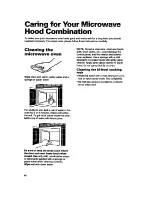
Page 46: ...er towel do not spray directly on oven CAE ning the bi level cooking l Wash by hand with a miM detergent and a soft or nylon scrub brush Dry completely l Do not use abrasive scrubbers or cleans Wipe often with warm sudsy water and a sponge or paper towel ers to clean rack For stubborn soil boil a cup of water in the oven for 2 or 3 minutes Steam will soften the soil To get rid of odors inside the ...

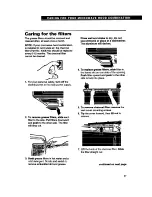
Page 47: ...ilters downward and push to the other side The fifter will drop out Soak grease filters in hot water and a mild detergent Scrub and swish to remove embedded dirt and grease Rinse well and shake to dry Do not use ammonia or place in a dishwasher The aluminum will darken 4 To replace grease filters slide filter in the frame slot on one side of the opening Push filter upward and push to the other sid...

Page 48: ...t the main power supply 11 Do not operate the hood without the filters in place Replacing the cooktop and oven lights The cooktop light Fire and Electrical Shack Hazard Use only candelabra base bulbs 30 watt maximum Failure to do so couM result in fire Turn off power at main power supply 1 before replacing the light bulb Failure to do so could result in electrical shock I 9i J s 1 Turn off power a...

Page 49: ...ve the vent cover mounting screws 3 Tip the cover forward then lift out to remove 4 Remove bulb holder mounting screw 5 Lift up the bulb holder 6 We recommend replacing the bulb with a candelabra base 30 watt bulb available from your authorized Whirlpool service company Part No 4156432 7 Replace the bulb holder and mounting screw 8 Slide the top of the vent cover into place Push the bottom until i...

Page 50: ... Refrigerated Refrigerated Refrigerated Refrigerated Refrigerated Room temp Room temp Room temp Refrigerated Refrigerated TIME POWER l 2 min at 70 2 4X min at 70 4 5 set 1 min per serving at 50 l 3 min per serving at 50 2 4 min at 100 4 6 min at 100 6 6 min at 100 5 8 min at 50 9 12 min at 50 13 l 6 min at 50 3 4 min at 50 5 7 min at 50 2X 3 min at 100 4 5X min at 100 15 25 set at 100 30 40 set at...

Page 51: ...r standing Turkey 100 5min Breast 70 8 12 min lb internal temperature should be 185 F after ftanding Fish Fillets 100 5 6 min l lb Scallops and 100 3X 5Y2 min Shrimp 1 lb Zook at 100 Cook Power OOD TIME Beans Green or 6 12 min Yellow 1 lb Broccoli 1 lb 6 10 min w 0 FOOD TIME Carrots 1 lb 8 12 min Cauliflower 6 9 min medium head Corn on the Cob 4 9 min 2 4 6 16 min Potatoes Baked 13 19 min 4 medium...

Page 52: ...er than the thicker areas Place the thinner parts of chicken wings and legs in the center of the dish Stirring turning foods l Stirring and turning foods distributes heat quickly to the center of the dish and avoids overcooking at the outer edges of the food 52 Covering food Cover food to l Reduce splattering l Shorten cooking times l Retain food moisture All coverings that allow microwaves to pas...

Page 53: ...prepackaged in an aluminum foil container then refer to the instructions on the package It is possible to use dispos able containers but it generally takes longer and the final result will not be as good as if fcod were placed in plastic or paper containers If you use aluminum containers without package instructions follow these guide lines l Place container in a glass bowl and add some water so t...

Page 54: ... to absotb microwave energy Never allow metal to touch walls or door For more information see page 53 This appearance is normal and does not affect the operation of your oven You hear the sound of the transformer wher the magnetron tube cycles on As the food becomes hot it will conduct the heat to the dish Be prepared to use hot pads to remove food after cooking Standing time means that food shouk...

Page 55: ...OLUTION Nothing will The unit is not wired into a Contact a qualified Whirlpool service operate live circuit with the proper technician to wire unit into a live voltage circuit with the proper voltage See Installation Instructions A household fuse has blown Replace household fuse or reset or a circuit breaker has tripped circuit breaker The electric company has Check electrii company for a power e...

Page 56: ... have set the controls as a Touch TIMER OFF to cancel the not cooking Minute Timer Minute Timer You do not hear The command is not correct Reenter command the Program ming Tone The microwave Probe is not pushed far Insert at least l 3 of probe into the food oven turns off enough into the food too soon or not soonenough Probe is not positioned Position probe tip in the center of when using the corr...

Page 57: ...vide after warranty service anywhere in the United States To locate the authorized Whirlpool service company in your area call our Consumer Assistance Center telephone number see Step 2 or look in your telephone directory Yellow Pages under APPLlANCE HOUSEHOLD WASHING MACHINES 6 YAIOR SERVlCE A REPAIR DRYERS SERVICE 6 REPAJR Sea Whirlpeal Appliances or See Wh aol Appliances or Authorized Whirlpool...

Page 58: ...accident misuse fire flood acts of God or use of products not approved by Whirlpool E Any labor costs during limited warranty F Repairs to parts or systems caused by unauthorized modifications made to the appliance YEI3 WHIRLPOOL CORPORATION SHALL NOT BE LIABLE FOR INCIDENTAL OR CONSE QUENTIAL DAMAGES Some states do not allow the exclusion or limitation of incidental or consequential damages so th...

Reviews: