background image

Summary of Contents for MS1040XY

Page 1: ...User sManual Control panel I Defrost guide Door latches Glass tray MICROWAVEOVENS MSI040XYMSI065XY ...

Page 2: ...ave Cooking Recipes and Tables 36 Whirlpool Microwave Oven Warranty 60 1991 Whirlpool Corporation Thank you for buying a Whirlpool appliance Please complete and mail the Owner Registra tion Card provided with this product Then complete the form below Have this information ready if you need service or call with a question l Copy model and serial numbers from plate behind the microwave oven door on ...

Page 3: ...et basement or near a swimming pool and the like l DO not immerse cord or plug in water Electrical shock may result l Keep cord away from heated surfaces Electri cal shock may result Do not let cord hang over edge of table or counter Electrical shock may result See door surface and interior cleaning instruc tions on page 26 l To reduce the risk of fire in the oven cavity Do not overcook food Caref...

Page 4: ...erate this oven with the door open since open door operation can result in harmful exposure to microwave energy It is important not to defeat or tamper with the safety interlocks Do not place any object between the oven front face and the door or allow soil or cleaner residue to accumulate on sealing surfaces Do not operate the oven if it is damaged It is particularly important that the oven door ...

Page 5: ...or oven to operate 2 Door Safety Lock System 3 Window with Metal shield Shield prevents microwaves from escaping It is designed as a screen to allow you to view food as it cooks 4 Glass Tray It must be in oven during operation for best cooking results See page 32 for more details 5 Defrost Guide 6 Model and Serial Number Label 7 Control Panel Touch pads on this panel to perform all functions See p...

Page 6: ...cooking See pages 15 16 for more information COOK POWER Touch this pad followed by a Number Pad to set the amount of microwave energy released to cook the food The higher the number the higher the power or heat See page 13 for more information See the recipe section starting on page 36 for specific Cook Powers to use for the foods you are cooking PAUSE Touch this pad when you want the oven to paus...

Page 7: ...over or under cooking 5 Touch a Number Pad for the Cook Power you want 6 Touch START Defrosting 1 Put food in the oven and close the door 2 Touch QUICK DEFROST 3 Touch Number Pads for the defrosting time you want 4 Touch START This mode decreases the amount of time needed to thaw frozen food before cooking Two cycle cooking 1 Put food in the oven and close This mode lets you cook at two the door d...

Page 8: ...START Why you use it This mode lets you set the oven to pause between cycles for stirring turning over or rearranging food as well as for adding ingredients Auto start 1 Put in food and close the door 2 Touch AUTO START 3 Touch Number Pads for the time of day to staq cooking 4 Touch In the cooking time and Cook Power 5 Touch START This mode lets you set the microwave oven to begin cooking at a spe...

Page 9: ... oven this is an accurate digital clock When you are using the microwave oven it display time settings temperature settings and Indicator Lights Command pads Touch Command Pads to tell the microwave oven what to do and in what order A few examples CLOCK SET tells the oven you are going to set the clock START tells the oven to start See page 10 for information on the tone you hear when touching any...

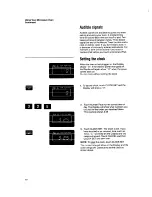
Page 10: ...gged in the Display shows O If the electric power ever goes off the Display will again show O when the power comes back on You can cook without setting the clock 1 2 3 To set the clock touch CLOCK SET and the Display will show a 0 Touch Number Pads for the correct time of day The Display will show what numbers you touched in the order you touched them This example shows 325 Touch CLOCK SET The Clo...

Page 11: ...o get the best cooking results l ALWAYS cook food for the minimum recommended cooking time If necessary add time in one or two minute periods then check for doneness to avoid overcooking the food l Stir turn over or rearrange the food being cooked about halfway through the cooking time for most even doneness with all recipes l If a glass cover is not available use waxpaper paper towels or microwav...

Page 12: ...he numbers you touched in the order you touched them The example shows 1 minute 30 seconds Touch START The oven will automatically cook at HIGH Cook Power The Cook 1 Indicator Light will continue to blink to show that the oven is cooking in the first cycle The Display counts down the time to show how much time is left in the first cycle When the cooking time ends End will show on the Display and 3...

Page 13: ... 70 of full power MED HIGH 6 600 o of full power 5 50 of full power MED 4 400 o of full power 3 30 of full power MED LOW 2 200 o of full power l lO of full power LOW O TIMER fan and light will be off 1 Put food in the oven and close the door 2 Touch COOK 1 2 The COOK 1 Indicator Light will blink and the Display will show 0 3 Touch Number Pads for the cooking time you want The Display will show the...

Page 14: ...n is cooking in the first cycle at a Cook Power other than HIGH The Display counts down the time to show how much cooking time is left in the first cycle When the cooking time ends End will show on the Display and 3 beeps will sound You can stop the beeping by touching CANCEL The Display will then show the time of day 14 ...

Page 15: ... Pads for the defrosting time you want The Display will show the numbers you touched in the order you touched them This example shows 2 minutes 30 seconds 4 Touch START The QUICK DEFROST Indicator Light will continue to blink to show that the oven is in the Quick Defrost cycle The Display counts down the time to show how much defrosting time is left When the defrost time ends End will show on the ...

Page 16: ...part __ _ Full Cook Power Second part 30 of full Cook Power Third part _ Standing Time no power This automatic step down in Cook Power helps defrost food quickly and completely Standing time allows item to complete defrosting At the end of the Quick Defrost cycle check the food with a long tined fork If the center is hard frozen set additional time using 20 Cook Power 16 ...

Page 17: ...is example shows 2 minutes 30 seconds Touch COOK 1 8 2 The COOK 1 Indicator Light will blink and the Display will show 0 Touch Number Pads for the cooking time you want The Display will show the numbers you touched in the order you touched them This example shows 4 minutes 30 seconds Select a Cook Power To cook at HIGH power skip to Step 6 To select another Cook Power touch COOK POWER The Display ...

Page 18: ... In me UUICK uerrost cycle When the defrost time is over you will hear 2 beeps and the Cook cycle will start The COOK 1 Indicator Light will blink dur ing the Cook cycle The Display counts down the time to show how much time is left in the second cycle When the Cook cycle ends End will show on the Display and 3 beeps will sound You can stop the beeping by touching CAN CEL The Display will then sho...

Page 19: ...r you touched them This example shows 3 minutes 25 seconds Select a Cook Power To cook at HIGH power skip to Step 6 To select another Cook Power touch COOK POWER The Display will show PL 10 This shows the oven is pre programmed to cook at full HIGH power Touch a Number Pad for the Cook Power you want in the first cycle The Display will show what you touched This example shows you touched Number Pa...

Page 20: ...r Touch START When you touch START the COOK 1 Indicator Light will blink while the oven is cooking in the first cycle COOK 2 Indicator Light will stay on The Display counts down the cooking time to show how much time is left in the first cycle You will hear 2 beeps at the end of the COOK 1cycle The COOK 2 Indicator Light will blink during the second cycle The Display counts down the time to show h...

Page 21: ...any order However when the microwave oven is started it will automatically go through the cycles in the order of the examples described in this book For example if you program COOK 1 and QUICK DEFROST the microwave oven will automatically follow this sequence QUICK DEFROST COOK 1 21 ...

Page 22: ...ven and close the oven door Touch in the desired cooking instructions for COOK 1 see page 19 Touch PAUSE The COOK 1 Indicator Light will blink and the Display will show PAUS Touch in the desired cooking instructions for COOK 2 see page 19 Touch START The Display will show the time you selected for Cook 1 When Cook 1 is over 2 beeps will sound and the oven will shut off The Display will show PAUS T...

Page 23: ...umbers you touched in the order you touched them This example shows 1 minutes 45 seconds 3 Touch COOK POWER The Display will show PL 10 4 Touch the 0 Number Pad The Display will show PL 0 This tells you that the oven will be operating at 0 power 5 Touch START NOTE If you hear the fan start when you touch START you have not set the oven properly Touch CANCEL and start over The COOK 1 Indicator Ligh...

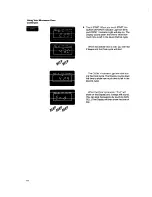
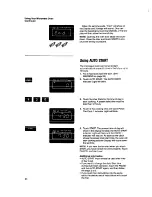
Page 24: ...e must be less than 12 hours Touch in the cooking time and Cook Power The Cook 1 Indicator Light will blink Touch START The present time of day will show in the display window the AUTO START Indicator Light will blink and the COOK 1 Indicator will stay on As soon as the clock shows the preset cook start time the oven will start cooking and the Display will count down the set time NOTE If you hear ...

Page 25: ...MOST UNFROZEN FOODS SHOULD NEVER STAND MORE THAN TWO HOURS BEFORE COOKING STARTS l Do not use foods containing baking powder or yeast when using delay start They will not rise properly l Do not allow food to remain in oven for more than two hours after end of cooking cycle Otheroperating hints To stop the oven while it is running 1 Open the door The oven will stop To restart the oven close the doo...

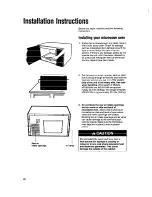
Page 26: ...ensils you put in it The control side of the unit is the heavy side Use care when handling The weight of Models MS1650XW and MS1651XW are approxi mately 23 2 Ibs 10 5kg The weight of Model MS1451XW is approximately 23 1 Ibs 10 4 kg Do not block the rear air intake openings and air vents on side and back of microwave oven Allow a few inches of air circulation on side and back of oven where vents an...

Page 27: ...ong wall receptacle installed by a qualified elec trician Consult a qualified electrician if the grounding instructions are not completely understood or if doubt exists as to whether the appliance is properly grounded It is not recommended to use an exten sion cord with your microwave oven but if you find it necessary to do so temporar ily until a properly grounded and pola rized 3 prong receptacl...

Page 28: ...the microwaveoven Wipe often with warm sudsy water and a soft cloth or sponge The glass tray may be removed for cleaning Wash by hand in mild detergent or in a dishwasher Do not operate the microwave oven when the glass tray is removed for cleaning For stubborn soil boil a cup of water in the oven for 2 or 3 minutes Steam will soften the soil Be sure to keep the areas clean where the door and oven...

Page 29: ...alls and are absorbed by food Microwaves pass through glass paper and most plastics without heating them so food absorbs the energy Microwaves bounce off metal pans so food does not absorb the energy Microwaves may not reach the center of a roast The heat around the outside is what cooks the roast all the way through This is one of the reasons for letting some foods roasts baked potatoes stand for...

Page 30: ...tand ing time of one minute before cutting into them Liquids heated in certain containers especially cylindrical shaped containers may become over heated The liquid may splash out with a loud noise during or after heating or when adding ingredients coffee etc resulting in harm to the oven and possible personal injury For best results stir any liquid several times before heat ing or reheating Never...

Page 31: ... leave paper products books or cooking utensils in the oven when not in use Fire may result if someone accidentally starts the oven Do not let food or containers touch the top or sides of the oven Do not overcook potatoes Fire could result At the end of the recommended cooking time potatoes should be slightly firm because they will continue cooking during standing time After microwaving wrap potat...

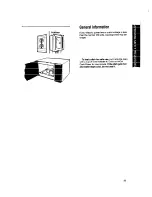
Page 32: ...or clothes in the oven Fire could result Glass tray 32 Do not try to melt paraffin wax in the oven Paraffin wax will not melt in a microwave oven because it allows microwaves to pass through it GlassTray Do not operate the microwave oven unless the glass tray is securely in place Cooking efficiency will be reduced Also arcing sparking and crackling can occur causing black marks in the oven cavity ...

Page 33: ...utlet voltage is less than the normal 120 volts cooking times may be longer To test a dish for safe use put it into the oven with a cup of water beside it Cook on HIGH Cook Power for one minute If the dish gets hot and water stays cool do not use it 33 ...

Page 34: ...cooking times seem too long l Is the electric supply to your home or wall outlets low or lower than normal Your electric company can tell you if the line voltage is low Your electricain or service technician can tell you if the outlet voltage is low l Is the Cook Power at the recommeneded setting l Are you allowing for more time when cooking more food at one time If the Display shows a time counti...

Page 35: ...nce Center tele phone number see Step 2 or look in your telephone directory Yellow Pages under APPLIANCES HOUSEHOLD MAJOR SERVICE 6 REPAIR ELECTRICAL APPLIANCES MAJOR REPAIRING 6 PARTS OR WASHING MACHINES DRYERS h IRONERS SERVICING WHIRLPOOL APPLIANCES AUTHORIZED WHIRLPOOL SERVICE SERWCE COMPANIES XYZ SERVICE CO 123 MAPLE 999 9999 4 If you are not satisfied with how the problem was solved l Contac...

Page 36: ...ooking energy Standing times which allow the extra cooking to take place can vary from one to five minutes for vegetables or five to ten minutes for a large roast Experience will help you determine standing times for the various foods you prepare Utensils Never use metal or metal trimmed utensils in your microwave oven Microwaves cannot penetrate metal They will bounce off any metal object in the ...

Page 37: ... conduct heat to areas near them Well marbled meat cooks more evenly Large areas of fat attract energy away from the meat and slow cook ing To prevent uneven cooking meats with bones or large fatty areas may require frequent turning during microwaving Techniques for Microwave Cooking Every different food has unique characteristics Here are some ideas and guidelines to help you achieve optimum resu...

Page 38: ...he center where they will get less energy l Arrange food in an even layer on plate l Cover foods when reheating with a layer of vented plastic wrap to retain moisture l When reheating observe the standing time recommended in cooking procedures to make maximum use of the microwave energy and to prevent overcooking of the reheated dish l When reheating potatoes in their skins breads pastries or mois...

Page 39: ...rvings 1 lb pasteurized process cheese spread wlth Mexican seasonlng 1 can 15 oz chili without beans 1 can 5 oz evaporated milk 1 medium tomato seeded and chopped 2 green onions sliced corn chips Cut cheese into l inch cubes In 2 quart microwavable casserole combine cheese chili and milk Cover Microwave at Power Level 7 for 12 to 14 minutes or until cheese melts Stir every 3 minutes Let stand 2 mi...

Page 40: ...rt microwavable casserole combine pork beer onion garlic and bay leaf Cover Microwave at High Power for 10 minutes then Cook Power 3 for 40 to 50 minutes or until pork is tender Let stand covered for 10 minutes Remove pork and onion Cool Discard cooking liquid Shred pork In e quart microwavable casserole mix pork reserved onion bar becue sauce chili sauce and ptpper Cover Microwave at High Power f...

Page 41: ...f Kabobs 6 oz boneless beef sirloin steak 1 inch thick 4 small red potatoes P inch 1 jar 6 oz marinated artichoke hearts reserve marinade Vbteaspoon pepper 6 pitted extra large black olives 4 wooden skewers lo inch Trim and discard fat from beef Cut into l inch cubes Set aside Trim l z inch strip around center of each potato Place potatoes in a l quart microwavable casserole Sprinkle with 1 tables...

Page 42: ... 75 minutes or Until 1 can 16 oz whole tomatoes beef is tender stirring every 4 minutes Let stand covered for chopped 10 minutes 1 cup thinly sliced carrots cup water 1 cup chopped onion 4 servings 1 tablespoon lemon juice 1 teaspoons instant beef bouillon granules 1 teaspoons paprika VZteaspoon garlic salt V2teaspoon sugar l d teaspoon dried dill weed V8teaspoon cayenne Garlic Beef with Carrots M...

Page 43: ...ents Fill cavities of Cornish hens Place breast side down on roasting rack In l cup glass measure combine all glaze ingredients Microwave at High Power for 45 to 60 seconds or until melted Stir Set aside Cover stuffed hens with wax paper Microwave at High Power for 10 minutes Turn hens over Brush with glaze Microwave covered at High Power for 10 minutes Brush with glaze Microwave covered for 5 to ...

Page 44: ...2 teaspoons snipped fresh parsley 1 teaspoon instant chicken bouillon granules l 2 teaspoon salt 4 servings I Bteaspoon dried summer savory ISteaspoon white pepper 1VZcups milk l 2 cup water 1 can 6V2 oz minced clams drained Sole Knots 1 lb fresh sole fillets S inch thick cut into lo inch x 2 inch strips 3 tablespoons butter or margarine 2 tablespoons all purpose flour V2 teaspoon salt l z teaspoo...

Page 45: ...d 1 tablespoon milk 14teaspoon salt ISteaspoon pepper 12cup shredded Monterey Jack cheese Place 1 tablespoon butter in O inch glass pie plate Microwave at High Power for 30 to 45 seconds or until butter melts Tilt to coat bottom Set aside In small mixing bowl beat egg whites at high speed of electric mixer until stiff but not dry In small bowl blend egg yolks milk salt and pepper Fold egg yolk mix...

Page 46: ...redients Microwave uncovered at High Power for 1 to 2 minutes or until thickened Pour over carrots Toss to coat 14teaspoon ground ginger 4 servings Orange Baked Apples 13cup butter or margarine 2 tablespoons sugar 2 tablespoons chopped pecans 1 teaspoon grated orange peel teaspoon ground nutmeg 4 large baking apples about 10 oz each 2 tablespoons brandy or apple juice Sweetened whipped cream Place...

Page 47: ...n e quart microwavable casserole combine caramels and milk Microwave at High Power for 3 to 4 minutes or until mixture can be stirred smooth stirring every 1 minute Stir in corn flakes and peanuts Press mixture into prepared baking dish Set aside In CUP glass measure combine chocolate chips and shortening Microwave at High Power for 1 to 1 minutes or until mixture is smooth stirring once Drizzle c...

Page 48: ...o 12 minutes 10 minutes Spareribs Country style ribs 2 to 3 Ibs 13 to 15 minutes per lb 10 minutes Roast under 4 Ibs 14 to 16 minutes per lb 30 minutes Bacon under 4 Ibs 7 to 8 minutes 5 minutes Sausage bulk 1 lb 6 to 7 minutes 5 minutes Sausage links 1 lb 6 to 7 minutes 5 minutes Hot dogs 1 lb 9 to 10 minutes per lb 5 minutes Turning or stiring should be done after th of the defrosting cycle 48 T...

Page 49: ...5 10 minutes 10 minutes Defrost in package on dish Turn over once After defrosting carefully separate fillets under cold water Defrost in package on dish After defrosting carefully separate steaks under cold running water Use a shallow dish the shape of the fish determines size Cover the head with aluminum foil Be carefull not to let foil touch sides or door of oven Turn over once The fish should ...

Page 50: ...es in e quart microwavable casserole Pour 1 cup water or broth over cubes Cook covered Stir cubes halfway through cooking Cook until fork tender Let stand covered 10 minutes Crumble beef and place in microwavable sieve or colander Place sieve in bowl to collect drippings Cover with waxed paper Stir after 3 minutes to break meat apart After cooking let stand covered 2 minutes If meat is still pink ...

Page 51: ...ed Let stand covered with foil 15 minutes Temperature may rise about lOoF Place roast fat side down on microwavable roast rack Add desired seasonings and cover with waxed paper Turn over meat halfway through cooking and shield if necessary Let stand covered with foil 15 minutes Remove roast from microwave when desired temperature is reached Temperature may rise about lOoF Place roast fat side down...

Page 52: ...ce meat on microwavable roast rack Cover loosely with waxed paper After cooking let stand 1 minute Place chops in microwavable baking dish Add desired seasonings and cover with plastic wrap and vent Cook until no longer pink or until internal temperature reaches 170 F Turn over chops Let stand covered 5 minutes Temperature may rise about 10 F Pierce hot dogs and place on microwavable roast rack Co...

Page 53: ...tand covered 1 minute Place sausage patties in a circle on micro wavable roast rack Brush with browning agent if desired Cover with waxed paper Turn patties over halfway through cooking After cooking let stand 2 minutes Place ribs cut into serving size pieces bone side down in large cooking bag Place bag in P quart microwavable casserole Add 1 cup water to bag Close bag loosely with micro wavable ...

Page 54: ...per Cook until no longer pink and juices run clear Let stand covered 5 minutes Wash and dry poultry Place breast side down on microwavable roast rack Brush with butter or browning agent and seasonings if desired Cover with waxed paper Cook l 3 of estimated time Turn breast side up brush on butter or browning agent Replace waxed paper Cook l 3 of estimated time again Shield if necessary Cook remain...

Page 55: ...er or browning agent and seasonings if desired Cook until no longer pink and juices run clear Remove hens from microwave when desired temperature is reached Let stand covered with foil 5 minutes Temperature may rise about 10 F Temperature in breast should be 170 F before serving FISH AND SHELLFISH COOKING TABLE Fish Shellfish Cook Cooking Time Power Minutes Per Pound Special Instructions Fish fill...

Page 56: ... until tender crisp Let stand covered 2 minutes Remove outer wrapping from box Place box on 2 paper towels After cooking let stand 2 minutes Place beans and 2 tablespoons water in 1 quart microwavable covered casserole Stir halfway through cooking Cook until tender crisp Let stand covered 2 minutes Place beets and l 4 cup water in l quart microwavable covered casserole Rearrange halfway through co...

Page 57: ...ch microwavable baking dish Cover with plastic wrap and vent Cook until tender crisp Let stand covered 5 minutes Pierce eggplant with fork and place on 2 paper towels Turn over halfway through cooking Cook until fork pierces skin easily Let stand 2 minutes Cut in half to remove pulp Place sliced leeks and 2 tablespoons water in l quart microwavable covered casserole Stir halfway through cooking Co...

Page 58: ...icrowavable covered casserole After cooking let stand covered 2 minutes Remove outer wrapping from box or pouch Place box on 2 paper towels Pierce pouch with fork and place in 1 quart microwavable casserole After cooking let stand 2 minutes Pierce squash several times with fork Place on 2 paper towels Carefully remove halfway through cooking Cut squash in half remove fibrous strands and seeds Plac...

Page 59: ...h 12cup meat filling without bun Mashed potatoes 1 cup 4 cups Baked beans 1 cup High 3 to 4 minutes High High High 2 to 2 minutes 9 to 10 minutes 2 to 2 minutes 7 to 8 minutes 1 to 2 minutes High 1 to 1 12 minutes 6 to 7 minutes High 3 to 4 minutes Special Instructions Place sliced meat on microwavable plate Cover with plastic wrap and vent l NOTE Gravy or sauce helps to keep meat juicy Place chic...

Page 60: ...by accident misuse fire flood acts of God or use of products not approved by Whirlpool E Any labor costs during limited warranty F Repairs to parts or systems caused by unauthorized modifications made to the appliance WHIRLPOOL CORPORATION SHALL NOT BE LIABLE FOR INCIDENTAL OR CONSEQUENTIAL DAMAGES Some states do not allow the exclusion or limitation of incidental or consequential damages SO this ...

Reviews: