background image

Summary of Contents for MW7500XW

Page 1: ...Vbfl 01 4a Home Appliis Use CareGuide Auto set guide I Control panel Metal cooking rack Turntable I Defrost guide Door latches MICROWAVE OVEN MW7500XW ...

Page 2: ...tions _ 38 If You Need Service Or Assistance _ _ _ _ _ _ _ _ _ ___ __ _ 42 Whirlpool Microwave Oven Warranty 44 01989 Whirlpool Corporation Remove the Consumer Buy Guide label It will be easier to remove before the oven is used To remove any remaining glue l Rub briskly with thumb to make a ball then remove or l Soak area with liquid hand dishwashing detergent before removing glue as described abo...

Page 3: ...mple closed glass jars foods may explode and should not be heated in this Do not deep fry In oven oven l Use this appliance only for its intended use as Test dinnerware or cookware before using described in this manual See page 41 Some dishes melamine Cen tura etc absorb microwave energy becom l As with any appliance close supervision is ing too hot to handle and slowing cooking necessary when use...

Page 4: ...n since open door operation can result in harmful exposure to microwave energy It is important not to defeat or tamper with the safety interlocks Do not place any object between the oven front face and the door or allow soil or cleaner residue to accumulate on sealing surfaces Do not operate the oven if it is damaged It is particularly important that the oven door close properly and that there is ...

Page 5: ...hield prevents microwaves from escaping It is designed as a screen to allow you to view food as it cooks 4 Glass Turntable This turntable turns food as it cooks for more even cooking It must be in oven during operation for best cooking results See page 40 for more details 5 Metal Cooking Rack 6 Defrost Guide 7 Control Panel Touch pads on this panel to perform all functions See page 6 for more deta...

Page 6: ...ng See pages 16 l 7 for more information PROBE TEMP Touch this pad when using the Temperature Probe to turn off the oven when food reaches a specific temperature Touch PROBE TEMP followed by Number Pads to set desired final temperature and COOK POWER followed by Number Pads for the Cook Power you want See pages 23 25 for more informa tion COOK POWER Touch this pad followed by a Number Pad to set t...

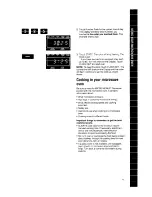
Page 7: ...ouch a Number Pad for the cooking time you want from 1 to 9 minutes 4 Touch COOK POWER This mode lets you select up to ten commonly used cooking times by touching only one Number Pad for each time 5 Touch a Number Pad for the Cook Power you want 6 Touch START Defrosting 1 Put food in the oven and close the door 2 Touch QUICK DEFROST 3 Touch Number Pads for the defrosting time you want 4 Touch STAR...

Page 8: ... 1 Put food in the oven and close the door 2 Touch in the desired cooking instruction for COOK 1 3 Touch PAUSE This mode lets you set the oven to pause between cycles for stirring turning over or rearranging food as well as for addmg ingredrents 4 Touch in the desired cooking instructions for COOK 2 5 Touch START Keep warm 1 Put cooked hot food in the oven and close the door 2 Touch KEEP WARM 3 To...

Page 9: ... accurate digital clock When you are using the microwave oven it displays time settings temperature settings and Indicator Lights Command pads Touch Command Pads to tell the microwave oven what to do and in what order A few examples CLOCK SET tells the oven you are going to set the clock START tells the oven to start See page 10 for information on the tone you hear when touching any pad Each Comma...

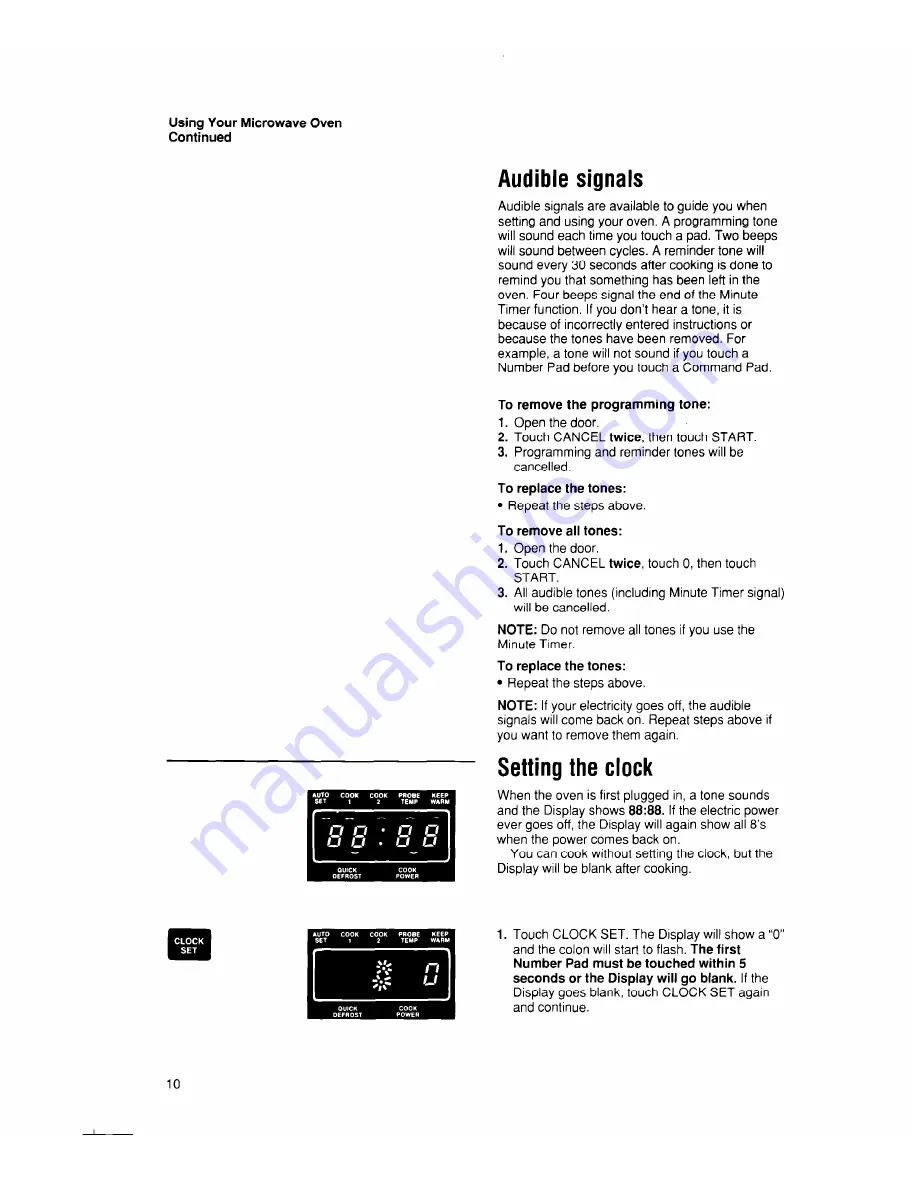
Page 10: ...ncelled To replace the tones l Repeat the steps above To remove all tones 1 Open the door 2 Touch CANCEL twice touch 0 then touch START 3 All audible tones including Minute Timer signal will be cancelled NOTE Do not remove all tones if you use the Minute Timer To replace the tones l Repeat the steps above NOTE If your electricity goes off the audible signals will come back on Repeat steps above if...

Page 11: ...ave oven It contains information about l What microwave energy is l How food is cooked by microwave energy l What affects cooking speed and cooking evenness l Safety tips l Utensils to use when cooking in a microwave oven l Cooking times for different foods Important things to remember to get the best cooking results l ALWAYS cook food for the minimum recom mended cooking time If necessary add tim...

Page 12: ... to show that the oven is cooking in the first cycle The Display counts down the time to show how much time is left in the first cycle When the cooking time ends End will show on the Display and 4 beeps will sound You can stop the beeping by opening the door or by touching CANCEL End will remain on the Display and a reminder tone will sound every 30 seconds to remind you that food is left in the o...

Page 13: ...wer MED HIGH 6 60 of full power 5 50 of full power MED 4 40 of full power 3 30 of full power MED LOW 2 20 of full power 1 10 of full power LOW 0 TIMER fan and light will be off 1 2 3 4 5 Put food in the oven and close the door Touch COOK 1 The COOK 1 Indicator Light will come on and the Display will show four O s Touch Number Pads for the cooking time you want The Display will show the numbers you...

Page 14: ...d for the new Cook Power 3 Touch START The cycle will cook at the new Cook Power for the original time OR 1 Touch COOK POWER twice if you want to change a lower Cook Power to HIGH 2 Touch START UsingAUTOSET Auto Set provides ten preset times One to nine minutes at HIGH Cook Power can be selected by touching AUTO SET and the corresponding Number Pad l 9 You don t need to touch any additional Number...

Page 15: ...Display will show what you touched This example shows you touched Number Pad 5 for 50 of full power Touch START The AUTO SET Indicator Light will stay on while the oven is cooking in the preprogrammed cycle If you selected a Cook Power other than HIGH the Cook Power Indicator Light will also come on The Display counts down the time to show how much cooking time is left For 2 of every 10 seconds th...

Page 16: ... see the guide behind the oven door or the chart in your MICRO MENUS Cookbook 1 2 3 4 Put frozen food in the oven and close the door Touch QUICK DEFROST The QUICK DE FROST Indicator Light will come on and the Display will show four O s Touch Number Pads for the defrosting time you want The Display will show the numbers you touched in the order you touched them This example shows 2 minutes 30 secon...

Page 17: ... START When COOK 1 follows QUICK DEFROST the oven automatically provides a standing time equal to the time touched in for QUICK DEFROST COOK 1 will begin after the automatic standing time See Cooking automatically after defrosting rs page 18 For a different standing time 1 Touch QUICK DEFROST and the desired time 2 Touch COOK 2 3 Touch Number Pads for the desired standing time 4 Touch COOK POWER 5...

Page 18: ...le shows 2 minutes 30 seconds 4 Touch COOK 1 The COOK 1 Indicator Light will come on and the Display will show four O s 5 6 7 Touch Number Pads for the cooking time you want The Display will show the numbers you touched in the order you touched them This example shows 4 minutes 30 seconds Select a Cook Power To cook at HIGH power skip to Step 8 To select another Cook Power touch COOK POWER The COO...

Page 19: ...ps and the Cook cycle will start The COOK 1 Indicator Light will be on during the Cook cycle The COOK POWER Indicator Light will also be on if you are using a Cook Power other than HIGH The Display counts down the time to show how much time is left in the second cycle For 2 of every 10 seconds the Display will show the Cook Power you selected if you are using a Cook Power other than HIGH When the ...

Page 20: ...them This example shows 3 minutes 25 seconds 4 Select a Cook Power To cook at HIGH power skip to Step 6 To select another Cook Power touch COOK POWER The COOK POWER Indicator Light will come on and the Display will show P HI This shows the oven is prepro grammed to cook at full HIGH power 5 Touch a Number Pad for the Cook Power you want in the first cycle The Display will show what you touched Thi...

Page 21: ...er you selected if you are using a Cook Power other than HIGH You will hear 2 beeps at the end of the Cook 1 cycle You can either open the door to check stir or turn over the food etc or you can let the oven start the next cycle If you do open the door touch START after closing the door to restart the oven The COOK 2 Indicator Light will be on during the second cycle The COOK POWER Indicator Light...

Page 22: ...s sequence QUICK DEFROST STANDING TIME COOK 1 KEEP WARM NOTE The microwave oven will automatically provide standing time between QUICK DEFROST and COOK 1 See page 17 Changing or adding instructions You can change times Cook Powers or add cycles any time before touching START or during oven operation 1 Touch the Cook cycle you wish to change or add COOK 1 or 2 2 Touch numbers for new time if desire...

Page 23: ... food See page 25 Place food in the oven and plug the probe into the socket on the oven wall Make sure the probe does not touch any part of the oven interior including the turntable Close the door Touch PROBE TEMP The PROBE TEMP Indicator Light will come on and the Display will show F Touch Number Pads for the desired final temperatures between 90 F and 200 F The Display will show the numbers you ...

Page 24: ... you that food is left in the oven until the door is opened or CANCEL is touched The Display will then show the time of day NOTE ERR will be displayed after START is touched if an incorrect temperature has been selected less than 90 F and more than 200 F NOTE Some foods are started using a timed COOK cycle and finished by using the tempera ture PROBE TEMP cycle You can set PROBE TEMP to follow COO...

Page 25: ...wooden spoon or spatula so the tip of the probe is in the center of the liquid l For roasts the tip of the probe should be in the center of the largest muscle but not touching fat or bone l Casseroles cooked using the Temperature Probe should be made from precooked foods Do not use raw meats raw vegetables and cream sauces in casseroles l Dry casseroles do not work well l Thaw frozen casseroles an...

Page 26: ...ny cycle and KEEP WARM or after QUICK DE FROST 1 2 3 4 5 Put food in the oven and close the oven door Touch in the desired cooking instructions for COOK 1 page 20 Touch PAUSE The COOK 1 Indicator Light will be on and the Display will show PAUS Touch in the desired cooking instructions for COOK 2 see page 20 Touch START The Display will show the time you selected for Cook 1 When Cook 1 is over 2 be...

Page 27: ...ou to stir turn over or rearrange the food for more even defrosting 1 Put frozen food in the oven and close the door 2 Touch QUICK DEFROST 3 Touch Number Pads for the defrosting time you want 4 Touch PAUSE 5 Touch START When half of the QUICK DEFROST time is remaining you will hear 2 beeps and the oven will shut off 27 ...

Page 28: ...he door or by touching CANCEL End will remain on the Display and a reminder tone will sound every 30 seconds to remind you that food is left in the oven until the door is opened or CANCEL is touched The Display will then show the time of day Adding PAUSE between cycles Pause can be added to any cycle in operation as long as there is another cycle programmed to follow 1 Touch PAUSE 2 Touch START Th...

Page 29: ... START if additional KEEP WARM time is desired l Foods cooked covered should be covered during KEEP WARM l Pastry items pies turnovers etc should be uncovered during KEEP WARM Complete meals kept warm on a dinner plate should be covered during KEEP WARM l The use of more than one complete KEEP WARM about 1 hour 40 minutes is not recommended The quality of some foods will suffer with extended time ...

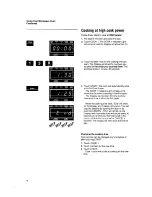
Page 30: ...u touched in the order you touched them This example shows 1 minute 45 seconds 3 Touch COOK POWER The COOK POWER Indicator Light will come on and the Display will show P HI 4 Touch the 0 Number Pad The Display will show P O This tells you that the oven will be operating at 0 power 5 Touch START NOTE If you hear the fan start when you touch START you have not set the time properly Touch CANCEL and ...

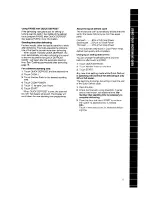
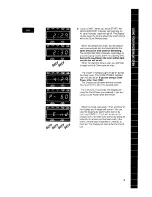
Page 31: ...Use the Cook 1 cycle at 0 Cook Power to delay the start of the Cook 2 cycle for up to 99 minutes 99 seconds 1 2 3 4 5 6 7 Put in food and close the door See WARNING on page 32 Touch COOK 1 The COOK 1 Indicator Light will come on and the Display will show four 0 s Touch Number Pads for the length of delay you want The Display will show the numbers you touched in the order you touched them This exam...

Page 32: ...should be very cold or frozen before it is put in the oven MOST UNFROZEN FOODS SHOULD NEVER STAND MORE THAN TWO HOURS BEFORE COOKING STARTS l Do not use foods containing baking powder or yeast when using delay start They will not rise properly l Do not allow food to remain in oven for more than two hours after end of cooking cycle There are a number of things you can do with your microwave oven So...

Page 33: ...d Use hot pads when removing rack from oven after cooking to prevent burns Rack may be hot Do not store the metal rack in the oven Arcing and damage to the oven can result if someone accidentally starts the oven Use rack only in the microwave oven Do not use rack with browning dish Do not let food container on rack touch the top or sides of the oven Do not cook foods directly on rack without putti...

Page 34: ...airs made 2 Put the oven on a cart counter table or shelf that is strong enough to hold the oven and the food and utensils you put in it The control side of the unit is the heavy side Use care when handling The weight of the oven is approximately 55 1 Ibs 25 kg 3 Do not block the rear air intake opening Blocking the air intake opening can cause damage to the oven and poor cooking results Make sure...

Page 35: ...ounded and correctly polarized 3 prong wall receptacle installed by a qualified electrician Consult a qualified electrician if the ground ing instructions are not completely under stood or if doubt exists as to whether the appliance is properly grounded It is not recommended to use an exten sion cord with your microwave oven but if you find it necessary to do so temporarily until a properly ground...

Page 36: ...born soil boil a cup of water in the oven for 2 or 3 minutes Steam will soften the soil Be sure to keep the areas clean where the door and oven frame touch when closed Use only mild non abrasive soaps or detergents applied with a sponge or soft cloth when cleaning surfaces Rinse well Abrasive cleansers steel wool pads gritty wash cloths etc can damage the control panel and the interior and exterio...

Page 37: ...en lets microwaves through Then they bounce off a metal floor back through the glass turntable and are absorbed by the food Microwaves pass through glass paper and most plastics without heating them so food absorbs the energy Microwaves bounce off metal pans so food does not absorb the energy Microwaves may not reach the center of a roast The heat around the outside is whal cooks the roast all the...

Page 38: ...r poached eggs and allow a standing time of one minute before cutting into them Liquids heated in certain containers especially cylindrical shaped containers may become overheated The liquid may splash out with a loud noise during or after heating or when adding ingredients coffee etc resulting in harm to the oven and possible personal injury For best results stir any liquid several times before h...

Page 39: ...ls in the oven when not in use Fire may result if someone accidentally starts the oven Do not let food or containers touch the top or sides of the oven Do not overcook potatoes Fire could result At the end of the recommended cooking time they should be slightly firm Wrap in foil and set aside for 5 minutes They will finish cooking while standing If a fire should start in the oven cavity l do not o...

Page 40: ...e oven has been running for a while Do not use newspaper or other printed paper in the oven Fire could result Do not dry flowers fruit herbs wood paper gourds or clothes in the oven Fire could result Do not try to melt paraffin wax in the oven You may be burned Do not operate the microwave oven unless the glass turntable is securely in place and can rotate freely Carefully place cookware on glass ...

Page 41: ... outlet voltage is less than the normal 120 volts cooking times may be longer To test a dish for safe use put it into the oven with a cup of water beside it Cook on HIGH Cook Power for one minute If the dish gets hot and water stays cool do not use it ...

Page 42: ...oltage is low Your electrician or service technician can tell you if the outlet voltage is low l Is the Cook Power at the recommended setting l Are you allowing for more time when cooking more food at one time If the Display shows a time counting down but the oven is not cooking l Is the oven door closed completely l Have you set the controls as a minute timer l Is the oven in standing time betwee...

Page 43: ...ONERS SERVICING WHIRLPOOL APPLIANCES AUTHORIZED WHIRLPOOL SERVICE SERVICE COMPANIES XYZ SERVICE CO 123 Maple 999 9999 4 If you have a problem Call our COOL LINE service assistance telephone number see Step 2 and talk with one of our consultants or if you prefer write to Mr Donald Skinner Director of Consumer Relations Whirlpool Corporation 2000 M 63 Benton Harbor Ml 49022 Please include a daytime ...

Page 44: ...is designed to be repaired in the home D Damage to microwave oven caused by accident misuse fire flood acts of God or use of products not approved by Whirlpool E Any labor costs during limited warranties WHIRLPOOL CORPORATION SHALL NOT BE LIABLE FOR INCIDENTAL OR CONSEQUENTIAL DAMAGES Some states do not allow the exclusion or limitation of incidental or consequential damages SO this limitation or ...

Reviews: