background image

Summary of Contents for MW8550XS

Page 1: ...WAVE OVEN Model MW8550XS tlor Freerers Ice Makers Dishwashers Bwlt In Ovens and Surlace Units Ranges Microwave Ovens Trash Campaclors Room Air Condilionen Oehumldlllets Automatic Washers Clolhes Oryers Free2 ...

Page 2: ...ight Bulb 19 Cooking in Your Microwave Oven 7 Operating Safety Precautions 20 Cooking at High Cook Power 7 If You Need Service or Assistance 22 Defrosting 10 Microwave Oven Warranty 24 01989 Whirlpool Corporation Parts and features Model MW8550XS MODEL AND SERIAL NUMBER PLATE DEFROST GUIDE VENTS CONTROL PANEL Thank you for buying a Whirlpool appliance Please complete and mail the Owner Registra ti...

Page 3: ... surface strong enough to support its weight l Has been properly connected and grounded to electrical supply See Installation instructions l Is not used by children or anyone unable to operate it properly l Is properly maintained l Is used only for jobs expected of a home microwave oven PRECAUTIONS TO AVOID POSSIBLE EXPOSURE TO EXCESSIVE MICROWAVE ENERGY DO NOT attempt to oper ate this oven with t...

Page 4: ...iance should be serviced only by qualified service personnel Call a Whirlpool authorized TECH CARE Service Company for examination repair or adjustment 10 Do not cover or block any opening on the appliance fire may result 11 Do not use outdoors damage to the oven or electric shock may result 12 Do not immerse cord or plug in water electric shock may result 13 Keep cord away from heated surfaces el...

Page 5: ...hen you are not using the microwave oven this is an accurate digital clock When you are using the microwave oven it displays time set tings temperature set tings and Indicator Lights Touch Command Pads to tell the microwave oven what to do and in what order A few examples CLOCK SETtells the oven you are going to set the clock STARTtells the oven to start See page 6 for informa tion on the tone you...

Page 6: ... then touch START l All audible tones except Minute Timersignal will be cancelled cancelled To replace the tones l Repeat the steps above To replace the tones l Repeat the steps above Setting the clock You can cook or use the Minute Timer without setting the Clock but the Display will be blank after cooking When the oven is first plugged in the Clock Display shows 88 88 Ifthe electric power ever g...

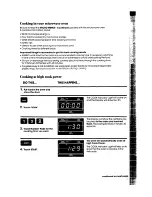
Page 7: ...urn or rearrange the food being cooked about halfway through the cooking time for most even doneness with all recipes l If a glass cover is not available use waxpaper paper towels or microwave approved I plastic wrap Turn back a corner to vent steam during cooking Cooking at high cook power DO THIS THIS HAPPENS 1 Put food in the oven and close the door m 2 Touch COOK The COOK Indicator Light will ...

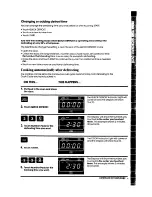
Page 8: ...ower Cook Powers The lowerthe Cook Power the slower the cooking Each Number Pad also stands for a different percentage of Cook Power Many recipes in your MICRO MENUS Cookbook tell you by number which Cook Power to use Recipes in other books and magazines may tell you by name HI MED LO etc or percentage IO 50 80 etc The following chart gives the percentage of Cook Power each Number Pad stands for a...

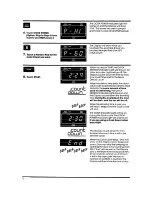
Page 9: ...Display and 4 beeps will sound You can stop the beeping by opening the door or by touching CAN CEL End will remain on the Display and a reminder tone will sound every 60 seconds to remind you that food is left in the oven until the door is opened or CANCEL is touched The Display will then show the time of day Changing cook power The Cook Power can be changed any time before touching STARTor during...

Page 10: ...g by opening the door or by touching CAN CEL End will remain on the Display and a reminder tone will sound every 60 seconds to remind you that food is left in the oven until the door is opened or CANCEL is touched The Display will then show the time of day Standing time For best results allow the food to stand for a while after defrosting This helps equalize the temperature of the food to provide ...

Page 11: ...frosting l Close the door and touch STARTto continue the cycle if no additional time is needed OR l Touch in new instructions for additional defrosting time Cooking automatically after defrosting The controls can be set so the microwave oven goes automatically from defrosting to the Cook Cycle you have touched in DO THIS THIS HAPPENS 1 Put food in the oven and close the door I The Display will sho...

Page 12: ...d The Display will then show the time of day dOWll When you touch START the QUICK DEFROST Indicator Light will stay on All other Indicator Lights will go off The Display counts down the time to show how much time is left in the Quick Defrost cycle When the defrost time ends the micro wave oven automatically lets the food stand for the same amount of time used for defrosting The QUICK DEFROST Indic...

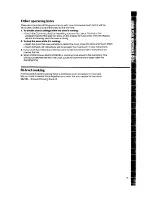
Page 13: ...ls KEEPWARM Close the door and touch KEEPWARM then STARTif additional KEEPWARM time is desired l Foods cooked covered should be covered during KEEPWARM l Pastry items pies turnovers etc should be uncovered during KEEPWARM l Complete meals kept warm on a dinner plate should be covered during KEEPWARM l The use of more than one complete KEEPWARM about 1hour 40 minutes is not recommended The quality ...

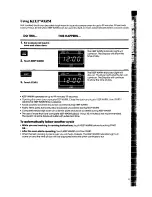
Page 14: ...will stay on to show that the timer is running The COOK POWER Indicator Light will be off The Display counts down to show how much time is left During the count down the oven will be dark and the fan will be off When the set time ends End will show on the Display and 4 beeps will sound You can stop the beeping by opening the door or by touching CANCEL End will remain on the Display and a reminder ...

Page 15: ...pen the door The oven will stop To restart the oven close the door and touch START l Touch CANCEL All instructions will be erased You must touch in new instructions 3 If you touch two instructions into the same cycle the second set of instructions will cancel the first 4 When COOK follows QUICK DEFROST a standing time equal to the defrosting time will occur between the two The Cook cycle will auto...

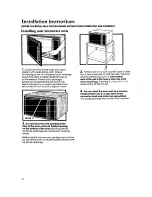
Page 16: ...er table or shelf that is strong enough to hold the oven the food and the utensils you put in it The control side of the unit is the heavy side Use care when handling The weight of the oven is ap proximately 60 Ibs 27 kg 3 Do not block the vent opening at the front of the oven or the air Intake opening on the bottom of the oven Blocking vent or air intake openings can cause poor cooking results Ma...

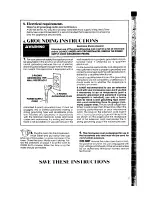
Page 17: ...t necessary to do so temporarily until a GROUNDING PLUG properly grounded and polarized 3 prong Pow PPq receptacle is installed use only a heavy duty UL listed 3 wire grounding type exten sion cord containing three 16 gauge mini mum copper wires It must not be longer than polarized j prong grounding plug It must be 10 feet cords longer than 10 feet may affect the plugged into a correct polarized m...

Page 18: ...GE RBand SB model series 2 Attach the microwave oven to a wall by itself or with cabinets over it 3 Put the microwave oven on the MICRO SHELF Hood over a cooktop The hood is available ducted or as a recirculating hood and includes cooktop lights Ask your dealer for details on l 8329 87 30 inch Built in Kit l 832989 24 inch Built in Kit l 832993 Wall Mounting Kit l RH3330XR MICRO SHELF Hood Use onl...

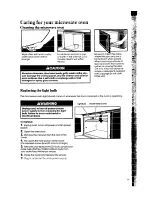
Page 19: ...n abrasive soaps or detergents applied with a sponge or soft cloth Rinse well Replacing the light bulb The microwave oven light should come on whenever the door is opened or the oven is operating Unplug cord or turn off power at main power supply before replacing the light bulb Failure to do so could result in electrical shock To replace 1 unplug cord or turn off power at main power supply 2 Open ...

Page 20: ...ngredients coffee etc resulting in harm to the oven and possible personal injury For best results stir any liquid several times before heating or reheating USE HOT PADS Microwave energy does not heat contain ers but the hot food does DO NOT heat store or use flammable inflammable or corrosive materials in or near the oven Fumes can create a fire hazard or explosion NEVER lean on the door or allow ...

Page 21: ... and set aside for 5 minutes They will finish cooking while standing Starting a microwave oven when it s empty is not recom mended If you experiment put a container of water in the oven It is normal for the inside of the oven door to look wavy after the oven has been running for a while I General information DO NOT try to melt paraffin wax in the oven you may be burned If your electric power line ...

Page 22: ... can tell you if the outlet voltage is low l Is Cook Power set correctly l Are you allowing for more time when cooking more food at one time If the display shows a time counting down but the oven is not cooking l Is the oven door closed completely l Is the oven in a standing time between QUICK DEFROST and COOK See page IO Have you set the control as a kitchen timer If you do not hear a programming...

Page 23: ... 123hme 999 9999 4 If you have a problem Call our COOL LINE service assistance tele phone number see Step 2 and talk with one of our Consultants or if you prefer write to Mr Donald Skinner Director of Customer Relations Whirlpool Corporation 2000 M 63 Benton Harbor Ml 49022 Please include a daytime phone number in your correspondence 5 If you need FSP replacement parts FSP is a registered trademar...

Page 24: ...owave product 3 Replace house fuses or correct house wiring 4 Replace owner accessible light bulbs 6 Repairs when microwave product IS used in other than normal single family household use C Pick up and delivery This product is desrgned to be repaired in the home D Damage to microwave product caused by accident misuse fire flood acts of God or use of products not approved by Whirlpool E Any labor ...

Reviews: