background image

Summary of Contents for MW8600XS

Page 1: ...MICROWAVE OVEN Model MW8600XS ...

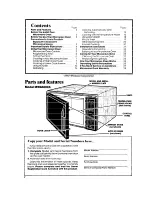
Page 2: ...ns 22 Building in Your Microwave Oven 23 Caring for Your Microwave Oven 23 Cleaning the Microwave Oven 23 Replacing the Light Bulb 23 How Your Microwave Oven Works 24 Operating Safety Precautions 25 If You Need Service or Assistance 27 Microwave Oven Warranty 28 IYOI wnlnpool c orporanon VENTS Parts and feature Model RAW8600 DOOR LATCH UT0 SEI GUIDE Copy your Model and Serial Numbers here Ifyou ne...

Page 3: ...s been properly connected to electrical supply and grounded See Installation Instructions l Is not used byanyone unable to operate it properly l Is properly maintained l Is used only for jobs expected of a home microwave oven PRECM TIONS TO 4VOID POSSIBLE EXPOSURE TO EXCESSIVE MICROWAVE ENERGY DO NOT Ott lmpt to oper ate this over with the door open since c pen door op eration can esult In harm fu...

Page 4: ...his appliance should be serviced only by qualified service personnel Call a Whirlpool authorized TECH CARE Service Company for examination repair or adjustment 10 Do not cover or block any opening on the appliance for fire may result 11 Do not use outdoors for damage to the oven or electric shock may result 12 Do not immerse cord or plug in water for electric shock may result 13 Keep cord away fro...

Page 5: ...g the microwave oven it displays time settings indicator lights and shows what number pads you touched Command pads Touch Command Pads to tell the microwave oven what to do and in what order A few examples CLOCK SETtells the oven you are going to set the clock START tells the oven to start See page 6 for informa tion on the tone you hear when touching any Each Command Pad except START CANCEL and C...

Page 6: ...at the above steps When the oven is first plugged in a tone sounds and the display shows 88 88 Ifthe electric power ever goes off the display will again show all 8 s when the power comes back on You can cook or use the Minute Timer without setting the clock but the display will be blank after cooking DO THIS THIS HAPPENS I Touch CLOCK SET 2 Touch Number Pads for the correct time of day 3 Touch STA...

Page 7: ...food l Stir turn or rearrange the food being cooked about halfway through the cooking time for most even doneness with all recipes l If a glass cover is not available use waxpaper paper towels or microwave approved plastic wrap Turn back a corner to vent steam during cooking Cooking at high cook power DO THIS THIS HAPPENS 1 Put food in the oven and close the door I The COOK Indicator Light will co...

Page 8: ...h Number Pad also stands for a different percentage of Cook Power Many recipes in your MICRO MENUS Cookbook tell you by number which Cook Powerto use Recipes in other books and magazines may tell you by name HI MED LO etc or percentage IO 50 80 etc The following chart gives the percentage of Cook Power each Number Pad stands for and Cook Power name usually used automatic 100 of full power HIGH 4 4...

Page 9: ...ycle For 2 of every 10 seconds the Display will show the Cook Power you selected When the cooking time ends End will show on the Display and 4 beeps will sound You can stop the beeping by opening the door or by touching CANCEL End will remain on the Display and a beep will sound every 30 seconds to remind you that food is left in the oven until door is opened or CANCEL is touched The Display will ...

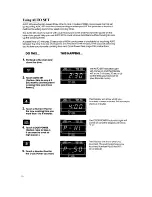
Page 10: ...e cooking time and Cook Power See page 11for instructions DO THIS 1 Put food in the oven and close the door 2 Touch AUTO SET Option Skip to step 6 it you want to use the preset cooking time and Cook Power 3 Touch a Number Pad for the new cooking time you want from 1 to 9 minutes 4 Touch COOK POWER Option Skip to Step 6 if you want to cook at high power 5 Touch a Number Pad for the Cook Power you w...

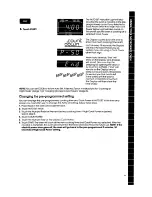
Page 11: ... touched The Display will then show the time of day NOTE You can set COOK to follow Auto Set if desired Touch in instructions for Cooking at High Power page 7 or Cooking at Lower Cook Powers page 8 Changing the pre programmed setting You can change the pre programmed cooking time and Cook Power in AUTO SETto the time and power you most often use To change the AUTO SETsetting follow these steps 1 P...

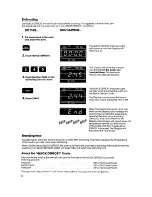
Page 12: ...how on the Display and 4 beeps will sound You can stop the beeping by opening the door or by touching CANCEL End will remain on the Display and a beep will sound every 30 seconds to remind you that food is in the oven until door is opened or CANCEL is touched The Display will then show the time of day For best results allow the food to stand for a while after defrosting This helps equalize the tem...

Page 13: ...ch in new instructions for additional defrosting time Cooking automatically after defrosting The controls can be set so the microwave oven goes automatically from defrosting to the Cook Cycle you have touched in DO THIS THIS HAPPENS 1 Put food in the oven and close the door 2 Touch QUICK DEFROST 3 Touch Number Pods for the defrosting time you wont 4 Touch COOK 5 Touch Number Pods for the Cooking t...

Page 14: ... The QUICK DEFROST Indicator Light stays on and the Display counts down the standing time During the countdown the oven will be dark and the fan will be off When the standing time is over you will hear 2 beeps and the cooking cycle will start The COOK Indicator Light will be on during the cooking cycle The COCK POWER Indicator Light will also be on if you ore using a Cook Power other than high The...

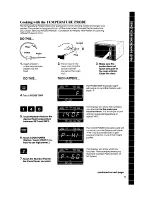
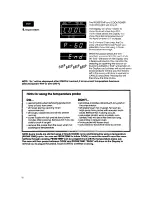
Page 15: ... final temperature between 90 F and 200 F 6 Touch COOK POWER Option Touch START if you wont to use high power 7 Touch the Number Pod for the Cook Power you wont 3 Make sure the probe does not touch any port of the oven interior Close the door The PROBE TEMP Indicator Light will come on and the Display will show F The Display will show the numbers you touched in the order you touched them This exam...

Page 16: ...ON T l use hot pads when removing probe from l let probe or probe cable touch any part of food or food from oven the oven interior l stir foods during cooking when l let probe touch foil if used Foil can be recommended kept away from probe with wooden tooth stir soups casseroles and drinks before picks Remove foil if arcing occurs serving l use paper plastic wrap or plastic con l cover roasts with...

Page 17: ...g thecenteroftheliquld fat or bone l Casseroles cooked using the Temperature Probe should be made from precooked foods Do not use raw meats raw vege tables and cream sauces in casseroles l Dry casseroles do not work well l Thaw frozen casseroles and meats in the microwave oven before inserting the probe l Dry meat loaf mixtures don t work well l Remember that roasts may vary in size shape and comp...

Page 18: ...n a dinner plate should be covered during KEEPWARM l The use of more than one complete KEEPWARM about 1hour 40 minutes is not recommended The qualify of some foods will suffer with extended time 3 Touch START The KEEPWARM Indicator Light will come on The Display will show the time of day The KEEPWARM Indicator Light will stay on The Oven light and the fan will come on The Display will continue to ...

Page 19: ...ells you that the oven will be operating at 0 power The COOK Indicator Light will stay on to show that the timer is running The Cook Power Indicator Light will be off The Display counts down to show you how much time is left During the count down the oven will be dark and the fan will be off When the set time ends End will show on the Display and 4 beeps will sound You can stop the beeping by open...

Page 20: ... The instruction programmed for that pad will show on the Display for 5 seconds Then the Display will return to show what the oven is doing 2 To stop the oven while it is running l Open the door The oven will stop You can restart it by closing the door and touching START l Touch CANCEL All instructions will be erased You must touch in new instructions 3 l If You touch two instructions into the sam...

Page 21: ...n checked by an authorized Whirlpool service technician and any repairs made 2 Put the oven on a ca counter table or shelf that is strong enough to hold the oven the food and the utensils you put in it The control side of the unit is the heavy side Use care when handling The weight of the oven is ap proximately 60 Ibs 27 kg 3 Do not block the vent opening at the front of the oven or the air intake...

Page 22: ...cessary to do so temporarily until a GROUNDING PLUG properly grounded and polarized 3 prong PowE PPqi receptacle is installed use only a heavy duty UL listed 3 wire grounding type exten sion cord containing three 16 gauge mini mum copper wires It must not be longer than polarized 3 prong grounding plug It must be 10 feet cords longer than 10 feet may affect the plugged into a correct polarized mat...

Page 23: ...nae For stubborn soil boil a cup of water in the oven for 2 or 3 minutes Steam will soften the so11 CAUTION Abrasive cleansers steel wool pads gritty wash cloths etc can damage the control panel and the interior and exterior oven surfaces Use a sott cloth or a sponge with a mild detergent or spmy glass cleaner Replacing the light bulb Be sure to clean the areas where the door and oven frame touch ...

Page 24: ...tic with out heating them so food ab sorbs the energy Microwaves bounce off metal pans so food does not absorb the energy Microwaves may not reach the center of a roast The heat around the outside is what cooks the roast all the way through This IS one of the rea sons for letting some foods roasts baked potatoes stand for a while after cook ing or for stirring some foods during the cooking time Me...

Page 25: ...ay become overheated The liquid may splash out with a loud noise during or after heating or when adding ingredients coffee etc resulting in harm to the oven and possible personal injury For best results stir any liquid several times before heating or reheating DO NOT heat store or use flammable or inflammable materials in or near the oven NEVER lean on the door or allow a child to swing on ii when...

Page 26: ...ng a microwave oven when DO NOT use newspaper or except in a microwave it s empty is not recommended approved popcorn popper or If you experiment put a commercial package designed container of water in the oven especially for microwave ovens Results are the man ufacturers responsibility NEVER try to pop corn in a paper bag Overcooking may result in smoke and fire I other printed paper in the oven ...

Page 27: ...istance Call Whirlpool COOL LINE service assistance telephone number Dial free from anywhere fn the U S 1 800 253 1301 and talk with one of our trained Consultants The Consultants can instruct you in how to obtain satis factory operation from your appliance or if service is necessary recommend a qualified service com pany in your area 3 If you need service aEar miil p Whirlpool has a nationwide ne...

Page 28: ...ve product 3 Replace house fuses or correct house wiring 4 Replace owner accessible light bulbs B Repairs when microwave product is used in other than normal single family household use C Pick up and delivery This product is designed to be repaired in the home D Damage to microwave product caused by accident misuse fire flood acts of God or use of products not approved by Whirlpool E Any labor cos...

Reviews: