background image

Summary of Contents for MW8650XL

Page 1: ...e If you need service or call with a questlon have thls lnformatton ready Model NumDi f 1 Complete Model and Serial Numbers from the plcte lust behlnd the mlcrowave oven door on the oven frame 2 Purchase date from sales slop Copy lhls information In these spaces Keep this book Serial Numoer Purchase Dale your warranty and sales slop together in a handy place Service Compony end Phone Number ...

Page 2: ... door I I _ 1 1 I _2 r _sl z 1 J I It j J 1 Empty the mlcrowave 2 Put the oven on a Carl 3 Do not block venh oven and clean Inside It with counter table or shelf that IS on back of the oven a soft damp cloth strong enough to hold the Blocking vents can cause oven The control side of the poor cooking results unit Is the heavy side Handling can be tricky 4 For Your safety this oven must be grounded ...

Page 3: ...Used only by people who can operate It properly l Kept clean and in good repair NEVER start the oven when it s empty The oven can be damaged DO NOT cook or reheat whole eggs in the mrcro wave oven Steam build up can cause an egg to burst Damage to the oven or injury to the user may result DO NOT use the oven until you have read and under stand ALL the information on safe use 7 ...

Page 4: ...s a display It counts down time settings and it shows you what number pads you touched COMMAND PADS AND SIGNAL LIGHTS Touch Com mand Pads to tell the microwave oven what to do and in what order A few examples COOK CYCLE 1 or 2 tel s the oven You are going to cook COOK POWER tells the oven you are going to cook at less thari full power START tells the oven to start Each Command Pad has Its own Sign...

Page 5: ...p you will hear a beep and the Display will show a 0 To remove the 0 touch CANCEL The door must be closed for the beep to sound Use the Minute mmer alone or while the oven IS in use Opening the oven door does not stop the Mtnute mmer countdown however it does stop any cooking or defrosting Close the door and touch START to continue cooking or defrosting TO CHANGE THE MINUTE TIMER TO CANCEL THE MIN...

Page 6: ...COOK CYCLE 1 Signal Light will stay on to show that the oven IS cookrng rn the first cycle d count own The Display counts down the time to show how much cooking trme IS left in the flrsl cycle When the cooking time ends you will hear 4 beeps You can stop the beeping bv opening the oven door or touching CANCEL When the beeping stops the Drsplay will show only the colon CHANGING THE COOKING TIME You...

Page 7: ...ll power HIGH 9 90 of full power 8 80 of full power 7 70 of full power MED HI 6 60 of full power 5 50 of full power MED 4 40 of full power Tmk 3 30 of full power MED LO 2 20 of full power 1 10 of full power LO 0 no power fan and light will be off I DO THIS THIS HAPPENS 1 Put food in the oven and close the door The COOK CYCLE 1 Signal Light will come on and the Display will show four O s 2 Touch CO...

Page 8: ... at any time during the cooking cycle Touch COOK POWER Touch a number for the new Cook Power Touch START The cycle will cook at the new Cook Power for the original time OR Touch COOK POWER twice II you want to change a lower Cook Power to htgh Touch START DEFROSTING Use QUICK DEFROST to thaw frozen food before cooking For suggested defrost times see the guide on the inside of the oven door or the ...

Page 9: ...y WIII count down the trme for COOK CYCLE 2 at zero Cook Power You WIII hear 4 beeps when the standing time IS over ABOUT THE QUICK DEFROST CYCLE ___ The mrcrowave oven automattcally divides the time set for the QUICK DEFROST Cycle into three equal parts First part 80 of full Cook Power Second part 50 of full Cook Power Third part 20 of full Cook Power Thus automatic step down In Cook Power fs an ...

Page 10: ... s 2 Touch COOK CYCLE 1 3 Touch Number Pads for the cooking time you want in the first cycle liil The COOK POWER Stgnal Light will come on and the Dtsplay will show two 0 s 4 Touch COOK POWiR If you want the high Cook Power skip to step 6 5 Touch a Number Pad for the Cook Power you want In the first cycle The COOK CYCLE 2 Srgnol Lrght will come on and the Display will show four O s The Drsploy WII...

Page 11: ...e food or you can let the oven start the second cycle If you do open the door lust close it and push START to restart the oven The COOK CYCLE 2 Light will be on during the second cycle The COOK POWER Lrght WIII also be on if you are usrng a Cook Power other than high All other ltghts WIII be off The Display counts down the cooking trme to show how much time IS left In the second cycle For 2 of eve...

Page 12: ...hed in the order yoy touched them This example shows 2 mrnutes 30 seconds The COOK CYCLE 1 Signal Lrght wtll come on and the Display will show four O s 4 Touch COOK CYCLE 1 5 Touch Number Pads for the cooking time you want in the first cycle 6 The COOK POWER Srgnal Lrght WIII come on and the Drsplay WIII show two O s Touch COOK POWER Options Sklp to step 8 if YOU want the first cycle to cook at hl...

Page 13: ... in the second cooking cycle When you touch START the QUICK DEFROST Signal Lrght WIII stay on All other Signal Lrghts 111 go ott The Drsolav counts down the time to show count how much trme IS leti tn the defrost cycle down When the defrost trme ends the microwave oven automatically lets the tood stand for the same amount of time used for defrost ing The QUICK DEFROST Signal Light stays on and the...

Page 14: ...gh When the last cycle ends You wrll hear 4 beeps You can stop the beeping by opening the door or by touchtng CANCEL When the beeping stops the Display WIII show only the colon I 1 Standlng time provides more even To sklp the automa tlc standlng tlme defrosting and cooklng because l instruct the microwave oven to It allows food temperature to even defrost in QUICK DEFROST and to cook out in COOK C...

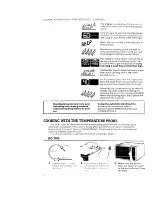
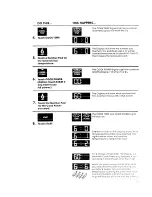
Page 15: ...power The Display will show what you touched This example shows 60 of full power 7 Touch the Number Pad for the Cook Power you want 8 Touch START The left number on the display shows what temperature number you selected The right number shows you how the temperature IS rrsrng In the food For 2 of every 10 seconds the D sploy 111 show the Cook Power You selected II you ore using a Cook Power other ...

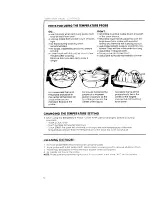
Page 16: ...of the probe should be in the center of the food Stir foods when recom mended Replace the probe For liquids balance the probe on a wooden spoon or spatula so the tip of the probe is in the center of the liquid For roasts the tip of the probe should be in the center of the largest muscle but not touching fat or bone CHANGING THE TEMPERATURE SETTING l When using the Temperature Probe COOK TEMP can b...

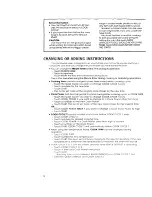
Page 17: ...will show the numbers you touched In the order you touched them This example shows 60 minutes 1 hour The COOK POWER Signal Light will come on and the Display will show two 0 s 4 Touch COOK POWER The Display will show the COOK POWER you touched O for delayed start 5 Touch 0 number pad The COOK CYCLE 2 Signal Light WIII come on and the Display WIII show four O s 6 Touch COOK CYCLE 2 7 Touch in the c...

Page 18: ...Cycle you wish to change COOK CYCLE 1 or 2 Touch numbers for the new time Touch START The cycle will cook at the original Cook Power for the new time l Cook Power can be changed at any time during either cooking cycle or COOK TEMP Touch the Cook Cycle you wish to change COOK CYCLE 1 or 2 Touch COOK POWER if you want to change to a Cook Power other than high Touch a nuhber for the new Cook Power To...

Page 19: ...number of things you can do with your microwave oven Some WIII be reminders Others will be pentloned for the first ttme 1 To double check settings while the oven is running touch the command pad for the setting you want to check The InstructIon programmed for that pad WIII show on the Display for 5 seconds Then the Display returns to show what the oven IS doing 2 To stop the oven while it is runni...

Page 20: ...teel wool pads gritty wash cloths and the like can damage the control panel and electronics Use a sott cloth or a sponge with a mild detergent or commercial glass cleaner on the outside of the door and the control panel Replacing the light bulb 1 Unplug the power cord 4 Replace bulb with a 40 2 Remove holding screw on watt appliance bulb access panel 5 Replace the access 3 Remove the light bulb pa...

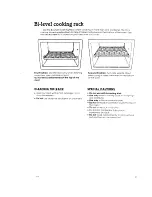
Page 21: ... THE RACK l Wash by hand with a mtld detergent or In your dishwasher l Do not use abrasive scrubbers or cleansers Second Position Turn rack upside down when using a taller container on the bottom of the oven SPECIAL CAUTIONS l Do not use wlth browning dish l Use only when cooking foods In more than one container l Use only in the mlcrowave oven l Do not let food or container touch the top of the o...

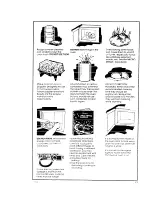
Page 22: ... use put it Into the oven with a cup of water berlde it Cook on high Cook Power for one minute I the dish gets hot and the water stays cool do not use It NEVER COOK OR REHEAI WHOLE EGG Slice hard boiled eggs before heatrng Steam burld uc whole eggs may cause them to burst and possit damage the oven Paper can char or burn and some plastics can melt If used when heating foods for more than 4 minutes...

Page 23: ... containers to heat lrqurds again Follow MICRO MENUS Cookbook directions carefully to properly cook different types of food If using a different cookbook you may need to experiment with times and Cook Powers l Double check all settings l Use the oven only for defrosting cooking or reheating Overcooking some foods can cause them to scorch or flame especially foods like potatoes popcorn snacks etc S...

Page 24: ...per and plasllc wlthout heating them so tood absorbs the energy Mlcro waves bounce off metal pans so food does not absorb the energy MIcrowaves may not reach the center of a roast The heat around the outside is what cooks the roast all the way through This IS one of the reasons for letting some foods roasts baked pota toes stand for a while after cooklng or for stirring some foods during the cooki...

Page 25: ...ch the microwave 3 Put the microwave oven oven to a wall by Itself or on the MICRO SHELF with cabinets over it Hood over a cooktop The hood is avarlable for outside ventrng or as a recirculating hood wrth Kit RCH3660 and in cludes cooktop lrghts Ask your dealer for details on e RCKBll 832875 Wall Mount Vent Grrlle RCK803 832849 30 Inch Built in Kit and Filler Kit RCK805 832856 253 inch Built In Ki...

Page 26: ...ng time between DEFROST CYCLE and COOK CYCLE 17 See page9 I If you do not hear the Programmlng Tone page 19 Is the command correct Has the tone been cancelled If the fan seems to be runnlng slower thar usual l Has the oven been stored In a cold arec The fan will run slower until the oven warms up to normal room temperature It there has been a power lnterruptlon or the Control Panel ON OFF Switch h...

Page 27: ... FRANCHISEDTECH CARESERVICE SERL IC E OUP 4 YIE S SERL IC E O tfPA IE Xv SERVICE CO XVLSERVICE CO MdDlE 933 3999 123 MaDIe 999 9999 OR WASHING MACHINES DRYERS A IRONERS SERVICING VvHIRLPOOL APPLIANCES 1 iRANCHlSEDTECH CAGE SERVICE SERI F OMF S LIE XYZSERVICE CO 23 Maple 939 9993 4l If you have a problem Call our COOL LINE service assistance tele phone number see Step 21 and talk with one of our Co...

Page 28: ...ghl and work rlghl because lhey are made lo the some evocllng speclffcallons used to build every new Whirlpool appllonce BenIon Harbor Mlchloan Aulomallc Wasners Clolhes Dryers Freezers Aelr qeralor Freezers Ice Makers Olshwasherr BurlI fn Ovens and Surlace Unlls Ranger Microwave Ovens Compactors Room Air Condllloners Ochum d l ers Central Healmg and AI Condtliontng Sysrems Part No 312347 Printed ...

Reviews: