background image

Summary of Contents for MW8650XS

Page 1: ...OWAVE OVEN Model MW8650XS Freezers Ice Makers DIshwashers BullI In Ovens and Surface Units Ranges MIcrowave Ovens Trash Compaclors Room Air Condtlmners Dehumldillers Aulomaltc Washers Clolhes Dryers Freezer ...

Page 2: ...uilding in Your Microwave Oven 26 Caring for Your Microwave Oven 26 Cleaning the Microwave Oven 26 Replacing the Light Bulb 26 How Your Microwave Oven Works 27 Operating Safety Precautions 28 If You Need Service or Assistance 30 Microwave Oven Warranty 32 Parts and features Model MW8650XS I CONTROL PANEL B POSITION MODEL AND SERIAL NUMBER PLATE AUTO SETTIME TEMP GUIDE not shown Copy your Model and...

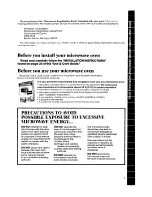
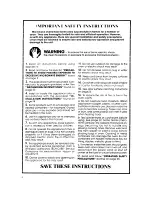
Page 3: ...as been properly connected to electrical supply and grounded See Installation Instructions l Is not used by children or anyone unable to operate it properly l Is properly maintained l Is used only for jobs expected of a home microwave oven PRECAUTIONS TO AVOID POSSIBLE EXPOSURE TO EXCESSIVE MICROWAW ENERGY energy It is important not to DO NOT attempt to oper defeat or tamper with the safety interl...

Page 4: ... This appliance should be serviced only by qualified service personnel Call a Whirlpool authorized TECH CARE Service Company for examination repair or adjustment 10 Do not cover or block any opening on the appliance for fire may result 11 Do not use outdoors for damage to the oven or electric shock may result 12 Do not immerse cord or plug in water for electric shock may result 13 Keep cord away f...

Page 5: ...using the microwave oven it displays time settings indicator lights and shows what number pads you touched Command pads Touch Command Pads to tell the microwave oven what to do and in what order A few examples CLOCK SETtells the oven you are going to set the clock STARTtells the oven to stat t See page 6 for informa tion on the tone you hear when touching any pad Each Command Pad except START CANC...

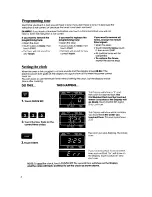
Page 6: ...Setting the clock When the oven is first plugged in a tone sounds and the display shows 88 88 If the electric power ever goes off the display will again show all 8 s when the power comes back on You can cook or use the Minute Timer without setting the clock but the display will be blank after cooking DO THIS THIS HAPPENS 1 Touch CLOCK SET 2 Touch Number Pads for the correct time of day The Display...

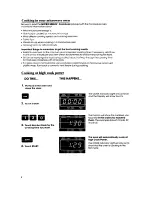
Page 7: ...inute Timer When the set time is up a 3 second signal will sound and the Display will show the time of day Changing the minute timer Touch MINUTE TIMER Touch numbers to set new time Touch START New instructions cancel the old ones Cancelling the minute timer Touch MINUTE TIMER Touch CANCEL Note Touch MINUTE TIMER before touching CANCEL to cancel just the Minute Timer If CANCEL is touched first all...

Page 8: ...e food l Stir turn or rearrange the food being cooked about halfway through the cooking time for most even doneness with all recipes l If a glass cover is not available use waxpaper paper towels or microwave approved plastic wrap Turn back a corner to vent steam during cooking Cooking at high cook power DO THIS 1 Put food in the oven and close the door 2 Touch COOK 3 Touch Number Pads for the cook...

Page 9: ...lower the Cook Power the slower the cooking Each Number Pad also stands for a different percentage of Cook Power Many recipes in your MICRO MENUS Cookbook tell you by number which Cook Powerto use Recipes in other books and magazines may tell you by name HI MED LO etc or percentage 10 50 80 etc The following chart gives the percentage of Cook Power each Number Pad stands for and Cook Power name us...

Page 10: ... the Cook Power you selected When the cooking time ends End will show on the Display and 4 beeps will sound You can stop the beeping by opening the door or by touching CANCEL End will remain on the Display and a beep will sound every 30 seconds to remind you that food is left in the oven until door is opened or CANCEL is touched The Display will then show the time of day The Cook Power can be chan...

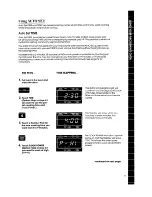
Page 11: ...d The time may be changed to any time from O 99 minutes O 99 seconds allowing you to store your favorite cooking time and Cook Power See page 12 for instructions DO THIS 1 Put food in the oven and close the door 2 Touch TIME Option Skip to step 6 if you want to use the pre set cooking time and Cook Power 3 Touch a Number Pad for the new cooking time you want from 1 to 9 minutes 4 Touch COOK POWER ...

Page 12: ...nd you that food is left in the oven until the door is opened or CANCEL is touched The Display will then show the time of day You can set COOK to follow Auto Set TIME if desired Touch in instructions for Cooking in your microwave oven page 8 or Cooking at lower cook powers page 9 Changing the pre programmed setting You can change the pre programmed cooking time and Cook Power in AUTO SETTIME to th...

Page 13: ...ite cooking temperature and cook power See page 14 for instructions DO THIS I Put food in the oven and close the door 2 Touch TEMP Option Skip to step 6 if you want to use the pre set temperature and Cook Power 3 Touch a Number Pad for the new temperature you want from 110 F to 190 F 4 Touch COOK POWER Option Skip to Step 6 if you want to cook at 70 power 5 Touch a Number Pad for the Cook Power yo...

Page 14: ...to the temperature and power you most often use To change the Auto Set TEMP setting follow these steps 1 Insert at least of the temperature probe into the food 2 Place food in the oven and close the door 3 Touch TEMP twice 4 Touch the Number Pads for the new desired temperature between 90 F and 200 F If high Cook Power is desired skip to Step 6 5 Touch COOK POWER 6 Touch the Number Pad for the des...

Page 15: ... ends End will show on the Display and 4 beeps will sound You can stop the beeping by opening the door or by touching CANCEL End will remain on the Display and a beep will sound every 30 seconds to remind you that food is in the oven until door is opened or CANCEL is touched The Display will then show the time of day For best results allow the food to stand for a while after defrosting This helps ...

Page 16: ...ded OR l Touch in new instructions for additional defrosting time Cooking automatically after defrosting The controls can be set so the microwave oven goes automatically from defrosting to the Cook Cycle you have touched in DO THIS 1 Put food in the oven and close the door 2 Touch QUICK DEFROST 3 Touch Number Pads for the defrosting tlme you want 4 Touch COOK 5 Touch Number Pads for the Cooking ti...

Page 17: ...ROST Indicator Light stays on and the Display counts down the standing time During the countdown the oven will be dark and the tan will be off When the standing time is over you will hear 2 beeps and the cooking cycle will start The COOK Indicator Light will be on during the cooking cycle The COOK POWER Indicator Light will also be on if you are using a Cook Power other than high The Display count...

Page 18: ... if you want to use high power 7 Touch the Number Pad for the Cook Power you want 2 Place food in the oven and plug the probe into the socket on the oven wall THIS HAPPENS 3 Make sure the probe does not touch any part of the oven interior Close the door The PROBE TEMP Indicator Light will come on and the Display will show F The Display will show the numbers you touched in the order you touched the...

Page 19: ...ON T l use hot pads when removing probe from food or food from oven l stir foods durlng cooking when recommended stir soups casseroles and drinks before serving cover roasts with foil and let stand a few minutes after cooking Remove foil if you de tide to cook it longer l remove the probe from the oven when not cooking by temperature l let probe or probe cable touch any part of the oven interior l...

Page 20: ... thecenteroftheliquid fat or bone l Casseroles cooked using the Temperature Probe should be made from precooked foods Do not use raw meats raw vegeta bles and cream sauces in casseroles l Dry casseroles do not work well l Thaw frozen casseroles and meats in the microwave oven before inserting the probe l If you are cooking individual servings such as mugs of soup check the probe setting in sev era...

Page 21: ...or and touch KEEPWARM then START if additional KEEPWARM time is desired l Foods cooked covered should be covered during KEEPWARM l Pastry items pies turnovers etc should be uncovered during KEEPWARM l Complete meals kept warm on a dinner plate should be covered during KEEPWARM l The use of more than one complete KEEPWARM about 1hour 40 minutes is not recommended The quality of some foods will suff...

Page 22: ...lay for 5 seconds Then the display returns to showing what the oven is doing 2 To stop the oven while it is running l Open the door The oven will stop Restart the oven by closing the door and touching START l Touch CANCEL All instructions will be erased You must touch in new instructions 3 If you touch two instructions into the same cycle the second set of instructions will cancel the first 22 ...

Page 23: ...lei container on the bottom of the oven Second position Do not operate the oven with the metal rack stored on the floor of the oven Damage to the interior finish will result Special caution l Do use hot pads when removing rack from oven after cooking It may be hot l Do put food in containers then place containers on rack l Do use only when cooking foods in more than one container l Do use only in ...

Page 24: ...ng at the front of the oven or the air intake opening on the bottom of the oven Blocking vent or air intake openings can cause poor cooking results Make sure the microwave oven legs are in place Do not set the oven on anything that will block the air intake openings 2 Put the oven on a ca counter table or shelf that is strong enough to hold the oven the food and the utensils you put in it The cont...

Page 25: ... temporarily until a GROUNDING PLUG properly grounded and polarized 3 prong PowE PPqj receptacle is installed use only a heavy duty Ul listed 3 wire grounding type exten sion cord containing three l gauge mini mum copper wires It must not be longer than polarized 3 prong grounding plug It must be 10 feet cords longer than 10 feet may affect the plugged into a correct polarized mating 3 cooking per...

Page 26: ...sponge For stubborn soil boil a cup of water in the oven for 2 or 3 minutes Steam will soften the soil CAUTION Abmslve cleansers steel wool pads gritty wash cloths etc can damage the control panel and the lnterlor and exterior oven surfaces Use a sott cloth or a sponge wlth a mlld detergent or spmy glass cleaner Replacing the light bulb Be sure to cle the areas where the door and oven frame touch ...

Page 27: ...re they are scattered or stirred by a mode mixer like a fan Microwaves bounce off metal oven walls and are absorbed by food Microwaves may not reach the center of a roast The heat around the outside is what cooks the roast all the way through This is one of the rea sons for letting some foods roasts baked potatoes stand for a while after cook ing or for stirring some foods during the cooking time ...

Page 28: ...ter heating or when adding ingredients coffee etc resulting in harm to the oven and possible personal injury For best results stir any liquid several times before heating or reheating USE HOT PADS Microwave energy does not heat contain ers but the hot food does DO NOT heat store or use flammable or inflammable materials in or near the oven NEVER lean on the door or allow a child to swing on it whe...

Page 29: ...ty NEVER try to pop corn in a paper bag Overcooking may result in smoke and fire Starting a microwave oven when it s empty is not recommended If you experiment put a container of water in the oven I neral information DO NOT try to melt paraffin wax in the oven Fire or other hazards may result I If your electric power line voltage is less than the nor mall20 volts cooking times may be longer If a f...

Page 30: ... l Is the Minute Timer in use l Is the oven door closed completely Is the oven in standing time between QUICK DEFROST and COOK or AUTO SET TIME See page 15 If you do not hear a Programming Tone page 6 l Is the command correct l Has the tone been cancelled If the fan seems to be running slower than usual l Has the oven been stored in a cold area The fan will run slower until the oven warms up to no...

Page 31: ...ith one of our Consultants or if you prefer write to Mr Robert Stanley Division Vice President Whirlpool Corporation 2000 M 63 Benton Harbor Ml 49022 If you must call or write please provide model number serial number date of purchase and a complete description of the problem This intor mation is needed in order to better respond to your request for assistance 5 If you need FSP replacement parts F...

Page 32: ...bulbs B Repairs when microwave product is used in other than normal single family household use C Pick up and delivery This product is designed to be repaired in the home D Damage to microwave product caused by accident misuse fire flood acts of God or use of products not approved by Whirlpool E Any labor costs during the limited warranties WHIRLPOOL CORPORATION SHALL NOT BELIABLE FOR INCIDENTAL O...

Reviews: