background image

Summary of Contents for MW8700XL

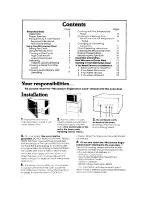
Page 1: ...Microwave Oven Model MW87OOXL Defrost Guide N 2 Position Bi Level Cooking Rack Door Latch Model and Serial Number Plate Control Pan ON OFF Switch not shown ...

Page 2: ...block vents counter table oi shelf that is on back of the oven strong enough to hold the Blocking vents can cause oven The control side of the poor cooking results unit is the heavy side Handling can be tricky 4 For your surety this oven must be grounded DO NOT REMOVE THETHIRD PRONG FROM THE PLUG You must have a qualified electrician put in the right outlet if Yours does not have the 3 prong plug ...

Page 3: ...l Used only by people who can operate It properly l Kept clean and in good repair NEVER start the oven when it s empty lhe oven can be damagea DO NOT cook or reheat whole eggs in the micro wave oven Steam build up can cause an egg to burst Damage to the oven or injury to the user may result DO NOT use the oven until you have read and under stand ALL the information on safe use ...

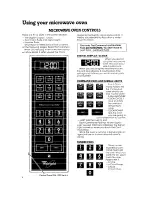
Page 4: ...e The Command and Number Pads are not buttons You don t have to Dush them iust touch them DIGITAL DISPLAY CLOCK When you are using the micr6wave oven this acts OS a display It counts down time settings and it shows you what number pods you touched COMMAND PADS AND SIGNAL LIGHTS Touch Com mand Pods to tell the microwave oven what to do and in what order A few examples COOK CYCLE 1 cook at less than...

Page 5: ...nal Lrght goes off 3 Touch START USING THE MINUTE TIMER The Minute Timer does not start or stop cooking it works like o kitchen timer Set in mrnutes or seconds and you will hear a beep when the set time is up The oven door must be closed before setting the Minute Timer DO THIS THIS HAPPENS Touch MINUTE TIMER Touch Number Pads for minutes and seconds Touch START The MINUTE TIMER Signal Light will c...

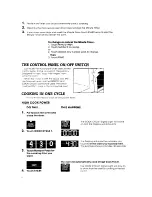
Page 6: ...fingers from using the oven When the suitch is OFF the Clock and Min ute Timer wili work but the DEFROST and COOK CYCLkS cannot be used The switch must be ON I cook In the microwave oven COOKING IN ONE CYCLE Follow th se steps to cook at one power level HIGH COOK POWER DO THIS 1 Put food in the oven and close the door 2 Touch COOK CYCLE 1 THIS HAPPENS The COOK CYCLE 1 Signal Light will come on and...

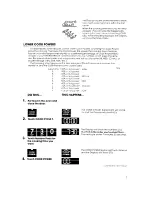
Page 7: ... you by name HI MED LO etc or by percentage 1 O 50 808 etc The following chart gives you the percentage of Cook Power each Number Pad stands for and the Cook Power name us ually used DO THIS automatic 200 of frill power HIGH 9 90 of flJll power 8 80 ot full power 7 70 of full power MED HI 6 60 of full power 5 50 of full power MED 4 40 ot tul poLver 3 30 of uil power MED LO 2 20 of fuii power 1 10 ...

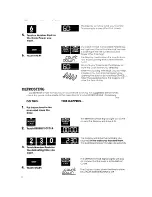
Page 8: ... hear 4 beeps You can stop the beeping by opening the door or by touching CANCEL When the beeping stops the Display WIII show the time of day Use DEFROST CYCLE to thaw froren food before cookrng for suggested defrost trmes check the guide on the Inside of the oven door or rn your MICRO MENUS Cookbook Tmk DO THIS THIS HAPPENS Put frozen food in the oven and close the door The DEFROST CYCLE Signal L...

Page 9: ...e even defrostrng COOKING IN MORE THAN ONE CYCLE For best results some recipes call for one Cook Power for a certain iength of time and another Cook Power for another length of time Your oven can be set to change from one to the other and even a third one automatrcally 1 2 3 4 5 DO THIS THIS HAPPENS Put food in the oven and close the door Touch COOK CYCLE 1 The COOK CYCLE 1 Signal Light WIII come ...

Page 10: ...ird cooking cycle touch COOK CYCLE 3 and repeat steps 7 8 and 9 10 count than high All other Signal Lights will go off d The Display counts down the cooking time own to show how much time is left in each cycle tamFor 2 of every 10 seconds of countdown the Display will show the Cook Power you selected if you are using a Cook Power other than high You will hear a beep at the end of each cycle You ca...

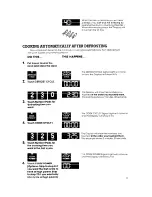
Page 11: ... s Touch DEFROST CYCLE Touch Number Pads for defrosting time you want Touch COOK CYCLE 1 Touch Number Pads for the cooking time you want in the first cycle Touch COOK POWER Options Skip to step 8 if you want the first cycle to cook at high power Skip to step 12 if you want only one cycle at high power The Display will show the numbers you touched in the order you touched them This example shows 2 ...

Page 12: ...l come on and the Display will show 2 O s The Display WIII show what you touched This example shows 40 of full power 11 Touch a Number Pad for the Cook Power you want in the second cooking cycle 12 Touch START For a third cooking cycle touch COOK CYCLE 3 and repeat steps 9 10 and 11 12 d count own When you touch START the DEFROST CYCLE Signal Light will stay on All other Signal Lights will go off ...

Page 13: ...nt down The Disp ay counts down the time to show how much cooking time IS lef t in fne second cycle For 2 of every 10 seconds the Display wili show the Cook Power you selected If you are using a Cook Power other than high When the last cooking cvcle ends COOK CYCLE 2 or 3 You will hear 4 beeps You can stop the beeping by opening the oven door or touching CANCEL When the beeping stops the Display w...

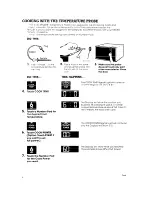
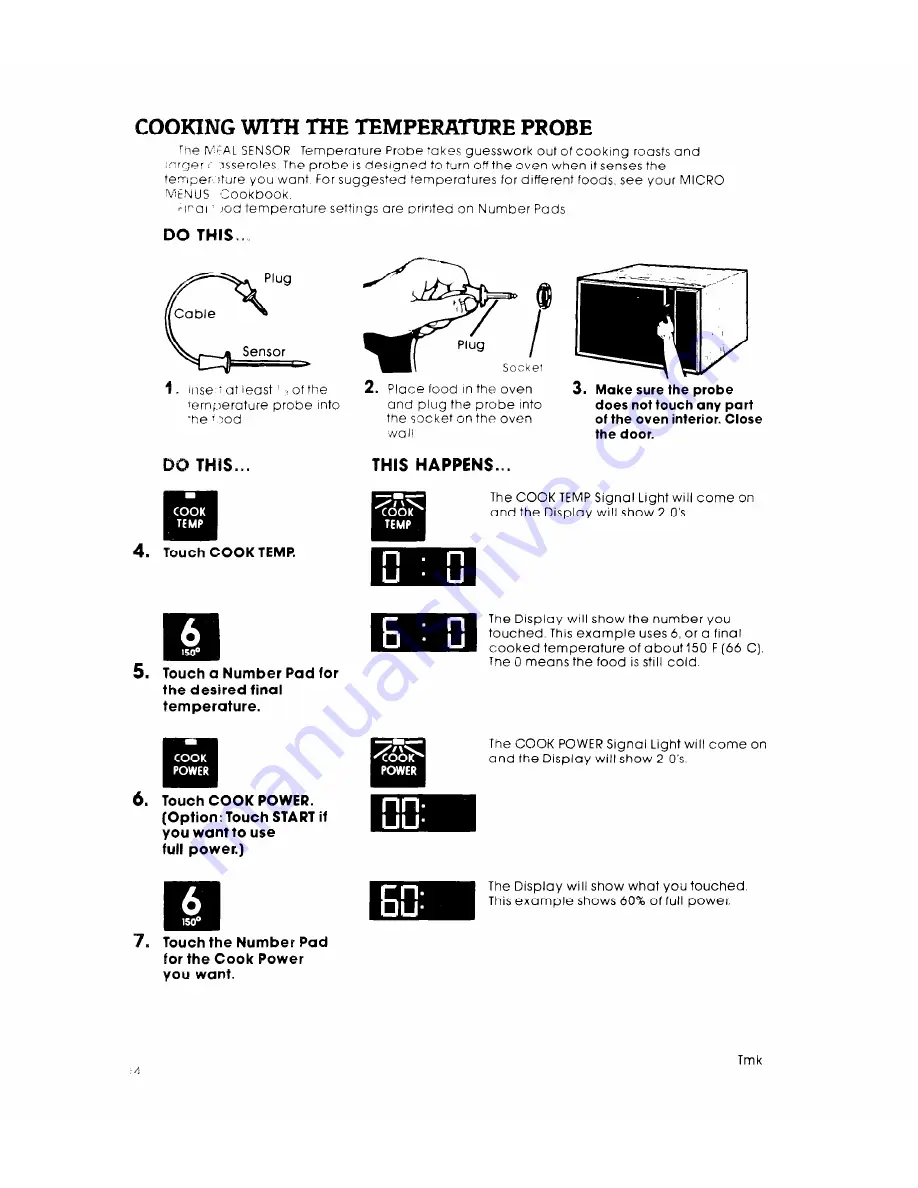
Page 14: ...be and plug the probe into does not touch any part the socket on the oven of the oven interior Close wali the door The COOK TEMP Signal Light will come on and the Display will show 2 O s Touch COOK TEMP E m The Display will show the number you touched This example uses 6 or a final cooked temperature of about 150 F 66 C Tne 0 means the food is still cold Touch a Number Pad for the desired final te...

Page 15: ...d l iet probe or probe cable touch any rxrt of the oven interior l stir soups casseroles ond drunks before serving l cover roasts with for and let stand Q few minutes after cooking Remove foil it You decide to cook It let probe touch foil if used Foil can be kept away from probe with wooden toothpicks Remove foil if arcrng occurs l use paper plastic wrap or or plastic con tainers They WIII be in t...

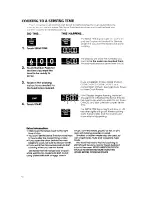
Page 16: ...what you told it to do Touch CANCEL and start over with a later Serve Time The SERVE TIME Signal Light will stay on All the other lights will go off When cooking starts Signal Lights and the Display will show what is happening Extra Information l Make sure the Clock is set to the right time of day l You can t set the Serve Time for more than 12 hours after the correct time of day l If you open the...

Page 17: ...turns to show what the oven is doing 2 To stop the oven while it is running l Open the door The oven Lvill stop You can reslart it by closrng the door and tou chrng START a Touch CANCEL A I instructions WI I be erased qou must touch in new instructions 3 If you touch two instructions into the same cycle the second instructions will erase the fl st 4 Whef usfng a Cook Power other trlan hian the Dis...

Page 18: ...ING THE LIGHT BULB 1 Unplug the power cord 2 Remove holdtng screw on access panel 3 Remove tne light bulb from its sot ket 4 Replace bulb with a 40 watt appliance bulb 5 Replace the access panel and holding screw Second Position Turn rack upside down when using a taller container on the bottom of the oven SPECIAL CAUTIONS l Do not use with browning dish l Use only when cooking foods in more than o...

Page 19: ...e oven with a cup of water beslde it Cook on high Cook Power for one minute If the dlsh gets hot and the water stays cool do not use It NEVERCOOK OR REHEATA WHOLE EGG Slice hard boiled eggs before heating Steam build up rn whole eggs may cause them to burst and possibly damage the oven Paper can char or burn and some plastics can melt if used when heating foods for more than 4 minutes NEVERstart a...

Page 20: ...d not use such containers to heat liquids again Follow MICRO MENUS Cookbook directions carefully If using a different cookbook you may need to experiment with times and Cook Powers l Double check all settings l Use the oven only for defrosting cooking or reheating Overcooking some foods can cause them to scorch or flame especially foods like potatoes popcorn snacks etc See the MICRO MENUS Cookbook...

Page 21: ...nce off a metal floor back through the ceramic bottom and are absorbed by the food The mlcrowaves disturb water molecules tn the food As the molecules bounce around bumping Into each other heat ISmade like rub bing your hands together This IS the heat that ccoks Building in your microwave oven Your liicrowave oven is not limited to carts counters or tables Custom lnstallatlons are mc 3e easy with ...

Page 22: ...te Timer Signal Light on l Is the oven door closed completely l Is the oven in a standing time between DEFROST CYCLE and COOK CYCLE I See page12 If the fan seems to be running slower than usual l Has the oven been stored in a cold area The fan will run slower until the oven warms up to normal room temperature If there has been a power interruption the Display will show 88 88 Reset the clock page 5...

Page 23: ...irectcry Yellow Pages under APPL IANCESm HOUSEHOLD MAJOR SERVICE REPAIR ELECTRICAL APPLIANCES MAJOR REPAIRING PAPTS Call our COOL LINE service assistance tele phone number see Step 2 and talk with one of our Consultants or if you prefer write to Mr Guy Turner Vice President Whirlpool Corporation Administrative Center 2000 US 33 North Benton Harbor Ml 49022 If you must call orwrite please provide m...

Page 24: ...rll fit right and work right because they are made lo the same exacting specifications used to build every new Whrrlpoal appliance Benton Harbor Michigan Automalic Washers Clolhes Dryers Freezers Retrigeralor Freezers Ice Makers Dishwashers Euill in Ovens and Surface Units Ranges Microwave Ovens Compaclors Room Air Conditioners Dehumidifiers Cenlral Healing and Air Conditioning Syslems Printed in ...

Reviews: