background image

Summary of Contents for RE953PXP

Page 1: ...lowave Ovens Trash Compactors Room AH Conditloners Oehum d fiers Automatic Washers Clothes Dryers Freezers Refrigerator Free2 ...

Page 2: ...venVent 12 If You Need Service or Storage Drawer 13 Assistance 26 Tmk 01984 Whirlpool Corporation Before you use your range Read thls Use 8 Care Guide and The Cooking Guide for important safety Information You are personally responsible for l Reading and following all safety precautions in this Use Care Guide and the Cooking Guide l Installing the range where it is protected from the elements and ...

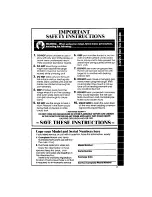
Page 3: ...ktop 9 DO NOT heat unopened containers and oven walls racks and door They could explode The hot con can get hot enough to cause tents could burn and container par burns titles could cause injury 5 DO NOT use the range to heat a 10 MAKE SUREto open the oven door room Persons in the room could all the way when adding or remov be burned or injured or a fire ing food to prevent burns could start l FCR...

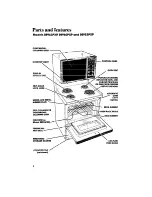
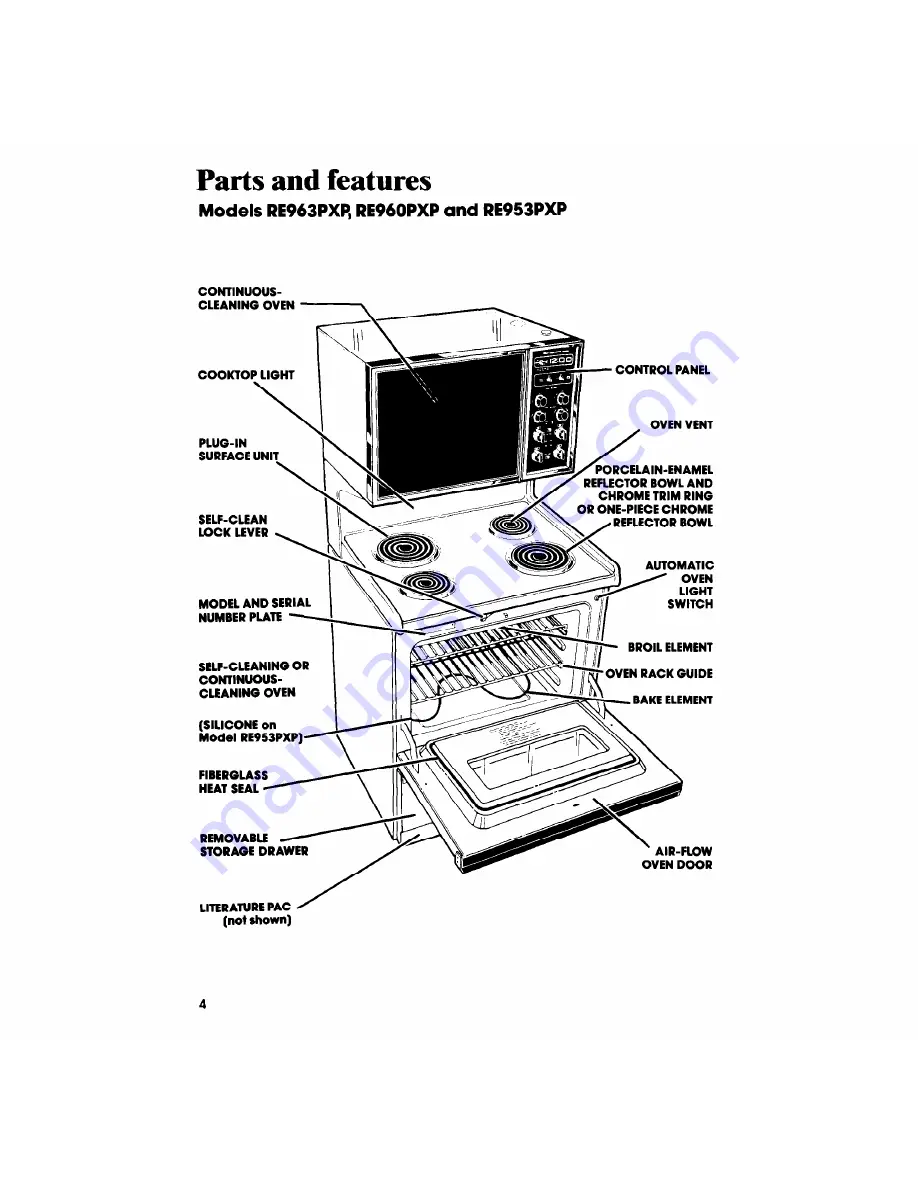
Page 4: ...OR BOWL AND SELF CLEAN CHROME TRIM RING OR ONE PIECE CHROME REFLECTOR BOWL t h AUTOMATIC MODEL AND SERIAL NUMBER PLATE SWITCH BROIL ELEMENT SELF CLEANING OR CONTINUOUS I OVEN RACK GUIDE CLEANING OVEN BAKE ELEMENT SILICONE on Model REOSBPXP FIBERGLASS HEAT SEAL H REMOVABLE STORAGE DRAWER OVEN DOOR LITERATURE PAC not shown ...

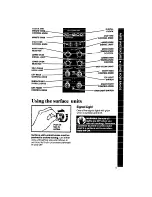
Page 5: ...OL KNOB 5 PPER OVEN SIGNAL LIGHT UPPER OVEN TEMPERATURE CONTROL LOWER OVEN TE P l rySELF CLEAN LIGHT RIGHT REAR CONTROL KNOB TOP LIGHT SWITCH RIGHT FRONT CONTROL KNOB OVEN LIGHT SWITCH Using the surface units Signal light V PUSH IN kmto reltlng Surface unit control knobs must be pushed in betore turning Turn either way until setting you want shows in window Set them anywhere between HI and OFF One...

Page 6: ...food at the trim rings or chrome reflector bowls Start cooklng on HI temperature and turn control down to coniinue cooklng you want Use only flat bottomed utensils for best cooking results and to prevent damage to the cooktop Specialty items with rounded or ridged bottoms woks ridged bottom canners or tea kettles are not recommended See the Cooklng Guide for Important utensil lnformatton Optional ...

Page 7: ...The Minute Timer does not start or stop the oven It works like a kitchen timer Set it in minutes up to an hour You will hear a buzzer when the set time is up DO NOT PUSH IN THEKNOB when setting the Minute Timer 1 Without pushlng It In turn the Minute Timer Knob until the time in the window passes the setting you want 2 Without pushlng In turn the knob back to the setting you want When the tfme Is ...

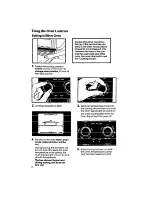
Page 8: ... pull out 2 Set Oven Selector to BAKE 3 Set Oven Temperature Control to the baking temperature vou want I The Oven gignai Light will come on The oven is preheated when the Oven Signal Light first goes off 4 Put food in the oven Note Oven racks walls and door will be hot During baking the elements will turn on and off to keep the oven temperature at the setting The Oven Signal Light will turn on an...

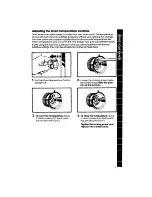
Page 9: ...ou different results I If after using the ovens for a period of time you are not satisfied with the tem perature settings they can be adjusted by following these steps 1 Pull the Oven Temperature Control straight off 3 To lower the temperature move a notch closer to LO Each notch equals aboutlOaF 5 2 Loosen the locking screw inside the control knob Note the posi tion of the notches 4 To raise the ...

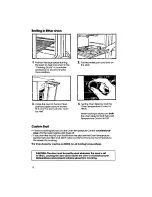
Page 10: ... the Oven Selector and the Oven Temperature Control to OFF Custom Broil l If food is cooking too fast turn the Oven Temperature Control counterclock wise until the Oven Signal Light goes off If you want the food to broil slower from the start set the Oven Temperature Control between 150 and 325 F 65 5 and 142 C The lower the temperature the slower the cooking The Oven Selector must be on BROIL tar...

Page 11: ... 1 Position the oven rack s properly and place the food in the oven 2 Make sure the clock is set to the right time of day 3 Push in and turn the Start Time Knob clockwise to the time you want baking to start 4 Push in and turn the Stop Time Knob clockwise to the time you want the oven to shut off 5 Set the Oven Selector on TIMED 6 Set the Oven Temperature Con trol on the baking temperature you wan...

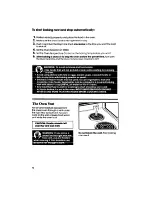
Page 12: ...r on TIMED 5 Set the Oven Temperature Control on the baking temperature you want 6 Atter baking is done or to stop the oven betore the preset time turn both the Oven Selector and the Oven Temperature Control to OFF The Oven Vent Hot air and moisture escape from the lower oven through a vent under the right rear surface unit You can cook on the unit or keep food warm on it while the oven is on CAUT...

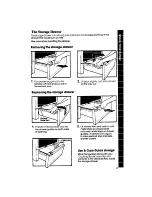
Page 13: ... Lift back slightly and slide drawer all the way out Replaclng the storage dmwer 1 Fit ends of drawer slld ails into the drawer guides on both sides of opening 2 Lift drawer front and push in until metal stops on drawer slide rails clear white stops on drawer guides Lift drawer front again to clear second stop and slide drawer closed Use Care Gulde stomge Store this booklet along wlth your Cooklng...

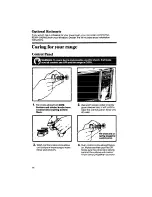
Page 14: ...traight off NOTE Surface unlt control knobs have a collar and a spring behlnd them 2 Use warm soapy water or spray glass cleaner and a soft cloth to wipe the control panel Rinse and dry well 3 Wash control knobs and surface unitcollars in warm soapy water Rinse well and dry 4 Push control knobs straight back on Make sure they point to OFF Make sure the collar and spring behind the surface unit con...

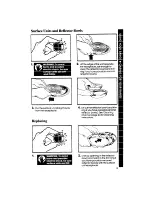
Page 15: ...reflector bowls 3 Pull the surface unit straight away from the receptacle Replacing 4 Lift out the reflector bowl and trin ring if you have porcelain enamel reflector bowls See Cleaning Chart on page 24 for cleaning instructions 2 Line up opening in the reflector bowl and notch in the trim ring you have porcelain enamel reflector bowls with the surface unit receptacle ...

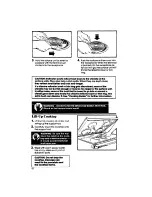
Page 16: ...t heatbetter and look new longer If a ohrome refledtor bowl or trim ring gets dlaoolomd some of the ubnsib may not be ftat enough or may be too large for the surfaoe unit In e r ease some of the heat that I8 meant to go into or around a utemii goes down and heats the ohrome refleofor bowl or Mm ring This extra heat oan dtsoolor lt See CookIng Oulde for further informatlon Lift Up Cooktop 1 Lift fr...

Page 17: ...r over the ends of the hinges Push the door down evenly The door will close only when it is on the hinges correctly The Upper Oven Rack Guides Removing the upper oven rack guides will help make it easier to clean the I upper oven 1 Lift the front of the rack guide 2 Swing the front away from the oven wall far enough so the tab in the guides clears the notch in the oven wall Pull the guides straigh...

Page 18: ... the oven bottom is recommended to catch sugar and starchy spills from pies and casseroles it must be used properly Cut foil from a roll of heavy dutyl8 inch 45 cm aluminum foil or buy a foil kit Part No 241430 from your Whirlpool Appliance dealer 1 Lift the cool bake element slightly to lift the feet off the oven bottom 2 Silde the foil under the bake element Make sure the foil is centered long e...

Page 19: ...foil on me oven bottom according to instructions Spillovers do not burn away and may stain the bottom Hand Cleaning RACKS Use soapy steel wool pad for best cleaning results Rinse well WINDOW Keep clean with hot sudsy water Use a plastic scour ing pad for stubborn spots Rinse well Do not use steel wool or abmslve cleansers WALLS AND DOOR Wash with hot soapy water Use a steel wool pad or plastic sco...

Page 20: ...ing the Self Cleaning Cycle they will darken and become harder to slide See T v tips on page 22 If you want the oven racks to remain shiny clean them by hand Clean Seal 6 The porcelain reflector bowls may be cleaned in the oven Clean Door l Put the oven racks on the second and fourth guides l Wipe the reflector bowls of loose soiled and grease Clean Frame l Place 2 bowls upside down on each rack F...

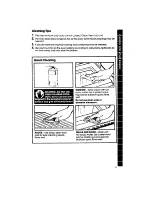
Page 21: ... the lever is all the way to the right 5 The Lock Light comes on when the oven temperature exceeds 500 F SOO C The Lock Lever must not be moved and the door can t be opened when this light is on 6 Atter the Clean Cycle Is com pleted the Lock Light goes off Move the Lock Lever back to the Cook Position Do not torte It Wait until it moves easily This turns off the Clean Light Turn the Oven Selector ...

Page 22: ...ven takes longer and results in more smoke than usual Oven racks lose their shine dis color and become harder to slide on their guides when they are left in the oven during the cleaning cycle To make them slide easier polish the edges of the racks with a soapy steel wool pad rinse well and wipe on a thin coat of salad oil To stop the cleanlnfij cycle at any time 2 Turnthe Oven Selector and Oven 1 ...

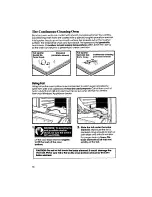
Page 23: ...nd warm soapy l Wlpe off regularly when cooktop and water lower oven are cool Nylon or plastic scouring l Do not allow teed oentalnlng aolds pad for stubborn spots such as vinegar tomato lemon juice or milk to nmaln on aurtaoo Adds will remeve the glessy Wsh l Do not use abmslve or harsh cleansen Suttace units No cleaning required l Spatters or spills will burn off l Do not Immerse In wuter Porcel...

Page 24: ...r glass Spray glass cleaner Warm soapy water or plastic scrubbing pad l Make sure oven Is cool 9 Follow directions provided with cleaner l Wash rinse and dry well with a soft cloth Conttnuous Warm soapy water or l Clean stubborn spots or stains Cleanlng Oven soapy scrubbing pad Rinse well with water Heavy duty aluminum foil l Place strip of aluminum foil on the or order a foil kit Part No bottom o...

Page 25: ...lass is heavy Hold it securely 3 Grasp the fluorescent tube at both ends Roll bottom of tube towards the front until bath ends come out of the receptacles Replace with a 20 watt coal white fluorescent tube 2 With both hands pull top of light cover towards you and lift it out of bottom support trim 4 With both hands caretully fit the glass light cover into the bottom metal support trim Then rotate ...

Page 26: ... nothlng operates Is the power supply cord plugged into a live circuit with the proper volt age See Installation Instructionsl l Have you checked the main fuse or circuit breaker box If the oven will not operate l Is the Oven Selector turned to a set ttng BAKE or BROIL but not TIMED BAKE l Is the Oven Temperature Control turned to a temperature setting If surface unfts will not operate l Have you ...

Page 27: ...ary recommend a qualified service company in your area FSP IS a regIstered trademark 0 of WhIrlpool Corporation for quality parts Look for this FSP symbol of quality whenever you need a re cement part 8 for your WMpoo applance FSP replacement parts WIII frt rrght and work rrght because they are made to the same exacttng specifications used to burld every new Whrrlpoo applrance 3 If you need servic...

Page 28: ...Maklng your world a llttle easier Part No 313295 01984 Whirlpool Corporation Printed in U S A ...

Reviews: