background image

Summary of Contents for RF310PXD

Page 1: ...Getting to Know Your Range 7 Using Your Range 8 Caring for Your Range 21 Troubleshooting 27 Requesting Assistance or Service 29 Index 31 Warranty 32 1 800 253 l 301 Call us with questions or comments STANDARD CLEANING ELECTRIC RANGE PART NO 3189088 Rev A MODEL RF310PXD Y 4 T ...

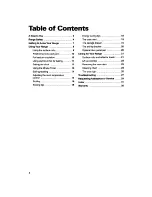
Page 2: ...g the Minute Timer 13 Baking roasting 14 Adjusting the oven temperature control 15 Broiling 18 Broiling tips 18 Energy saving tips 18 The oven vent 19 The storage drawer 19 The anti tip bracket 20 Optional door panel pat 20 Caring for Your Range 21 Surface units and reflector bowls 21 Lift up cooktop 23 Removing the oven door 23 Cleaning chart 24 The oven light 28 Troubleshooting 27 Requesting Ass...

Page 3: ...appliance The card helps us notify you about any new information on your appliance Please record your model s information Whenever you call to request service for Model Number your appliance you need to know your Serial Number complete model number and serial number You can find this information on the model Purchase Date and serial number plate see diagram on Dealer Name page 7 for location of pl...

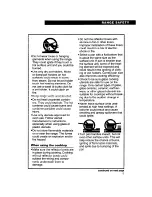
Page 4: ...limbing on it Donot leave children alone or unattended in area where the range is in use They should never be allowed to sit or stand on any part of the range They could be burned or injured l Do not operate the range if it is damaged or not working properly l Do not use the range for warming or heating the room Persons could be burned or injured or a fire could start l Use the range only for its ...

Page 5: ...uld subject the wiring and compo nents underneath them to damage l Do not line reflector bowls with aluminum foil or other liners Improper installation of these liners could result in a risk of electric shock or fire Select a pan with a flat bottom that is about the same size as the surface unit If pan is smaller than the surface unit some of the heat ing element will be exposed and could result i...

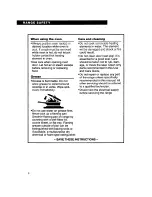
Page 6: ...d result Do not clean door heat seal It is essential for a good seal Care should be taken not to rub dam age or move the seal Clean only parts recommended in this Use and Care Guide Donot repair or replace any part of the range unless specifically recommended in this manual All other servicing should be referred to a qualified technician Disconnect the electrical supply before servicing the range ...

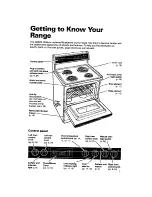
Page 7: ... bowl PP 8 24 Model and serial number piate Anti tip alternate wall mounted anti tip bracket see p 20 Removable storage Fy Automatic oven light switch P 26 Bake element Control panel Left front control knob Left rear control knob 8 24 Oven temperature Right rear Manual oven control knob pp 14 control knob 15 16 17 light switch PP 8 24 P 26 surface unit Clock Minute ndicator Timer Oven heatin Oven ...

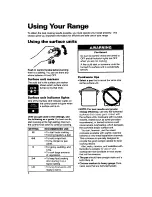
Page 8: ...re all control knobs are turned to OFF and all indicator lights are OFF when you are not cooking A fire could start or someone could be burned if a surface unit is accidentally left ON Cookware tips l Select a pan that is about the same size as the surface unit l NOTE For best results and greater energy efficiency use only flat bottomed cookware that makes good contact with the surface units Cookw...

Page 9: ...unit for best results Also use a canner pan which can be centered over the surface unit and which does not extend more than one inch outside surface unit area Large diameter canners pans if not properly centered trap heat and can cause damage to the cooktop l Do not place canner on two surface units at the same time Too much heat will build up and will damage the cooktop l Start with hot water Thi...

Page 10: ...ed location before turning oven on Be sure the rack s is level l If rack s must be moved while oven is hot use pot holders or oven mitts to protect hands Failure to follow the above precautions could result in personal injury For best air circulation Hot air must circulate oven for even heat to Use the following as a guide to determine where to place the pans One pan Place in the center of the ove...

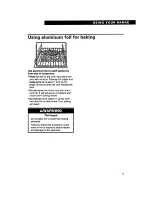
Page 11: ... all around than the dish holding the food l Do not cover the entire rack with alumi num foil It will reduce air circulation and cause poor cooking results l Do not line oven bottom or entire oven rack with foil or other liners Poor baking will result Fire Hazard Do not allow foil to touch the heating elements Failure to follow this precaution could result in fire or electrical shock hazard and da...

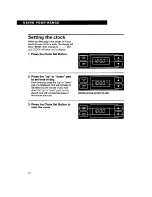
Page 12: ...change to I SET and CLOCK will show on the display 2 Press the up or down pad to set time of day Each time you press the up or down pad the displayed time will increase or decrease by one minute If you hold down the up or down pad the dis played time will increase decrease in ten minute amounts display shows set time of day 12 ...

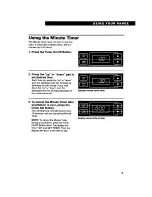
Page 13: ...play counts down time ten minute amounts 3 To cancel the Minute Timer after countdown is over press the Clock Set Button You will hear two reminder tones every 10 seconds until you cancel the Minute Timer NOTE To cancel the Minute Timer during a countdown press the Timer On Off Button twice The display will show OO and SET TIMER Then the display will return to the time of day 13 ...

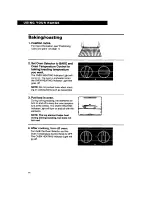
Page 14: ... goes off NOTE Do not preheat oven when roast ing or cooking items such as casseroles 3 Put food in oven During baking roasting the elements will turn on and off to keep the oven tempera ture at the setting The OVEN HEATING Indicator Light will turn on and off with the elements NOTE The top element helps heat during baking roasting but does not turn red 4 After cooking turn off oven Turn both the ...

Page 15: ...er Locking Tooth Notches To lower 2 Loosen the locking screws inside the control knob Note the position of the notches 3 To lower the temperature hold knob handle firmly and move the tooth a notch counterclockwise Each notch equals about 5 F 2 5 4 To raise the temperature hold knob handle firmly and move the tooth a notch clockwise Each notch equals about 5 F 2 5 5 Tighten the locking screws and r...

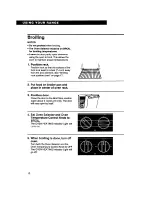
Page 16: ...away from the broil element See Broiling rack position chart on page 17 2 Put food on broiler pan and place in center of oven rack 3 Position door Close the door to the Broil Stop position open about 4 inches lo cm The door will stay open by itself 4 Set Oven Selector and Oven Temperature Control Knob to BROIL The OVEN HEATING Indicator Light will come on 5 When broiling is done turn off oven Turn...

Page 17: ...il heating element to cycle and to slow cook ing The lower the temperature the slower I the cooking NOTE Fish and chicken are some foods that may cook better if you use lower broiling temperatures Broiling rack position chart RACK POSITION TYPE OF FOOD FROM BOlTOM DONENESS 4 Hamburger patties and thin steaks l 2 thick or less 3 Quickly searing food rare and medium steaks medium patties ham slices ...

Page 18: ... energy when using your cooking product l Use pans with flat bottoms straight sides and tight fitting lids l Match the pan to the surface unit size l Cook with a minimum of liquid or fat to help shorten cooking time l Preheat pans only when recommended and for the shortest time possible l Start food on higher heat settings then set surface unit control on low or off to finish cooking Use retained ...

Page 19: ...burns The storage drawer You can remove the storage drawer to make it easier to clean under the range and to check for installation of the anti tip floor bracket if you have one Use care when handling the drawer Removing the storage drawer Replacing the storage drawer 1 Empty drawer of any pots and pans before removing drawer Pull drawer straight out to the first stop Lift front and pull out to th...

Page 20: ...anti tip bracket is attached to floor with screws l Make sure one rear leveling leg is posi tioned under the anti tip bracket To verify the anti tip bracket is engaged if you have a wall bracket Cable attached to rear of control panel Wall bracket l Look to see if the anti tip bracket is attached with screws to the wall behind the control panel l Make sure the cable on the back of the range is sec...

Page 21: ... is cool before cleaning Failure to do so could result in electrical shock or burns Surface units and reflector bowls Removing 1 2 Make sure all surface units are off and cool before removing surface units and reflector bowls Lift the edge of the unit opposite the receptacle just enough to clear the element hold down clip and the reflector bowl 3 Pull the surface unit straight away from the recept...

Page 22: ...ng around NOTE Reflector bowls reflect heat back to the utensils on the surface units They also help catch spills When they are kept clean they reflect heat better and look new longer If a reflector bowl gets discolored some of your utensils may not be flat enough or some may be too large for the surface unit In either case some of the heat that s meant to go into or around a utensil goes down and...

Page 23: ...ry from the cooktop accidentally falling NOTES Do not drop the cook top Damage could result to the porcelain and the cooktop frame Removing the oven door Removing the oven door will help make it easier to clean the oven 1 Open the door to the first stop position Electrical Shock Hazard Make sure all controls are OFF and the oven is cool before removing oven door Failure to do so could result in el...

Page 24: ...y l Do not spray cleaner directly on panel glass cleaner Apply cleaner to paper towel Exterior surfaces other than control panel Sponge and warm soapy water Surface units No cleaning required l Wash wipe with clean water and dry thoroughly l Use nonabrasive plastic scrubbing pad on heavily soiled areas l Do not use abrasive or harsh cleans ers They may damage the finish NOTE Do not allow foods con...

Page 25: ...ater and dry thoroughly Soapy steel wool l Wipe well with water pad for heavily soiled areas OR Commercial oven l Remove door for easier access cleaner for heavily soiled areas l Place newspaper on floor to protect floor surface l Follow directions provided with the oven cleaner Heavy duty aluminum foil or shallow pan used while cooking l Wipe well with clear water l Use in well ventilated room l ...

Page 26: ... bulb from breaking and from high oven temperatures Because bulb cover is made of glass be careful not to drop it I Failure to follow the above could result in electrical shock burns or injury from broken glass To replace the oven light 1 Unplug appliance or disconnect at the main power supply 2 Remove the glass bulb cover in the back of the oven by screwing it out counter clockwise 3 Remove the l...

Page 27: ... household fuse or tripped a circuit breaker Other possible problems and their causes PROBLEM The oven will not operate CAUSE l You have not set the Oven Selector to BAKE or BROIL l You have not turned the Oven Temperature Control Knob to a temperature setting The surface units will not operate Control knob s will not turn l You have blown a household fuse or tripped a circuit breaker l The surfac...

Page 28: ...taste or appearance of the food l You are using a pan that is not the correct type or size Refer to a reliable cookbook or recipe for recommended pan type and size l There is not enough air space around pan when baking Allow 1 to 2 inches 4 5 cm of air space on all sides of pan There must be a minimum space of 1 inch l The cooking utensil is too large or too small for the surface unit being used P...

Page 29: ...EHOLD WASHING MACHINES 6 MAJOR SERVICE 6 REPAIR DRYERS SERVlCE REPAIR See Whirlpool Appliances or See WlMp3d A ysiiances or Authorized hhidpod Service Aumonzed Yvhrlpcd Service bampfe xw selvics co Emmple XT2 Service Co 3 If you need FSP replacement parts FSP is a registered trademark of Whirlpool Corporation for quality parts Look for this symbol of quality whenever you need a replacement part fo...

Page 30: ... bowls 24 Surface units 24 Under the cooktop 23 CLOCK 12 CONTROL KNOBS 8 24 COOKTOP Cleaning 21 24 Using 8 9 COOKWARE Canning 9 Tips 8 ENERGY SAVING TIPS 18 TOPIC PAGE FEATURES 7 LIFT UP COOKTOP 23 LIGHT 26 MINUTE TIMER 13 MODEL AND SERIAL NUMBER 3 OPTIONAL DOOR PANEL PAC 20 OVEN DOOR REMOVAL 23 OVEN TEMPERATURE Adjusting 15 Setting 14 16 OVEN VENT 19 PANS 8 9 PARTS 7 RACKS 10 ROASTING Pans 10 Rac...

Page 31: ...by unauthorized modifications made to the appliance z 95 WHIRLPOOL CORPORATION SHALL NOT BE LIABLE FOR INCIDENTAL OR CONSE QUENTIAL DAMAGES Some states do not allow the exclusion or limitation of incidental or consequential damages so this exclusion or limitation may not apply to you This warranty gives you specific legal rights and you may also have other rights which vary from state to state Out...

Reviews: