background image

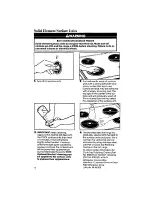
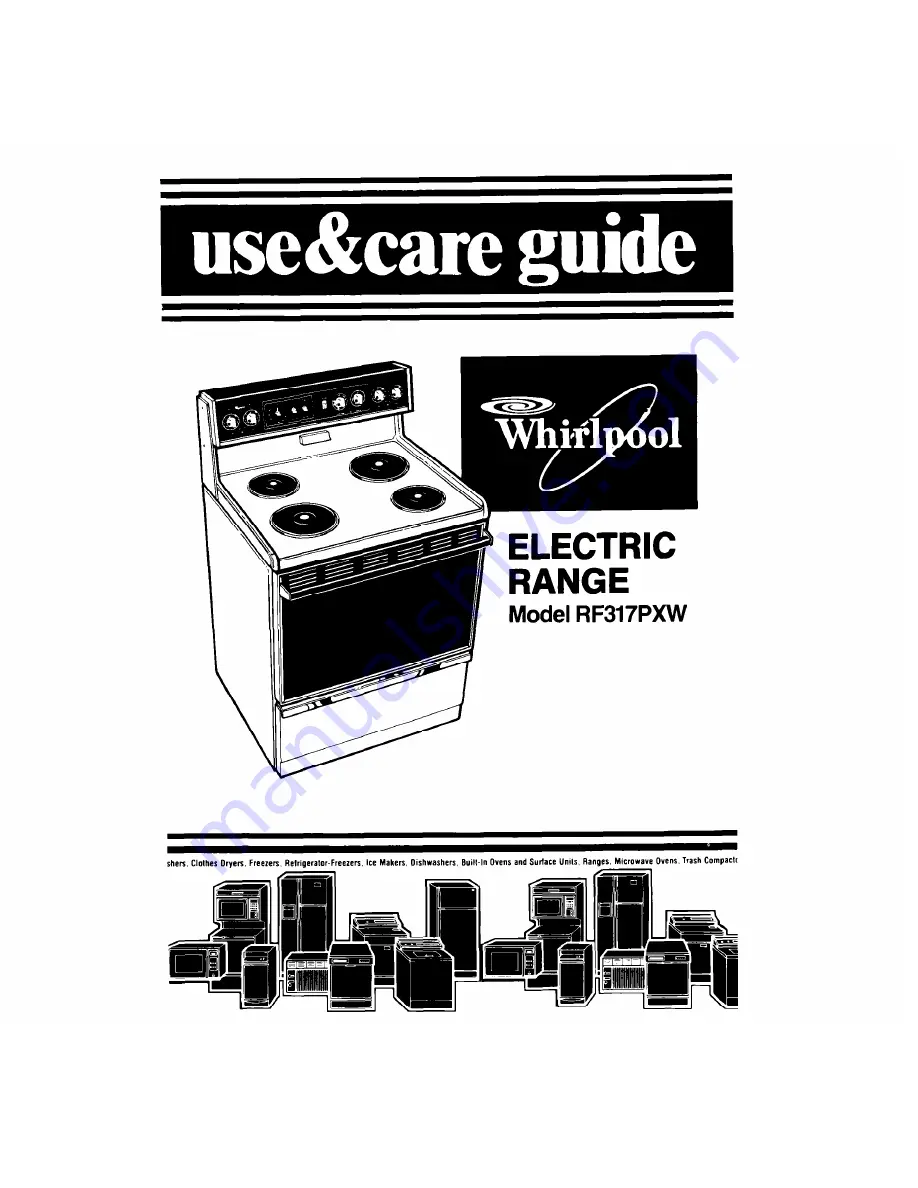
Summary of Contents for RF317PXW

Page 1: ...shers Clothes Dryers Freezen Relrigeralor Freezer Ice Makers Dishwashers Buill In Ovens and Surlace Unlls Ranges Mwowave OWIS Trash CQnWaClf ...

Page 2: ...are Guide and the Cooking Guide l Installing and leveling the range on a floor strong enough to support its weight and where it is protected from the elements See the Installation Instructions l Making sure the range is not used by anyone unable to operate it properly l Properly maintaining the range l Using the range only for jobs expected of a home range l Making sure the range is secured by a p...

Page 3: ...sult in the igniting of and verify that the anti et is engaged clothing or potholders Correct pan size also improves cooking a Do not use the range for warmin 9 efficiency or heating the room Persons cou d l Never leave surface units unat be burned or injured or a fire could start tended at high heat settings A boil over could result and cause l Do not leave children alone or smoking and greasy sp...

Page 4: ...rns During and atter use do not touch or let clothing or other flam mable materials contact surface units areas near units heating ele ments or interior surfaces of oven until they have had sufficient time to cool Other surfaces of the range may become hot enough to cause burns such as the oven vent opening the surface near the vent opening the cooktop the oven door and window FOR YOUR SAFETY l DO...

Page 5: ...OP OVEN LIGHT OVEN CLOCK MINUTE TIMER SURFACE UNIT INDICATOR LIGHT CONTROL KNOB CONTROL KNOB RIGHT REAR INDICATOR CONTROL KNOB LIGHT CONTROL PANEL SOLID ELEMEN SURFACE UNIT MODEL AND SERIAL NUMBER PLATE HEAT SEAL ANTI TIP BRACKm REMOVABLE STORAGE DRAWER OVEN DOOR ...

Page 6: ...re OFF when you are not cooking Someone could be burned or a flre could start if a surface unlt is accidentally left ON Until you get used to the settings use the following as a guide For best results start cooking at the high settings then turn the control knob down to continue cooking Use HI to start Use MED HI Use MED for Use MED LO Use LO to foods cook to hold a gravy pud to keep food keep foo...

Page 7: ...lt in longer cooking times Solid elements hold heat longerthan conventional surface units For best cooking results use a high setting for only a very short period of time Then use a lower setting to complete the cooking You may want to turn the solid element surface unit OFF a few minutes before you finish cooking Cookware Pans should be the same size or larger than the surface unit to prevent boi...

Page 8: ...The Minute Timer does not start or stop the oven It works like a kitchen timer Set it in minutes up to an hour You will hear a buzzer when the set time is up DO NOT PUSH IN THE KNOB when setting the Minute Timer 1 Without pushing it in turn the Minute Timer Knob until the timer hand passes the setting you want 2 WIthout pushing in turn the knob back to the setting you want When the time is up a bu...

Page 9: ...lements The top element helps heat during baking but does not turn red The rack s should be placed so the top of the food will be centered in the oven Always leave at least IYzto 2 inches 4 5 cm between the sides of the pan and the oven walls and other pans For more information see the Cooking Guide 3 Set the Oven Temperature Control to the baking temperature you want The Oven Indicator Light will...

Page 10: ...g the oven for a period of time you are not satisfied with the temperature settings they can be adjusted by following these steps I I 1 Pull the Oven Temoerature Control Knob straight off NOTCHES TOOTH 3 To lower the temperature move the tooth a notch closer to LO Each notch equals about 10 F 5 C 2 Loosen the locking screws inside the control knob Note the posi tion of the notches TObTH N6TCHES 4 ...

Page 11: ...one turn both the Oven Selector and Oven Temperature Control to OFF Custom Broil l If food is cooking too fast turn the Oven Temperature Control counterciock wise until the Oven Indicator Light goes off l If you want the food to broil slower from the start set the Oven Temperature Control between150 and 325 F 65 5 and 162 7 C The lower the tempera ture the slower the cooking The Oven Selector must...

Page 12: ...tion the oven rack s properly and place the food in the oven 2 Make sure the clock is set to the right time of day 3 Push in and turn the Start Time Knob clockwise to the time you want baking to start 4 Push in and turn the Stop Time Knob clockwise to the time you want the oven to shut off 5 Set the Oven Selector on TIMED BAKE 12 6 Set the Oven Temperature Con trol on the baking temperature you wa...

Page 13: ...cream soups and cooked meats or fish Any food that has to wait for cooking to start should be very cold or frozen before ft is put in the oven MOST UNFROZEN FOODS SHOULD NEVER STAND MORE THAN m0 HOURS BEFORE COOKING STARTS l Do not use foods containing baking powder or yeast when using delay start mey will not rtse properly l Do not allow food to remain in oven for more than two hours after end of...

Page 14: ...acing the Storage Drawer 1 Fit ends of drawer sliz rails into the drawer guides on both sides of opening 14 2 Lift back slightly and slide drawer all the way out 2 Lift drawer froxnd push in until metal stops on drawer slide rails clear white stops on drawer guides Lift drawer front again to clear second stop and slide drawer closed To verity the anti tip bracket is engaged l Remove the storage dr...

Page 15: ... range is cool before cleaning Failure to do so can result in burns or electrical shock 1 Turn control knobs to the OFF position 2 Pull control knobs straight off 3 Use warm soapy water or spray glass cleaner and a soft cloth to wipe the control panel Rinse and wipe dry 4 Wash control knobs in warm soapy water Rinse well and dry Do not soak 5 Replace control knobs by pushing them firmly into place...

Page 16: ...g apply a thin coat of salt free oil to the CCCL surface units then heat 3 5 minutes It may still smoke slightly when heated If surface units have dark spots caused by grease and food the oil treatment will improve their appearance but not eliminate the spots NOTE Optional Electrol dressing can be applied to the surface units to improve their appearance 16 4 The stainless steel trim rings will gra...

Page 17: ...cool before removing oven door Failure to do so can result in burns or electrical shock 1 2 3 Open the door to the first stop position Hold the door at both sides and lift it at the same angle it is in To replace fit the bottom corners of the door over the ends of the hinges Push the door down evenly The door will close only when it is on the t nges correctly ...

Page 18: ...cleansers Surface units Solld elements Warm soapy water and l Make sure the cooktop and the a soft cloth surface units are cool Soap filled scrubbing l Wipe off the surface units after each pad or scouring powder use See Solid Element Surface Units on page l After each cleaning heat surface 16 for more information units until dry Trim rlngs To darken surface units or to remove rust spots l Make su...

Page 19: ...apy water and Follow dlrectlons provided with a non abrasive plastic the cleaner scrubbing pad Wash rlnse and dry well Warm soapy water or l Remove door tor easler access soapy steel wool pads l Clean heavily solled areas or OR stains Rinse well with water Commercial oven cleaners l Remove door for easier access l Place newspaper on floor to protect floor surface l Follow dlrecttons provlded wlth ...

Page 20: ...result In elect al shock or burns The bulb cover must be In place when using the oven The cover protects the bulb tram breaking and from high oven temperatures Since bulb cover Is made of glass be careful not to drop It Broken glass could cause Injury 1 Unplug appliance or disconnect at the main power supply 3 Remove the light bulb from its socket Replace the bulb with a 40 watt appliance bulb 2 R...

Page 21: ...to turn If cooking results aren t what you expected l Is the range level l Does the oven temperature seem too low or too high See page 10 l If needed have you preheated the oven as the recipe calls for l Are you following a tested recipe from a reliable source l Are you using pans recommended in the Cooking Guide l If baking have you allowed 1Yzto 2 inches 4 5 cm on all sides of the pans for air c...

Page 22: ...hey are made to the same exacting specifications used to build every new Whirlpool appliance To locate FSP replacement parts in your area refer to Step 3 above or call the Whirlpool COOL LINE service assistance number in Step 2 5 If you are not satisfied with how the problem was solved l Contact the Major Appliance Con sumer Action Panel MACAP MACAP is a group of independent consumer experts that ...

Page 23: ...Notes 23 ...
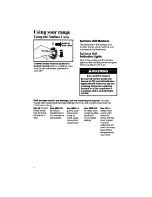
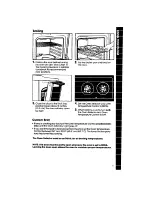
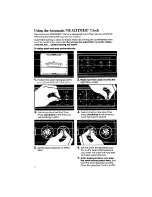
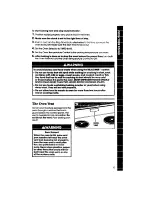
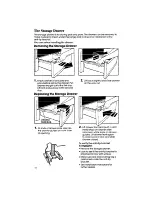
Page 24: ...HIRLPOOL CORPORATION SHALL NOT BELIABLE FOR INCIDENTAL OR CONSEQUENTIAL DAMAGES Some states do not allow the exclusion or limitation of incidental or consequential damages so this limitation or exclusion may not apply to you This warranty gives you specific legal rights and you may also have other rights which vary from state to state Outside the United States a different warranty may apply For de...

Reviews: