background image

Summary of Contents for RJE-3750W

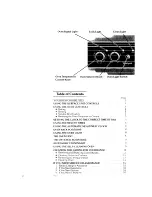
Page 1: ...ECTRIC RANGE Model RJE 3750W Control Panel Oven Went Plug In face Units Model and Serial Number Plate Automatic Oven Light Switch Fiberglass Heat Seal Oven Rack Guides Bake Element Removable Storage Drawer Air Flow Oven Door ...

Page 2: ...OF DAY USING THE MINUTE TIMER USING THE AUTOMATIC MEALTIMER CLOCK OVEN RACK POSlTlONS USING THE OVEN LIGHT THE OVEN VENT THE OPTIONAL ROTISSERIE ACCESSORY CANNING KIT USING THE SELF CLEANING OVEN CLEANING AND CARING FOR YOUR RANGE l Removing and Replacing Control Knobs l Cleaning Under the Cooktop l Removing the Storage Drawer l Cleaning Chart IF YOU NEED SERVICE OR ASSISTANCE 1 Before Calling for...

Page 3: ...ure your range l is properly installed and leveled on a floor that will hold the weight and in a well ventilated room l is connected only to the right kind of outlet with the right electric supply and grounding see Installation Instructions l is used only for jobs expected of home ranges l is out of the weather l is properly maintained l is not used by children or others who may not understand how...

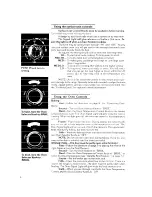
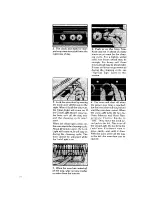
Page 4: ...portant utensil information Using the Oven Controls Baking First Follow the directions on page 8 for Positlonlng Oven Racks Second Turn the Oven Selector Knob to BAKE Third Turn the Oven Temperature Control Knob to the baking temperature you want The Oven Signal Light will glow while the oven is heating When this light goes off the oven has heated to the temperature you set Fourth Place food in th...

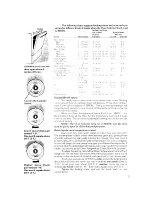
Page 5: ...of heating NOTE The Oven Selector must be on BROIL and the door must be partly open for all broiling temperatures Resetting the oven temperature control Does your new oven seem hotter or colder than your old oven The temperatures in older ovens often shift very gradually gettmg hotter or colder without the user really noticing the change Your new oven is properly adjusted to provide accurate tempe...

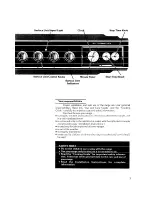
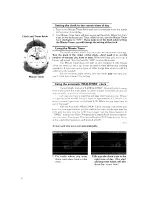
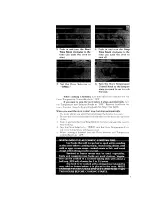
Page 6: ... the most accurate timing turn the knob past the time you ulant Then turn it back to the setting Using the automatic MEALTIMER clock The automatic feature of the MEALTIMER Clock lets you be away from home when the oven starts or when it stops It will turn on and off automatically or just turn off automatically Let s say you have a roast that will take four hours to cook Dinner ISsupposed to be at ...

Page 7: ...before it stops automatically turn the Temperature and Selector Knobs to OFF Remove food from the oven You don t have to do anything with the Stop Time Knob When you want the oven to start now but stop automatically 1 Put racks where you want them and place the food in the oven 2 Be sure the clock and the start and stop time hands show the right time of day 11 Push In and turn the Stop Time Knob t...

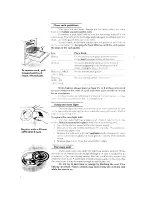
Page 8: ...air circulation Using the oven light The over1 light will come on uzht nthe oven door 1solxned To turn on rt c z light wIthout opening the door push the oven Ilght sultch Push It dgaln to turn tht light off To replace the oven light bulb The oven light bulb has a glass cover which ISheld on bb a wire r ld rThis cover must be in place when the oven IS helng used Iilrn off the electric power at the ...

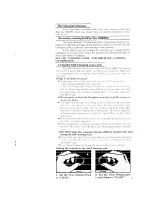
Page 9: ...d the outsItit of the covenseal 5011on these area u ill be more dlfflcult to rtlmovta after thr Self Clclanlny cycle Use hot water and detc rgent or a soapy stt lLi ool pad Rinse well l Do not move or bend the fiberglass oven door seal Do not try to clean it by hand l The hqh heat during tjhc clc anlny cycle 14 111 discolor thcj racks and take the shine off them If thrv are left 11 1 the oven duri...

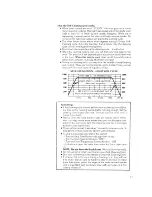
Page 10: ... way wipe out any residue or ashes from the bottom 4 Push in on the Stop Time Knob and set it ahead as many hours as you want for the clean ing cycle For a lightly soiled oven two hours ahead may be enough For heavy soil three hours ahead may be about right If some soil does not get removed during the cleaning cycle see Special Tips later in this section the preset stop time is reached but the ove...

Page 11: ...0 600 400 200 r I I I I I 1 I I y hr 1 hr 1 h hr 2 hr 2 hr Special tips l If the cleanrng cycle doesn t get the oven as clean as it should be the time set for cleaning was probably not long enough Set the cleaning time longer next time You can set it for more than 3 hours If you want l Plan to clean the oven before it gets too heavily soiled Other wise you may notice more smoke than you would expe...

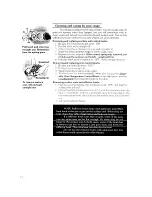
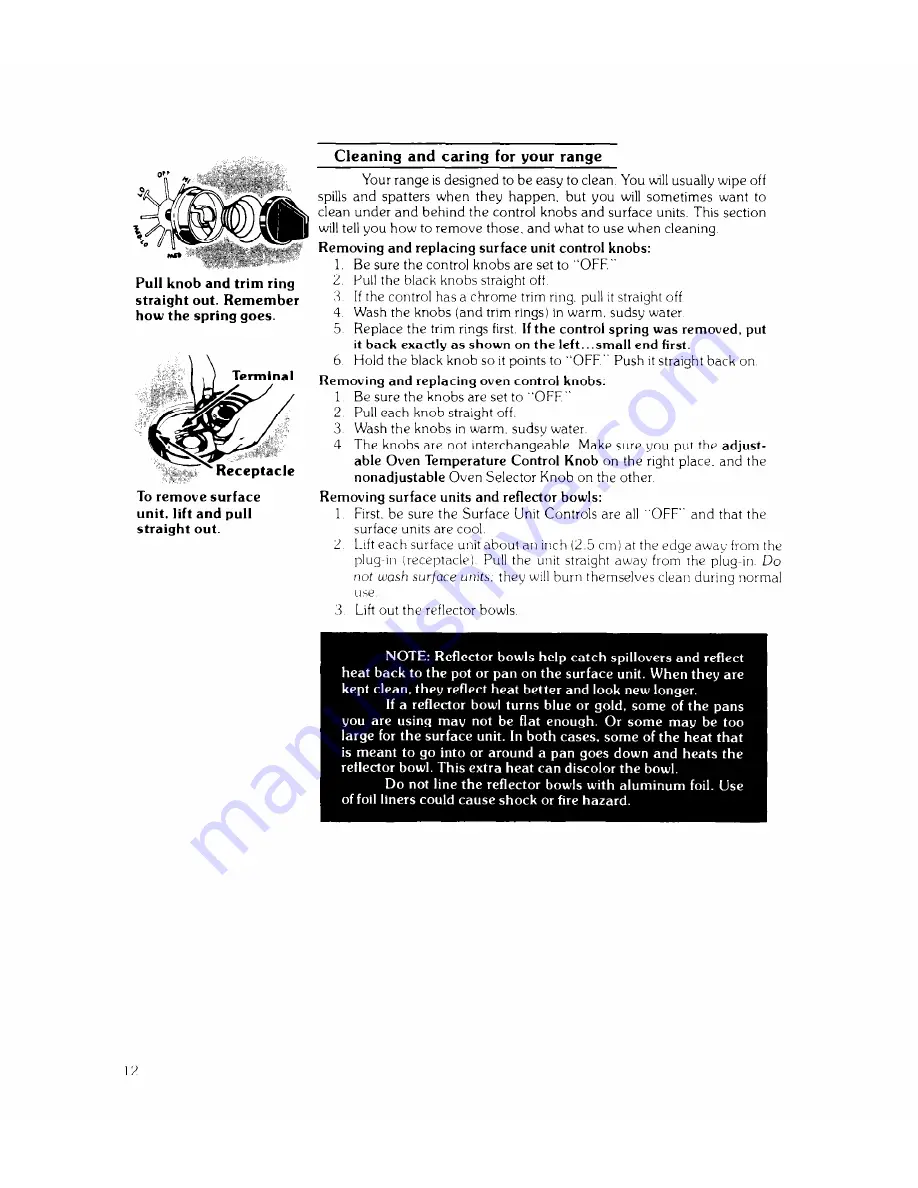
Page 12: ...back exactly as shown on the left small end first 6 Hold the black knob so it points to OFF Push it straight back on Removing and replacing oven control knobs 1 Be sure the knobs are set to OFF 2 Pull each knob straight off 3 Wash the knobs in warm sudsy water 4 The knobs are not interchangeable Make sure you put the adjust able Oven Temperature Control Knob on the right place and the nonadjustabl...

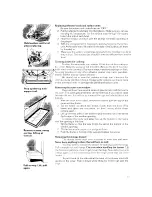
Page 13: ...inish or damage side panels and surface units Removing the outer oven window Oven windows have several panes of glass to help hold the heat In the oven The outer glass and frame can be removed if you wish to clean between the two It is held on by screws at the top and tabs hidden at the bottom 1 With the oven door closed remove the screws from the top of the outer window frame 2 Tip the frame out ...

Page 14: ... Clean frequently l Do not use harsh abrasives l Do not place in Self Cleaning Oven Alumrjlum Warm soapy wdtt r or soapy l Wash with other cooking utensils broiler pan steel wool pads and grid l Do not place In Self Cleaning Oven Control panel Warm soapy water l Wash rtnse and dry with soft cloth Oven racks Self Clearilrig Oven cycle l Leave in oven during Self Cleaning cycle Warm soapy water or s...

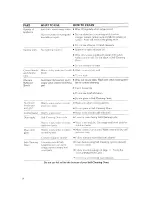
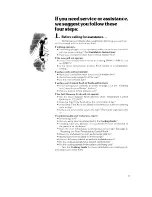
Page 15: ...arrng for your Range Section l Drd you push In before trying to turn If the Self Cleaning Cycle will not operate l Are the Oven Selector Knob and the Oven Temperature Control Knob set to CLEAN l Does the Start Time Knob show the correct time of day l Is the Stop Time Knob set ahead to the time you want the cleaning cycle to stop l Is the Lock Lever all the way to the right The Clean Lrght will com...

Page 16: ...RYERS MAJOR REPAIRING 8 PARTS 8 IRONERS SERVICING tiMH pC3LAPPLIAVCES OR VvHlRLPOOLAPPLlANCES OR WHlRLPOOLAPPLlANCES rQcZiCiqqtl tC CAAF RANCHISED TECH CARE SERWCE FRANCHISFD TEC i CARFSER ICE i H i 1 t t ii 4 At i r c E O M l Y E S Y H C CC sEHi i F c OL V E iiiSEAVlCLC0 X LSE9blCE C i li b 31 qguu 23 bole 999 9999 21 Maple 999 9999 4 If you have a problem Call our COOL LINE service assistance te...

Reviews: