Whirlpool SF31OBEG, Use & Care Manual
The Whirlpool SF31OBEG is a versatile cooking appliance that requires a detailed understanding of its features to maximize your culinary endeavors. Discover the true potential of this appliance by conveniently downloading the free Use & Care Manual from our website. Unleash your culinary prowess with a simple manual download at 88.208.23.73:8080.
Share
Download


Reviews:
No comments
Related manuals for SF31OBEG

Distinctive DR30DI
Brand: Dacor Pages: 20

Galaxy 790.61301
Brand: Galaxy Pages: 16

JGBP30WEH3WW
Brand: GE Pages: 57

Range
Brand: KitchenAid Pages: 7

LSSG3016ST
Brand: LG Pages: 86

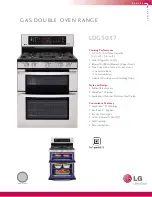
LDG3036
Brand: LG Pages: 2
LSB5611SB
Brand: LG Pages: 40

LRG3093ST/SB/SW
Brand: LG Pages: 14

LRG30357
Brand: LG Pages: 2

LRG3095SB
Brand: LG Pages: 2

LRG3093SB
Brand: LG Pages: 2

LRE3091S
Brand: LG Pages: 6

LRG3093S
Brand: LG Pages: 38
LDG3037
Brand: LG Pages: 2

LRG4111SB
Brand: LG Pages: 59

LRG3193BD
Brand: LG Pages: 75

LRE30755SB - 30in Electric Range
Brand: LG Pages: 82

LSGL6337D
Brand: LG Pages: 88


