FOR SERVICE TECHNICIAN ONLY - DO NOT REMOVE OR DESTROY
PAGE 22
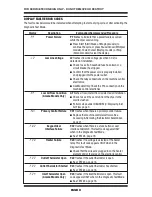
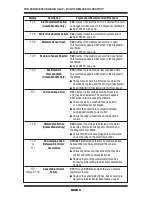
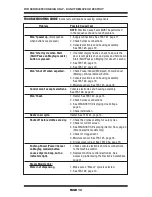
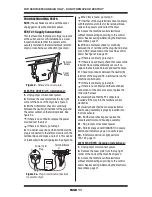
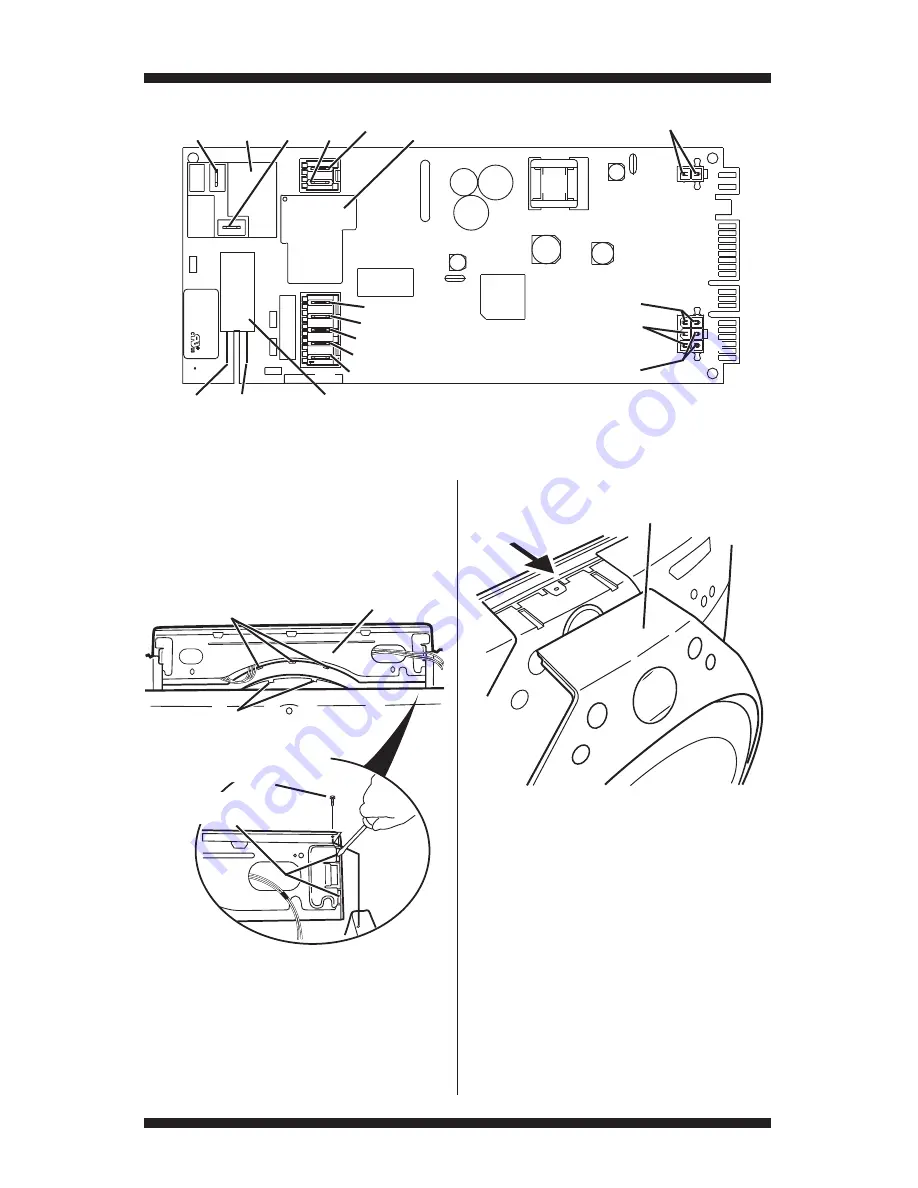
2.
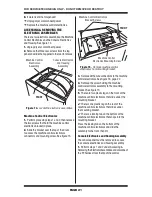
Remove the screw that fastens the assembly
to the machine control mounting bracket (figure
15, page 21), and the two screws that fasten the
console assembly to the dryer (figure 17).
Whirlpool Models:
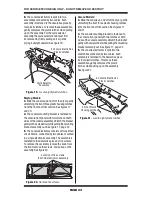
3.
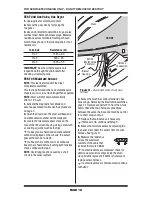
Gently remove the decorative trim that
surrounds the door and upper console by
unsnapping it from the dryer. See figure 18.
4.
Slide the console up and off of the dryer.
See figure 17.
5.
The console mounting bracket is fastened
to the console front panel with two latches at
both sides of the console assembly. Unlatch
the bracket gently with a screwdriver while
pulling the mounting bracket assembly out.
See figure 17.
P9
1
5
1
P14
P2
3
1
1
6
1
1
8
3
P5
P3
1
P13
1
P/N
XXX
XXX
Rev
X
Date
Code
YDD
D-xx
XXX
X-X
XX
MAD
EIN
COO
P4
P8
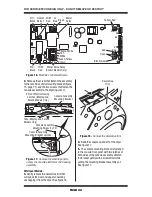
Figure 16.
Machine control electronics.
N.O.
Black
N.O.
Black
COM
Red
Water Valve Relay
(Steam Models Only)
COM
Red
Lt.
Blue Black
Yellow-Red
Motor
Relay
Heater
Relay 1
Black-White
Red
Open
Black (Gas)
Tan
White
Green-Yellow
Brown
Console Assembly
Mounting Bracket
3 Front Plastic Housing
Latches (Maytag and
Amana Models Only)
Console Assembly
Mounting Screw (1 of 2)
Console Assembly
Mounting Bracket Latches
Figure 17.
Remove the console panel to
access the console electronics and housing
assembly.
Decorative
Trim
Figure 18.
Remove the decorative trim.
Tabs (Maytag and Amana
Models Only)

