


19
EN
4. Press
to go back to the homepage.
MAKING COFFEE
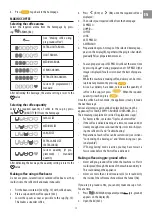
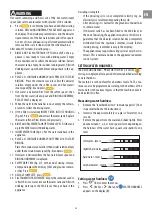
Selecting the coffee aroma
Select the required aroma from the homepage by press-
ing
AROMA (B6):
(see “Making coffee using
pre-ground coffee”)
EXTRA LIGHT AROMA
LIGHT AROMA
MEDIUM AROMA
STRONG AROMA
EXTRA STRONG AROMA
Custom (if programmed) /
Standard
After delivering the beverage, the aroma setting is reset to the
value.
Selecting the coffee quantity
Select the required quantity of coffee in the cup by press-
ing
QUANTITY (B7) from the homepage:
SMALL SIZE
MEDIUM SIZE
LARGE SIZE
EXTRA LARGE SIZE
(EXTRA LARGE)
Custom quantity (if pro-
grammed) / Standard
quantity
After delivering the beverage, the quantity setting is reset to the
value.
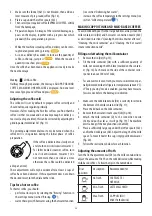
Making coffee using coffee beans
Do not use green, caramelised or candied coffee beans as they
could stick to the coffee mill and make it unusable.
1. Fill the beans container (A16) (fig. 12) with coffee beans;
2. Place a cup under the coffee spouts (A13);
3. Lower the spouts as near as possible to the cup (fig. 13).
This makes a creamier coffee;
4. Press (B10) or
(B8) until the required coffee is
displayed;
5. Then select your required coffee from the homepage:
• ESPRESSO
•
• COFFEE
• LONG
• 2X ESPRESSO
• AMERICANO
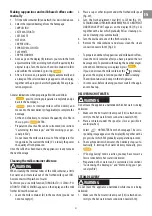
6. Preparation begins. An image of the selected beverage ap-
pears on the display (B), together with a progress bar which
gradually fills as preparation proceeds.
• You can prepare 2 cups of ESPRESSO coffee at the same time
by pressing 2X
during preparation of 1 ESPRESSO (the
image is displayed for a few seconds at the start of prepara-
tion).
• While the machine is making coffee, delivery can be inter-
rupted at any moment by pressing
.
• As soon as delivery has ended, to increase the quantity of
coffee in the cup, just press
. When the required
quantity is reached, press
.
Once the coffee has been made, the appliance is ready to make
the next beverage.
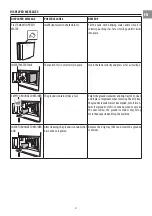
Various alarm messages could be displayed while using the
appliance (FILL TANK, EMPTY GROUNDS CONTAINER, etc.).
Their meaning is explained in section “Displayed messages”.
• For hotter coffee, see section “Tips for a hotter coffee”.
• If the coffee is delivered a drop at a time, too weak and not
creamy enough or too cold, read the tips in sections “Adjust-
ing the coffee mill” and “Troubleshooting”.
• Preparation of each coffee can be customised (see sections
“Customising the beverages” and “Memorising your per-
sonal profile”).
• If "Energy Saving" mode is active, you may have to wait a
few seconds before the first coffee is delivered.
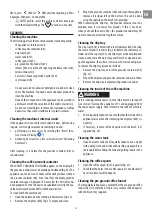
Making coffee using pre-ground coffee
• Never add pre-ground coffee when the machine is off or it
could spread through the inside of the machine and dirty it.
This could damage the appliance.
• Never use more than 1 level measure (C2) or it could dirty
the inside of the coffee machine or block the funnel (A4).
If you use pre-ground coffee, you can only make one cup of cof-
fee at a time.
1. Press AROMA (B6) repeatedly until
(pre-ground)
appears on the display (B).
2. Open the lid (A15).
Summary of Contents for W11 CM145
Page 1: ...Instruction for Use ...
Page 2: ...2 ...
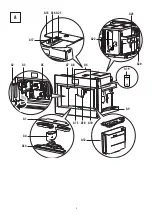
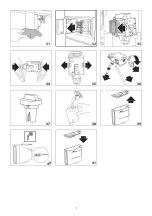
Page 4: ...4 x 1 x 1 approx 350mm x 2 560 1 mm x 4 x 4 FIG 3 FIG 5 FIG 4 FIG 6 FIG 7 ...
Page 5: ...5 A4 A1 A14 A13 A18 A3 A2 A5 A6 A8 A10 A7 A9 A16 A21 A15 A12 A A19 A17 A22 A20 A23 ...
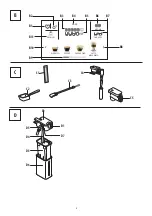
Page 7: ...7 1 4 5 7 13 15 2 3 6 8 9 10 12 14 11 ...
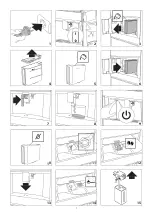
Page 8: ...8 16 30 17 18 23 24 25 20 22 28 27 26 21 19 29 ...
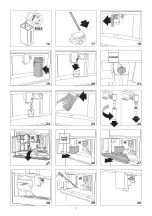
Page 9: ...9 34 33 36 38 39 40 35 37 41 31 32 ...
Page 36: ...400011239758 ...


