background image

13

Dryer Care

CLEANING THE DRYER LOCATION

Keep dryer area clear and free from items that would 

block the airflow for proper dryer operation. This includes 

clearing piles of laundry in front of the dryer.

CLEANING THE DRYER INTERIOR

To clean dryer drum
1.

  Use a mild hand dish detergent mixed at a low 

concentration with very warm water, and rub with  

a soft cloth.

2.

  Rinse well with a wet sponge or towel. 

3.

  Tumble a load of clean clothes or towels to dry drum 

     OR 
      Use a microfiber cloth and hot water in a spray bottle  

to clean the drum and a second microfiber towel to dry.

NOTE:

 Garments that contain unstable dyes, such as 

denim blue jeans or brightly colored cotton items, may 

discolor the rear of the dryer interior. These stains are  

not harmful to your dryer and will not stain future loads  

of clothes. Dry unstable dye items inside out to avoid 

transfer of dye.

REMOVING ACCUMULATED LINT

From Inside the Dryer Cabinet

Lint should be removed every 2 years, or more often, 

depending on dryer usage. Cleaning should be done by a 

qualified appliance servicer.

From the Exhaust Vent

Lint should be removed every 2 years, or more often, 

depending on dryer usage.

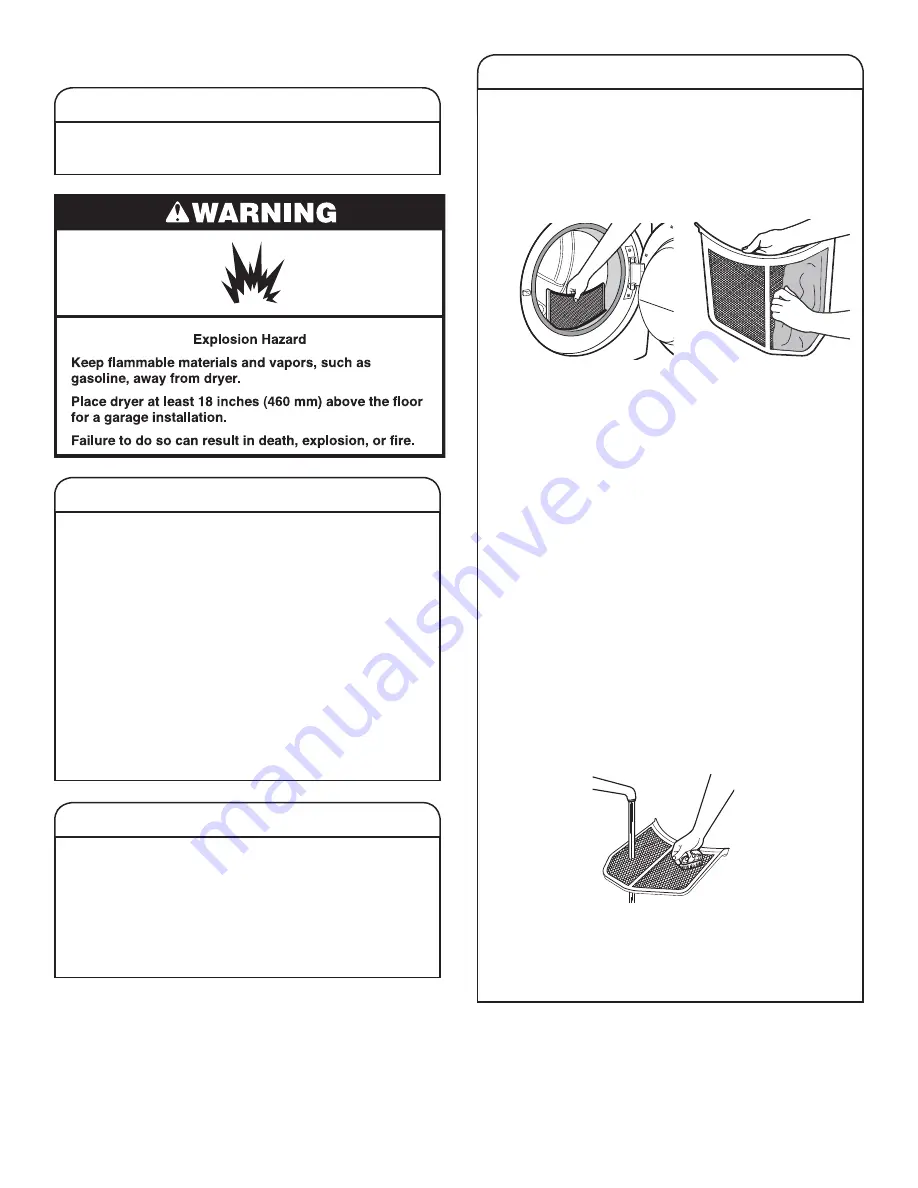
CLEANING THE LINT SCREEN

Every load cleaning

The lint screen is located in the door opening of the dryer.  

A screen blocked by lint can increase drying time.

To clean:
1.

  Pull the lint screen straight up. Roll lint off the screen 

with your fingers. Do not rinse or wash screen to remove 

lint. Wet lint is hard to remove.

2.

 Push the lint screen firmly back into place.

IMPORTANT:

Q

Do not run the dryer with the lint screen loose, 

damaged, blocked, or missing. Doing so can cause 

overheating and damage to both the dryer and fabrics.

Q

If lint falls off the screen into the dryer during removal,  

check the exhaust hood and remove the lint. See 

“Venting Requirements” in the Installation Instructions.

As needed cleaning

Laundry detergent and fabric softener residue can build 

up on the lint screen. This buildup can cause longer drying 

times for your clothes, or cause the dryer to stop before 

your load is completely dry. The screen is probably clogged 

if lint falls off while the screen is in the dryer.
Clean the lint screen with a nylon brush every 6 months, 

or more frequently, if it becomes clogged due to a residue 

buildup.

To wash:
1.

  Roll lint off the screen with your fingers.

2.

  Wet both sides of lint screen with hot water.

3. 

Wet a nylon brush with hot water and liquid detergent. 

Scrub lint screen with the brush to remove residue 

buildup.

4. 

Rinse screen with hot water.

5. 

Thoroughly dry lint screen with a clean towel.  

Reinstall screen in dryer.

Summary of Contents for WED75HEFW

Page 1: ... If you have any problems or questions visit us at www whirlpool com Pour tout problème ou question consulter www whirlpoolappliances ca Use Care Guide Guide d utilisation et d entretien Electronic Dryer Sécheuse électronique ...

Page 2: ...G 15 WARRANTY 18 ASSISTANCE OR SERVICE Back Cover Table de matières SÉCURITÉ DE LA SÉCHEUSE 19 ACCESSOIRES 21 VÉRIFICATION D UNE CIRCULATION D AIR ADÉQUATE POUR LE SYSTÈME D ÉVACUATION 22 TABLEAU DE COMMANDE ET CARACTÉRISTIQUES 23 GUIDE DES PROGRAMMES 25 UTILISATION DE LA SÉCHEUSE 27 TÉMOINS LUMINEUX DE PROGRAMME 29 CARACTÉRISTIQUES SUPPLÉMENTAIRES 30 ENTRETIEN DE LA SÉCHEUSE 31 DÉPANNAGE 33 GARAN...

Page 3: ...3 IMPORTANT When discarding or storing your old clothes dryer remove the door ...

Page 4: ...it us at www whirlpoolparts ca 15 Pedestal Color matched pedestals raise the washer and dryer to a more comfortable working height The large drawer provides convenient storage Stack Kit If space is at a premium the stack kit allows the dryer to be installed on top of the washer Drying Rack The Drying Rack provides a stationary drying surface for items such as sweaters and tennis shoes See the Addi...

Page 5: ...es to provide the most energy savings and enhanced fabric care from the dryer During Automatic Cycles drying air temperature and moisture level are sensed in the load This sensing occurs throughout the drying cycle and the dryer shuts off when the load reaches the selected dryness Use the NORMAL dryness level to provide optimal energy savings With Timed Dry the dryer runs the amount of time set an...

Page 6: ...he control panel features a sensitive surface that responds to a light touch of your finger To ensure your selections are registered touch the control panel with your finger tip not your fingernail When selecting a setting or option simply touch its name 3 2 1 5 B E A C D F 3 2 1 5 4 F 4 E C ...

Page 7: ...inder to manually reposition bulky loads midway through the cycle Wrinkle Shield Option If you will be unable to remove a load immediately touch Wrinkle Shield to add up to 140 minutes of periodic tumbling to help reduce wrinkling You may select the With Steam setting on some models to add a short steam cycle after 60 minutes to help smooth out wrinkles 1 2 3 4 OPTIONS Use to select available opti...

Page 8: ...ngerie performance wear Delicates Extra Low More Normal Less 28 Damp Dry Signal Wrinkle Shield Static Reduce Uses Extra Low heat to gently dry delicate items Shirts blouses permanent press synthetics lightweight items Casual Low More Normal Less 35 Damp Dry Signal Wrinkle Shield Static Reduce Uses a stepped drying temperature from Medium to Low for improved moisture removal and enhanced fabric car...

Page 9: ... rubber plastic or heat sensitive fabrics Line dry bonded or laminated fabrics NOTE If you have questions about drying temperatures for various loads refer to the care label directions You may select the With Steam setting to add a short steam cycle after 60 minutes This is available only with High and Medium Drying Temperature settings On steam models only Items to dry Cycle Drying Temperature De...

Page 10: ...nt Wet lint is hard to remove Push the lint screen firmly back into place For additional cleaning information see Dryer Care 2 Load the dryer Open the door by pulling on the handle Place laundry in the dryer Add a dryer sheet to wet load if desired Close the door IMPORTANT Do not tightly pack the dryer Items need to tumble freely Tightly packing can lead to poor drying performance and may increase...

Page 11: ...change throughout the cycle Cycle time can not be changed on Steam Cycles Steam Cycles on some models Select Steam Refresh to reduce odors and light wrinkles in dry loads Do not add dryer sheets ng Changing the Automatic Cycle settings to increase or decrease drying time If all your loads on all Automatic Cycles are consistently less dry or more dry than you would like you may change the default s...

Page 12: ...ls Check Vent This indicator will show the status of airflow through the dryer and dryer vent system for the dryer s life During the sensing phase at the beginning of the cycle the Check Vent light will come on if a blocked vent or low airflow issue is detected This light will stay on for the entire cycle The light will be cleared when selecting a new cycle touching POWER or opening the door after...

Page 13: ...eaning The lint screen is located in the door opening of the dryer A screen blocked by lint can increase drying time To clean 1 Pull the lint screen straight up Roll lint off the screen with your fingers Do not rinse or wash screen to remove lint Wet lint is hard to remove 2 Push the lint screen firmly back into place IMPORTANT Q Do not run the dryer with the lint screen loose damaged blocked or m...

Page 14: ...r dryer for an extended period of time you should 1 Unplug dryer or disconnect power 2 Clean lint screen See Cleaning the Lint Screen 3 Turn off the water supply to the dryer This helps to avoid unintended flooding due to a water pressure surge while you are away Moving Care For power supply cord connected dryers 1 Unplug the power supply cord 2 Gas models only Close shut off valve in gas supply l...

Page 15: ...stalled See the Installation Instructions All four dryer feet should be in firm contact with the floor Clothing is balled up in dryer When balled up the load will bounce causing the dryer to vibrate Separate the load items and restart the dryer Dryer Results Dryer will not heat Household fuse is blown or circuit breaker has tripped The drum may be turning but you may not have heat Electric dryers ...

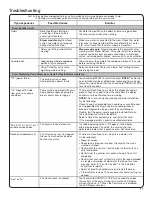
Page 16: ...s not contacting the moisture sensors during Automatic cycles See Level Dryer in the Installation Instructions Possible Causes Solution Dryer Results cont The dryer is located in a room with temperature below 45ºF 7ºC Proper operation of dryer cycles requires temperatures above 45ºF 7ºC The dryer is located in a closet Closet doors must have ventilation openings at the top and bottom of the door T...

Page 17: ...e the LED Display will count down 3 2 1 When the Control Lock is disabled the LED Display will clear Loc or Lc The drying cycle has been interrupted by a power failure Touch and hold START to restart the dryer NOTE The Control Lock function may be enabled when recovering from a power failure To unlock the control touch and hold CONTROL LOCK for at least 3 seconds There may be a problem with your h...

Page 18: ...use or use inconsistent with published user operator or installation instructions 2 In home instruction on how to use your product 3 Service to correct improper product maintenance or installation installation not in accordance with electrical or plumbing codes or correction of household electrical or plumbing i e house wiring fuses or water inlet hoses 4 Consumable parts i e light bulbs batteries...

Reviews: