background image

Summary of Contents for WFE114LWS0

Page 1: ...ara obtener informaci6n adicional acerca de su producto visite www whirlpool com Tenga listo su nQmero de modelo completo Puede encontrar su nQmero de modelo y de serie en la etqueta en el marco del homo detras del panel del caj6n de almacenamiento Tableof Contents RANGE SAtiETY 2 The Anti Tip Bracket 2 FEATURE GUIDE 4 COOKTOP USE 5 OVEN USE 6 Electronic Oven Controls 6 Aluminum Foil 6 Positioning...

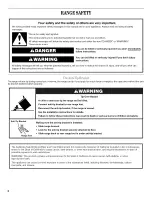
Page 2: ...fastened down properly Tip Over Hazard A child or adult can tip the range and be killed Connect anti tip bracket to rear range foot Reconnect the anti tip bracket if the range is moved See the installation instructions for details Failure to follow these instructions can result in death or serious burns to children and adults Anti Tip Bracket Range Foot Making sure the anti tip bracket is installe...

Page 3: ...cooking may subject wiring or components underneath to damage Protective Liners Do not use aluminum foil to line surface unit drip bowls or oven bottoms except as suggested in the manual Improper installation of these liners may result in a risk of electric shock or fire Glazed Cooking Utensils Only certain types of glass glass ceramic ceramic earthenware or other glazed utensils are suitable for ...

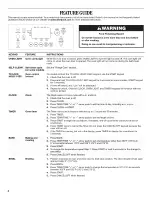
Page 4: ... the CLOCK OVEN LIGHT and TIMER keypads will function with the controls locked 3 Press TEMP TIME or arrow pads to set the time of day including a m or p m 4 Press CLocK or START TIMER Oven timer The Timer can be set in hours or minutes up to 12 hours and 59 minutes 1 Press TIMER 2 Press TEMP TIME or arrow pads to set the length of time 3 Press START to begin the countdown If enabled end of cycle t...

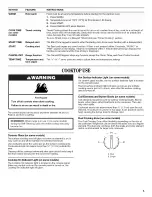
Page 5: ... on some models On ceramic glass models the hot surface indicator light is located on the console panel The hot surface indicator light will glow as long as any surface cooking area is too hot to touch even after the surface cooking area is turned off Coil Elements and Burner Bowls on some models Coil elements should be level for optimal cooking results Burner bowls when clean reflect heat back to...

Page 6: ...increase or to decrease the temperature in 10 F 5 C amounts The adjustment can be set between 30 F 15 C and 30 F 15 C 3 Press START Options Mode Press and hold TIMER for 5 seconds and Opt will appear Use the TEMP TIME keys to cycle through the following options Press CANCEL to exit the mode End of Cycle Tones bl beep once or b continue to beep will be displayed Press TIMER to toggle through select...

Page 7: ...d the selected temperature will appear on the display Broiling uses direct radiant heat to cook food Changing the temperature when Custom Broiling allows more precise control when cooking The lower the temperature the slower the cooking Thicker cuts and unevenly shaped pieces of meat fish and poultry may cook better at lower broiling temperatures For best results use a broiler pan and grid It is d...

Page 8: ...ompletely cooled remove ash with a damp cloth To avoid breaking the glass do not apply a cool damp cloth to the inner door glass before it has completely cooled To stop the self cleaning cycle at anytime press CANCEL OFE If the temperature is too high the oven door will remain locked and cool and locked will be displayed The oven light will not function during the self cleaning cycle Style I Elect...

Page 9: ...yrup Clean with cooktop scraper and cooktop cleaner Scrape off sugary spills while the cooktop is still warm You may want to wear oven mitts while cleaning the cooktop Heavy soil dark streaks specks and discoloration Clean with Cooktop Cleaner or nonabrasive cleanser Burned on soil Clean with Cooktop Cleaner and Cooktop Scraper Metal marks from aluminum and copper Clean with Cooktop Cleaner as soo...

Page 10: ...er size Use cookware about the same size as the surface cooking area element or surface burner Cookware should not extend more than 1 2 1 3 cm outside the cooking area Oven temperature too high or too low Does the oven temperature calibration need adjustment See Oven Temperature Control section of the Electronic Oven Controls section Oven indicator lights flash Do the oven indicator lights flash S...

Page 11: ...longer cooking times Are baked items too brown on the bottom Move rack to higher position in the oven Are pie crust edges browning early Use aluminum foil to cover the edge of the crust and or reduce baking temperature Canning Unit Kit coil element models Order Part Number 242905 Cooktop Care Kit includes cleaner protectant and applicator pads Order Part Number 31605 Cooktop Protectant Order Part ...

Page 12: ...f your major appliance is located in a remote area where service by an authorized Whirlpool servicer is not available 10 The removal and reinstallation of your major appliance if it is installed in an inaccessible location or is not installed in accordance with published installation instructions 11 Major appliances with original model serial numbers that have been removed altered or cannot be eas...

Reviews: