background image

CAUTION

PLEASE READ ALL THESE INSTRUCTIONS CAREFULLY BEFORE USING THIS APPLIANCE.

• Make sure that the voltage rating on the type plate corresponds to your main voltage.
• Never leave the appliance unsupervised when in use.
• Keep out of children or incompetent persons and do not allow them to operate this

appliance.

• Only use the appliance for domestic purposes and in the way indicated in these instruc-

tions.

• Never immerse the product in water or any liquid for any reasons. This appliance must be

placed in a dry environment. 

• Do not use if you have wet hands.
• Only use attachments supplied with the appliance or recommended by the manufacturer.
• Never use the appliance on or near hot surfaces.
• Never disconnect the appliance by pulling the cord.
• Before storing or cleaning the appliance, make sure that it is unplugged from the power

supply and that it is completely cooled. 

• Do not clean the appliance with abrasive chemicals.
• Regularly check the cord. Never use the appliance if cord or appliance show any sign of

damage.

• All repairs made by a non-qualified person can be dangerous; in this case guarantee

conditions would cancel. As all 
electrical products, a competent electrician must repair it.

SPECIAL RECOMMENDATIONS :

• Use only cool water to fill the tank
• At certain time, and due to the pressure within the coffee maker, there may be some water

or steam coming out of the coffee spout.

• Before first use, use several times only with water, this to clean the system out completely.

9

ENGLISH

ENGLISH

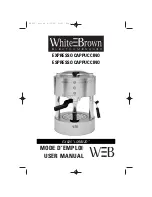
Congratulations for having chosen this 

WHITE AND BROWN

product, and thank you for trusting us. For your comfort and safety, your appliance has been

checked at every step of manufacturing and has successfully gone through all our tests of 

quality.  

WHITE AND BROWN 

creates original products to please you, as far as design and easi-

ness to use are concerned in order to give you complete satisfaction.

  EX_825_ notice  6/11/06  21:01  Page 9

Summary of Contents for EX 825 LORENZO

Page 1: ...MODE D EMPLOI MODE D EMPLOI USER MANUAL USER MANUAL EXPRESSO CAPPUCCINO ESPRESSO CAPPUCCINO EX 825 LORENZO EX_825_ notice 6 11 06 21 01 Page 1...

Page 2: ...ranger ou de nettoyer l appareil s assurer qu il est bien d branch et compl tement refroidi Ne pas nettoyer l appareil avec des produits chimiques abrasifs V rifier r guli rement l tat du cordon d ali...

Page 3: ...P Pour pr parer un premier caf plus chaud placer le filtre dans l appareil et laisser couler une ou deux tasses d eau chaude Ceci permet de chauffer les composants et d obtenir un caf la bonne temp ra...

Page 4: ...Fixations du porte filtre J Couvercle de valve K Filtre L Doseur tasse mouture M T moin lumineux de fonctionnement N Interrupteur Marche Arr t O T moin lumineux expresso P Interrupteur expresso Q T m...

Page 5: ...tir d un r cipient appropri ou bien retirer le r servoir pour le remplir directement sous le robinet Replacer le r servoir dans son logement en appuyant vers le bas Brancher l appareil et presser l in...

Page 6: ...Presser le bouton P Le caf commence couler Si le caf ne coule pas arr ter l appareil et v rifier que le r servoir d eau soit bien positionn Pour arr ter le flux de caf ou relancer la pr paration pres...

Page 7: ...Faire pivoter la buse vapeur D vers la gauche pour la positionner au dessus du bac r colte gouttes presser l interrupteur Vapeur R pour activer le nettoyage de la buse puis appuyer de nouveau pour arr...

Page 8: ...t de fixation du porte filtre Nettoyer r guli rement et d sobstruer si n cessaire avec un cure dent par exemple Nettoyer le bac r colte gouttes les filtres et le porte filtre l eau savonneuse Nettoyer...

Page 9: ...cooled Do not clean the appliance with abrasive chemicals Regularly check the cord Never use the appliance if cord or appliance show any sign of damage All repairs made by a non qualified person can...

Page 10: ...w one or two cupfuls of water to flow This way you shall warm up the components of the coffee maker Do not use without water inside the appliance This may damage the pump A slight noise and some vibra...

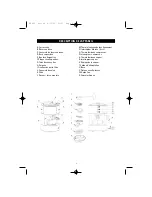
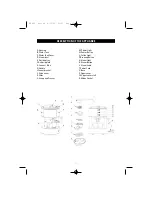
Page 11: ...ti drip plate G Connect Tube H Handle I Funnel bracket J Valve cover K Filter L Scoop and Presser M Power Light N Power Button O Coffee Light P Brewing Button Q Steam Light R Steam Button S Steam knob...

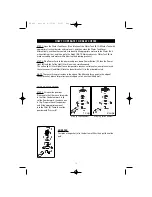
Page 12: ...ffee light O will go off once temperature reaches certain value now please insert the valve cover J and filter k into the funnel bracket I in the order indicated NOTE There are three protrusions in th...

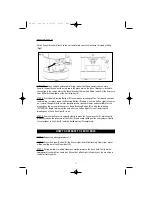
Page 13: ...he brewing any longer now please press down Brewing Button P to stop the brewing ATTENTION Begin to brew coffee only after the Coffee Light O is out and stop the brewing once the Coffee Light O is on...

Page 14: ...nwards and repeat the above procedure 4 for cleaning purpose STEP 8 Press Power Button N to disconnect the power empty the Anti drip tray HOW TO OPERATE TO HOT WATER STEP 1 Repeat the above procedure...

Page 15: ...the housing where the filter ring is placed This can be removed with a toothpick or the like Before cleaning make sure the appliance is unplugged from the mains Clean the tray the filters and the filt...

Page 16: ...de r utilisation des appareils usag s Veuillez vous adresser votre municipalit pour conna tre la d chetterie comp tente Instructions on environment protection Do not dispose of this product in the usu...

Reviews: